ON THIS PAGE
Onboard a Device to Freeform Blueprint (Telemetry-Only Mode)
Apstra supports two reference designs: two-stage L3 Clos (standardized datacenter design) and Freeform (flexible connectivity) design. This feature applies specifically to the Freeform design.
This topic describes how to onboard a device in HPE Networking Apstra Data Center Director using telemetry-only mode and assign it to a Freeform blueprint. This configuration collects device telemetry without managing or pushing its configuration, while preserving existing fabric management workflows.
Limitations
Before you get started, review the following limitations:
-
The feature is limited to Junos OS and Junos EVO devices.
-
Management level in the blueprint must match Operation Mode in the system agent. Both must be set to either "telemetry-only" or "full-control" mode.
-
Telemetry-only devices are only allowed in Freeform blueprints and are not applicable to IP Clos fabrics.
-
Telemetry-only mode applies only to internal systems. External systems are always unmanaged systems.
-
NOS upgrades cannot be performed while operating in telemetry-only mode.
-
Devices created in telemetry-only mode follow a different workflow, as the pristine configuration is not collected, which impacts other operations.
-
In telemetry-only mode, "Pristine Configuration Validation" and "Revert to Pristine on Uninstall" are skipped. If you manually execute these options, execution will fail.
-
To switch a device between full-control mode and telemetry-only mode, you must uninstall the agent, delete the agent, recreate the agent with the new mode, and reinstall the agent.
Prerequisites
If you are configuring an Offbox agent, these prerequisites apply:
-
Configure the device beforehand by setting the
mgmt_junosVRF with the systemsystem management-instance; without it, both the install job and check job will fail. This prerequisite applies to Offbox agents in general, not just telemetry-only agents. In full-control mode, Apstra configures themgmt_junosVRF. In telemetry-only mode, it simply verifies its presence. -
Make sure the gRPC port is either not configured or set to TCP port 32767. Apstra automatically sets the port number during the installation.
Onboard a Device to a Freeform Blueprint in Telemetry-Only Mode
During installation of an Offbox agent, Apstra configures gRPC on the device to collect telemetry. This is the only change Apstra makes to the device configuration; nothing is pushed to the device afterwards.
Follow these steps to onboard a device to a Freeform blueprint in telemetry-only mode:
-
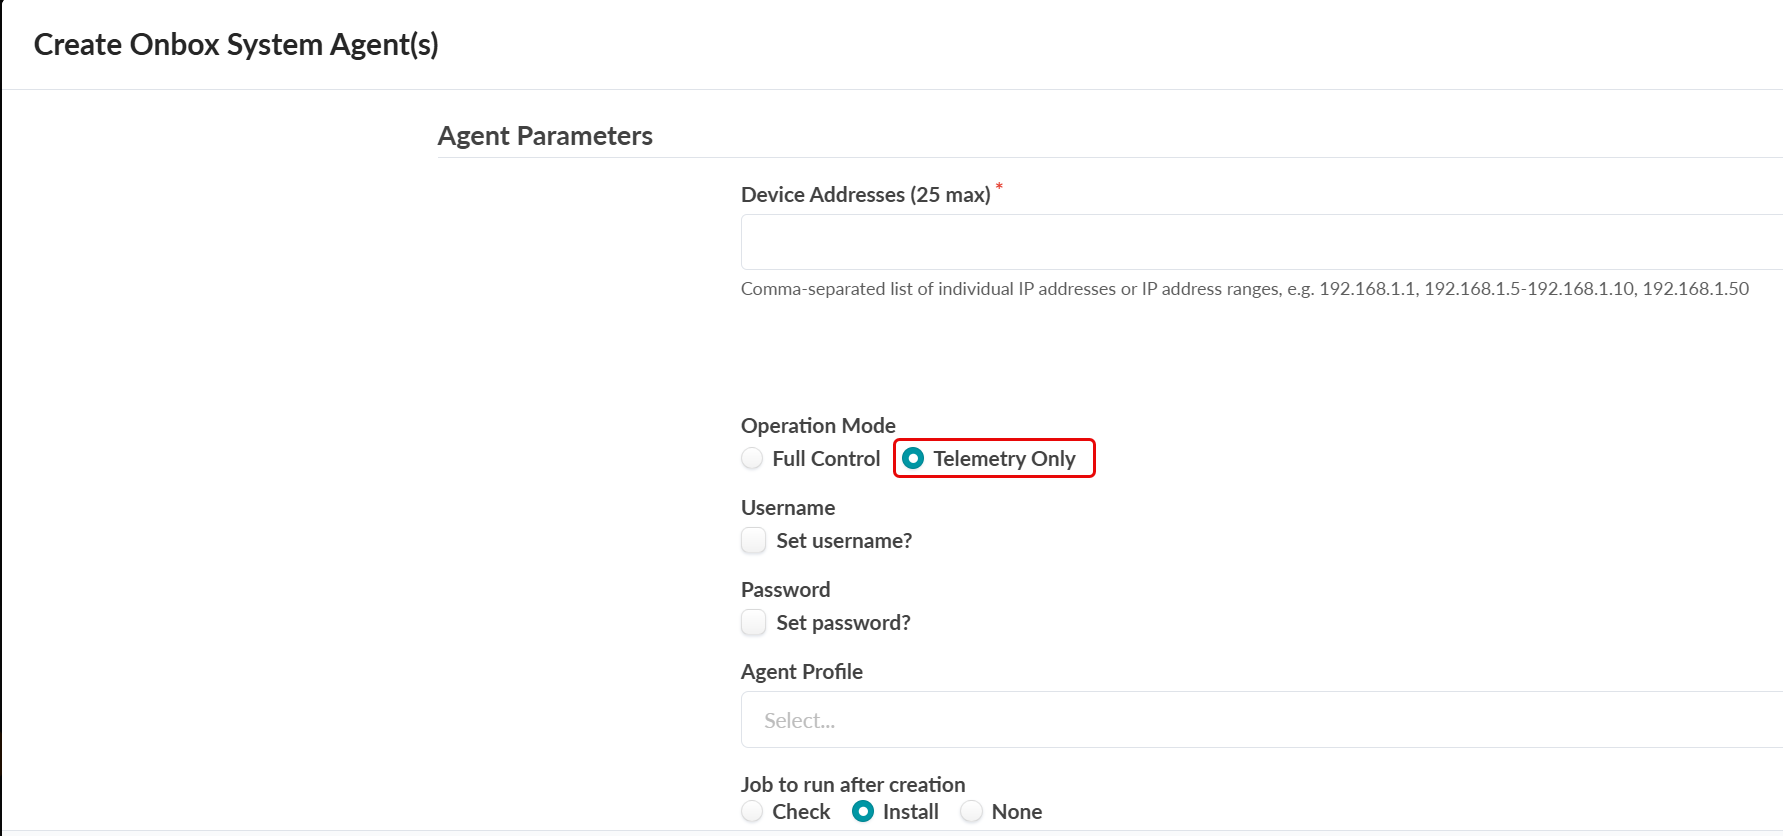
Create an Agent.
You can create either an Onbox or Offbox agent. These steps describe how to create an Onbox agent.Note:
-
With an Onbox agent, Apstra additionally installs the AOS agent software on the device along with its supporting configuration, so the device footprint is noticeably larger.
-
For both Onbox and Offbox agents, no pristine configuration is collected. The configuration is neither rendered nor deployed.
-
From the left navigation menu in the Apstra GUI, navigate to
Devices > Managed Devices, then select
Create Onbox Agent(s).

The Create Onbox System Agent(s) page opens.
-
-
Create the System.
Note: In Freeform, the term "system" represents the devices.
-
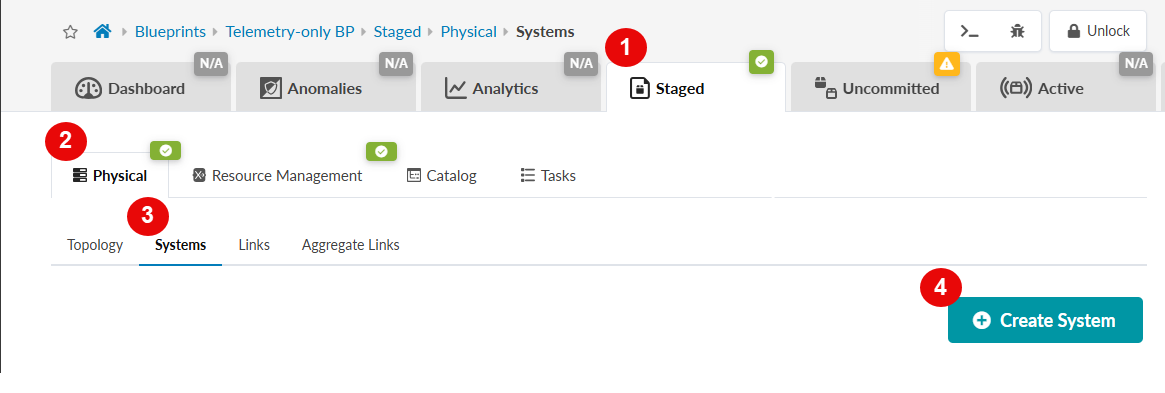
Navigate to Staged > Physical >
Systems and click Create
System.
-
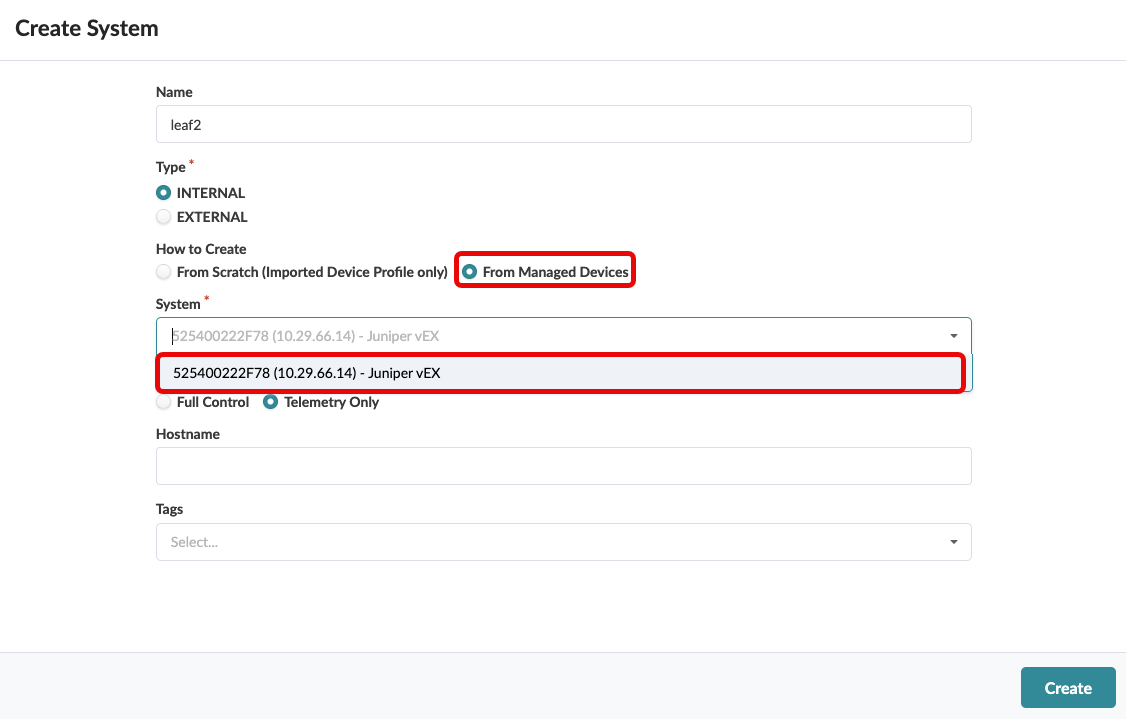
On the Create System page, select Type:
INTERNAL and select From
Managed Devices.
Select the managed device from the System drop-down list, select Telemetry Only mode and click Create.
 The newly created system appears in the Systems table list.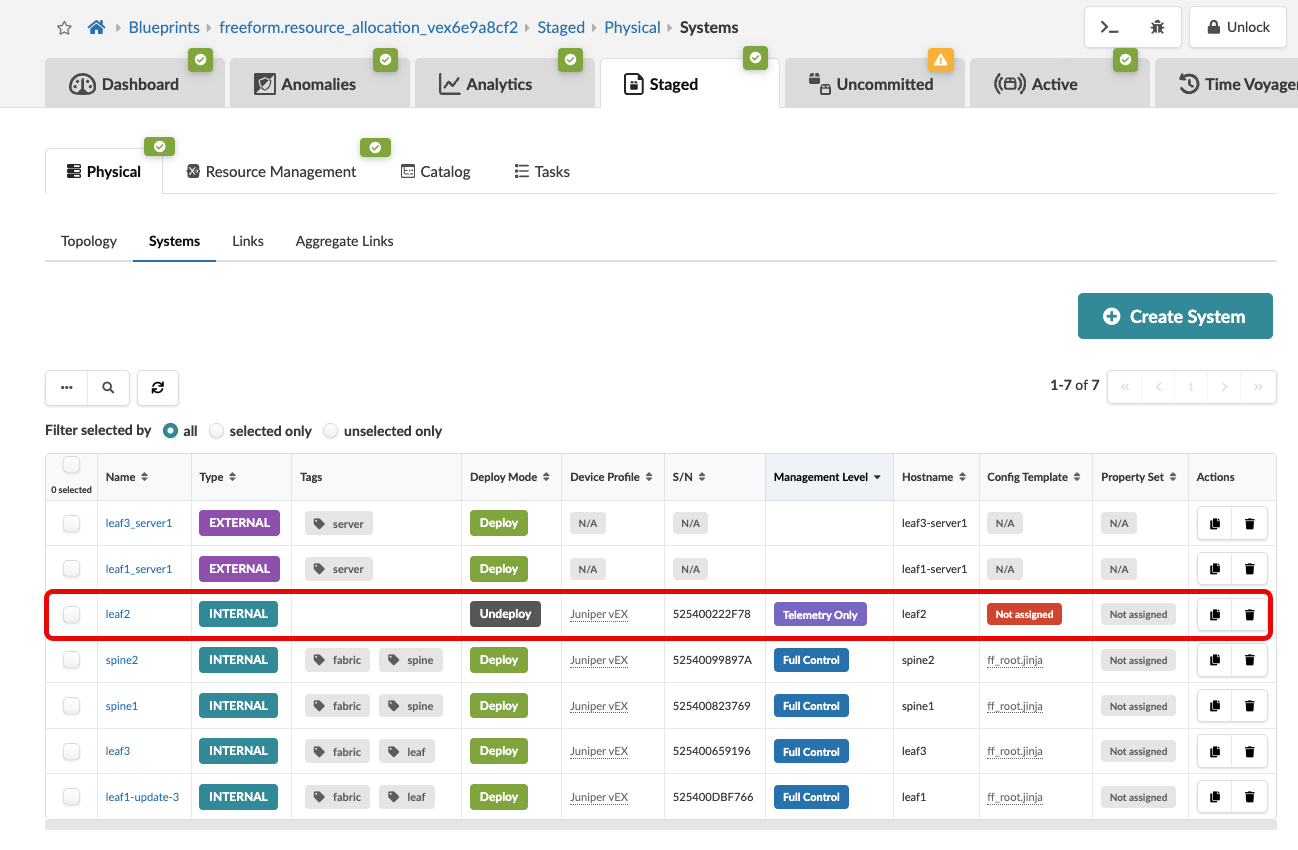
-
Navigate to Staged > Physical >
Systems and click Create
System.
-
Deploy the System.
-
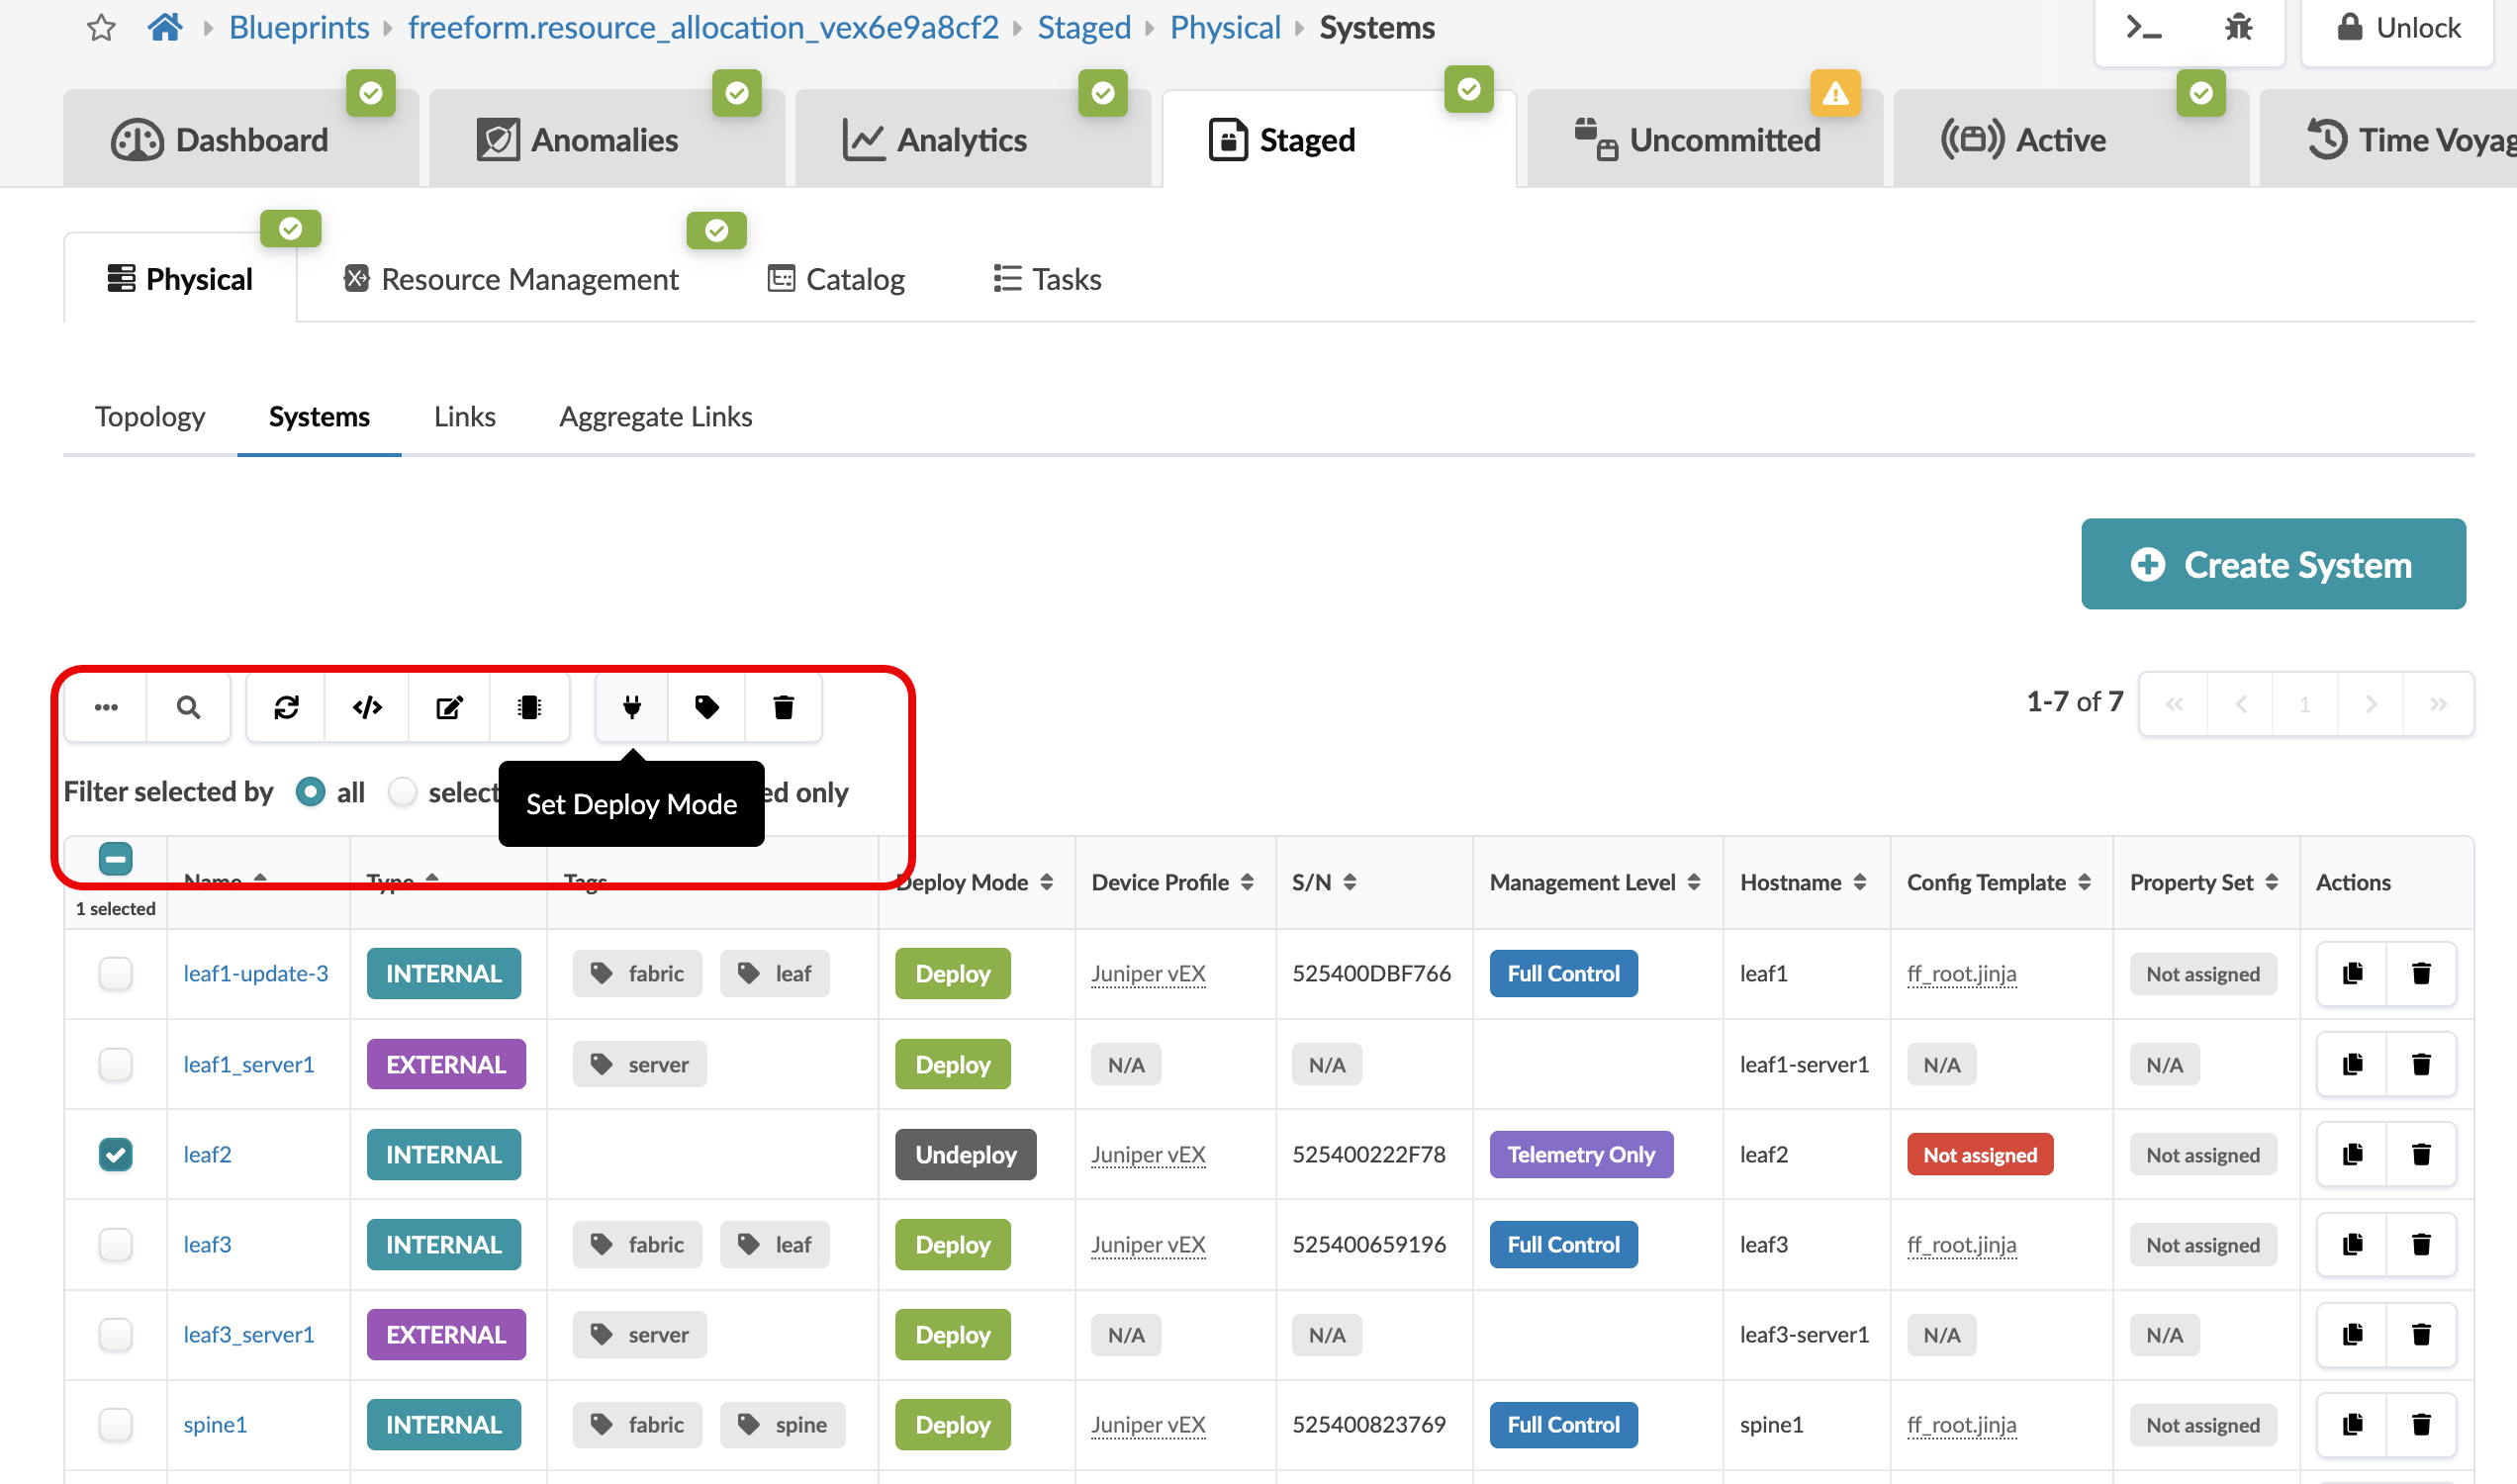
Select the check box next to the device, then click the
Set Deploy Mode button.
-
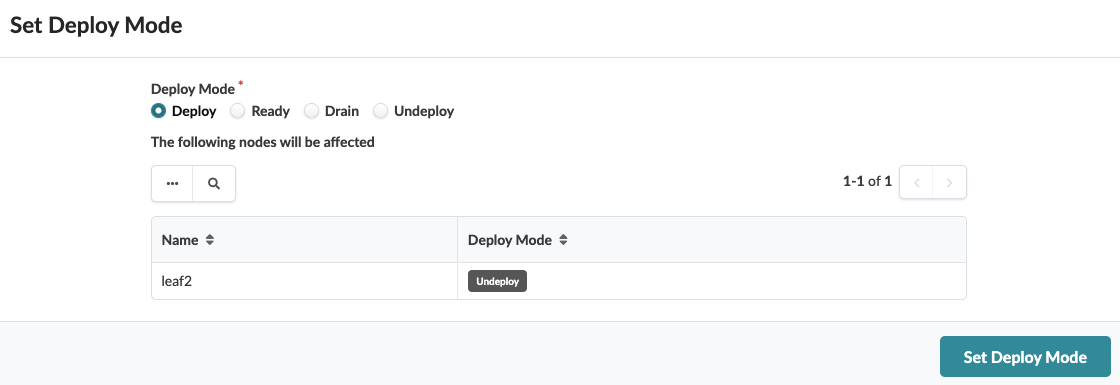
Select Deploy, then click Set
Deploy Mode.
The system now shows Deploy Mode: Deploy in the staged blueprint.
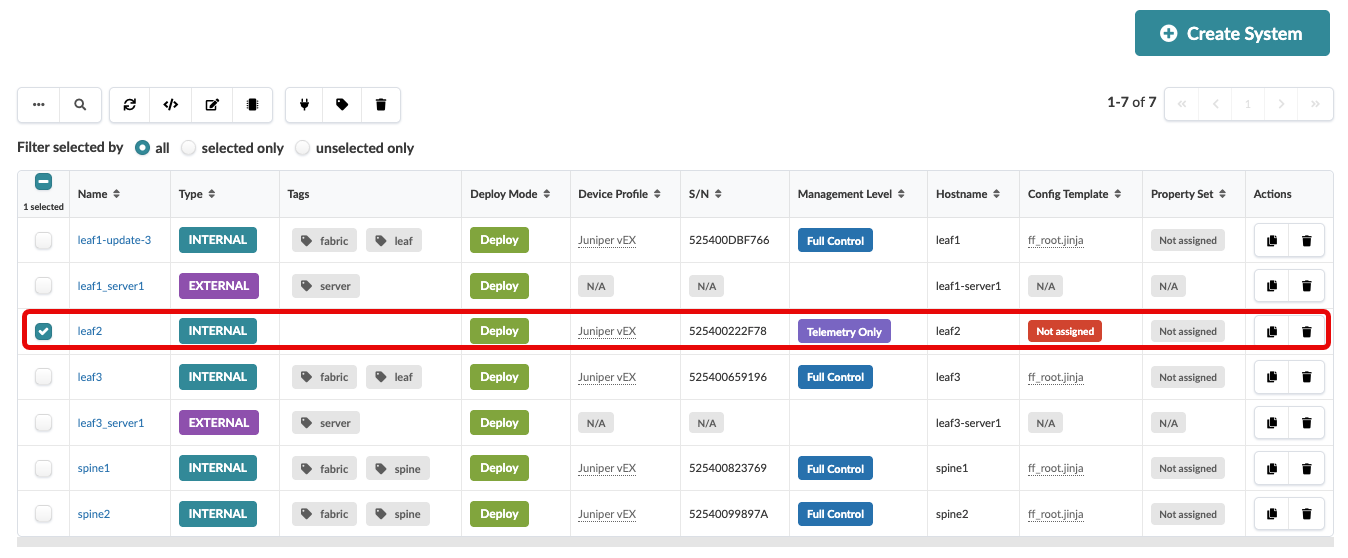 Note: A Config Template is unnecessary for telemetry-only systems. The "Not assigned" label under Config Template is not an error. Assigning a config template is not required.
-
Select the check box next to the device, then click the
Set Deploy Mode button.