Add Link (Freeform)

After you've created systems you can link them to each other from the Topology view.

  1. From the blueprint, navigate to Staged > Physical > Topology and click Edit.
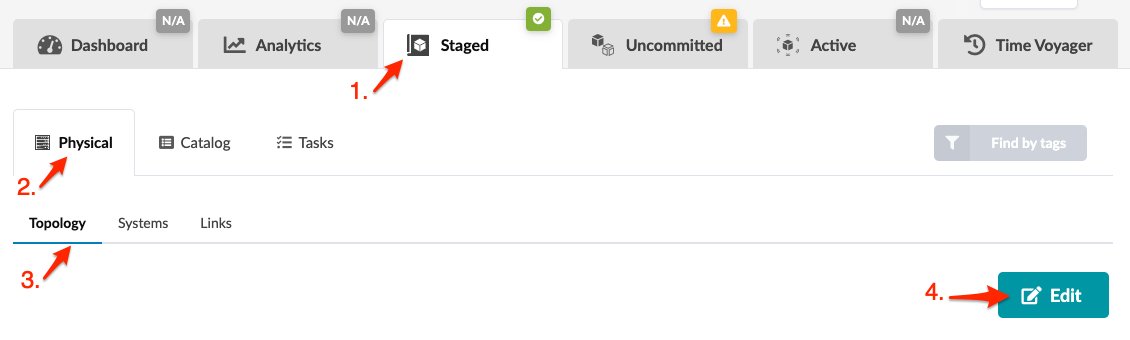
    User interface screenshot showing the Staged tab and Physical view with Topology subsection selected. Edit button available.
    CAUTION:

    Be careful. If you click away from the topology editor without clicking Save, your changes are discarded.

  2. In the topology editor select the two systems that you want to link. You can select them in a couple of different ways:
    • Click and drag across the two systems.

    • Hold down the alt key (command key on a Mac) while clicking the two systems.
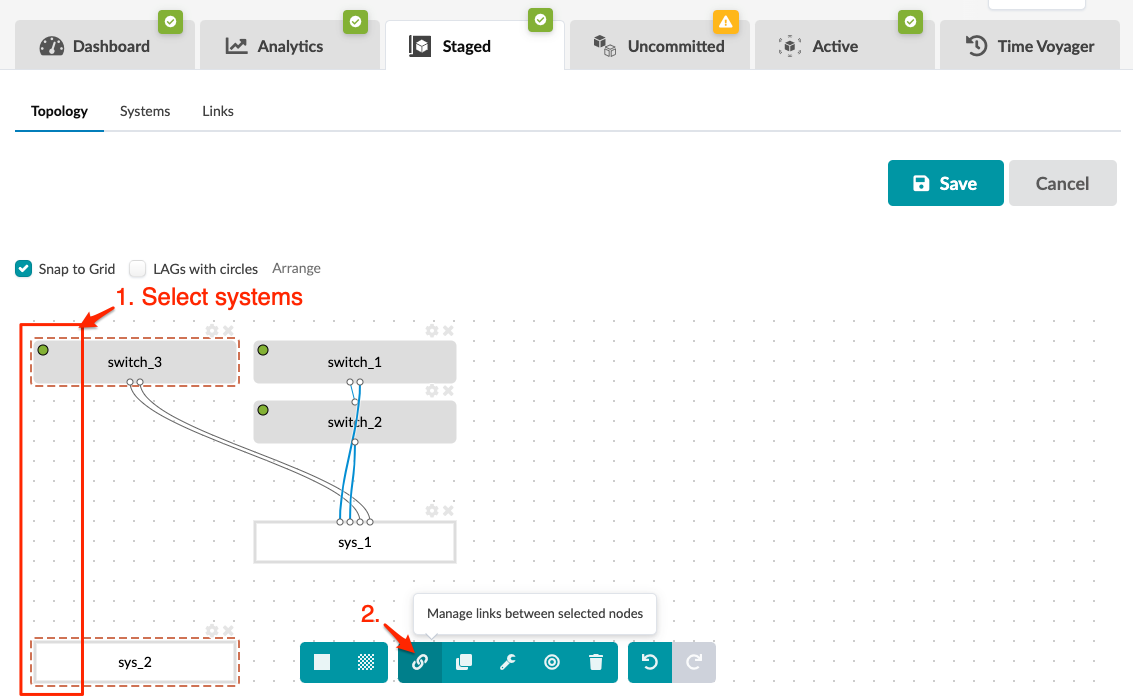
    Network topology editor interface showing nodes like switch_1 and sys_2 connected by lines. Steps highlight selecting nodes and managing links.
    When you select two systems additional tasks become available in the context-aware menu at the bottom.
  3. Click the Manage links between selected nodes button. The Links Management dialog opens showing the two node names (and device profiles, as applicable).
  4. Click Create Link. The port representations appear.
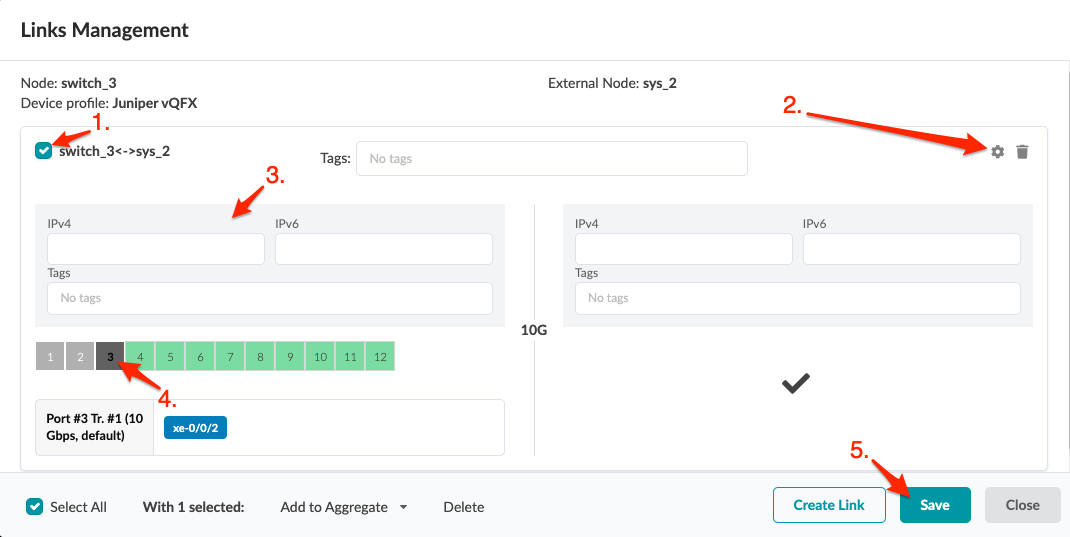
    Links Management interface for network configuration; node switch_3 with Juniper vQFX connects to sys_2. Port #3 selected, 10 Gbps, xe-0/0/2. Options for IP addresses, tags, settings, delete link, create link, save, close.
  5. Select the check box for the first node.
  6. Click the gear (upper-right) to show fields for IPv4, IPv6 and tags.
  7. You can enter IP addresses and/or tags to add them to the device model which can be used later when creating config templates.
  8. Select ports (and transformations as applicable), then click Save. (If you're connecting to an external system as in the example screenshot, you won't select ports.) You're still in the topology editor and if you click away without saving, your changes are discarded.
  9. Click Save in the topology editor to save your changes and leave the topology editor. (Depending on the size of your topology, you may need to scroll to see the Save button.)

Next Steps:

If you haven't created config templates yet, create them now. If you have config templates ready for your devices and haven't assigned them yet, assign them now. When you've assigned all required config templates and all other requirements are met, you can deploy your blueprint from the Uncommitted tab.