Update Assigned Config Template(Freeform)

You can update Freeform config template assignments on one or more systems.

Update Config Template Assignment on One System (from Systems)

If you haven't created your config templates yet, do that now.

  1. From the blueprint, navigate to Staged > Physical > Systems and click the system name to go to details for that system.
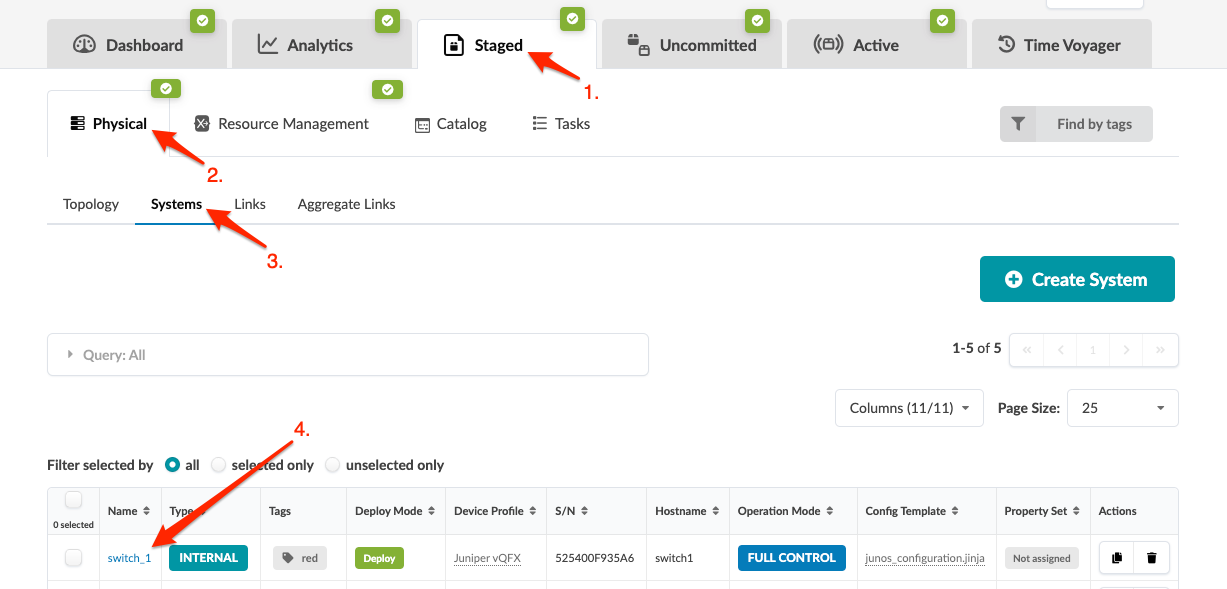
    Network management interface with tabs for Dashboard, Analytics, and more; Systems sub-tab selected with highlighted system switch_1 details.
    Note:

    You can also get to the Systems details page from the Topology view. From the blueprint, navigate to Staged > Physical > Topology and select the system to update.

  2. In the panel on the right, in the Devices tab, click the Edit button for the Config Template field.

    Network topology diagram showing switch_1 with interfaces xe-0/0/1, xe-0/0/2, and xe-0/0/0, sys_1 with eth1 and eth2, and switch_2 with xe-0/0/0. Dashed lines connect interfaces. Configuration panel on right for device, deploy mode active, junos_configuration.ji template selected with edit option. Show Aggregate Links checkbox checked.
  3. Select the config template from the drop-down list, then click the Save button. (Or, to cancel the change, click the gray discard button. Or, to remove the config template, click the red remove button.)
    The panel shows the value for the active blueprint and the staged value
When you're ready to activate your changes, commit them from the Uncommitted tab.

Update Config Template Assignment (Multiple Systems)

Internal systems with deploy mode set to Deploy require an assigned config template.

If you haven't created your config templates yet, do that now.

  1. From the blueprint, navigate to Staged > Physical > Systems to go to the Systems view.
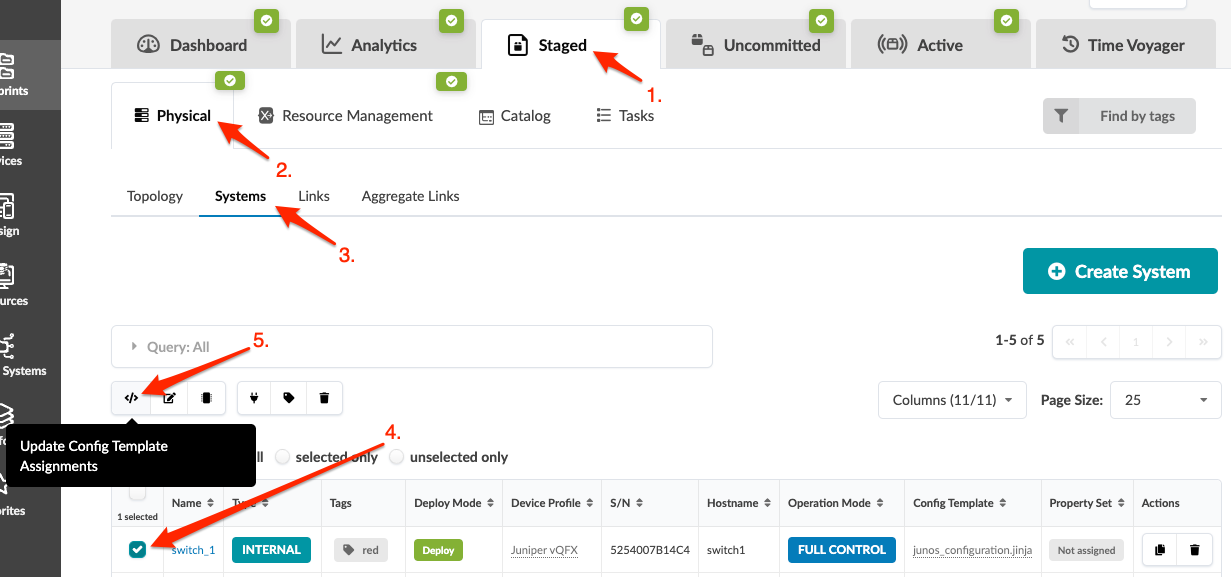
    Juniper Apstra interface showing 'Staged' mode in 'Physical' tab, 'Systems' sub-tab with selected system 'switch_1': Juniper vQFX, Deploy mode 'Deploy', hostname 'switch1', full control mode.
  2. Select one or more check boxes for the system(s) to update. (The same action will be applied to all selected systems. That is, all selected systems will be assigned or unassigned the same config template.)
  3. Click the Update Config Template Assignments button that appears above the table.
  4. To add or replace a config template assignment, leave Override Assignment selected and select a config template from the drop-down list. The template text appears for your review. (Each internal system is assigned only one config template, but that config template could nest other config templates within it.)
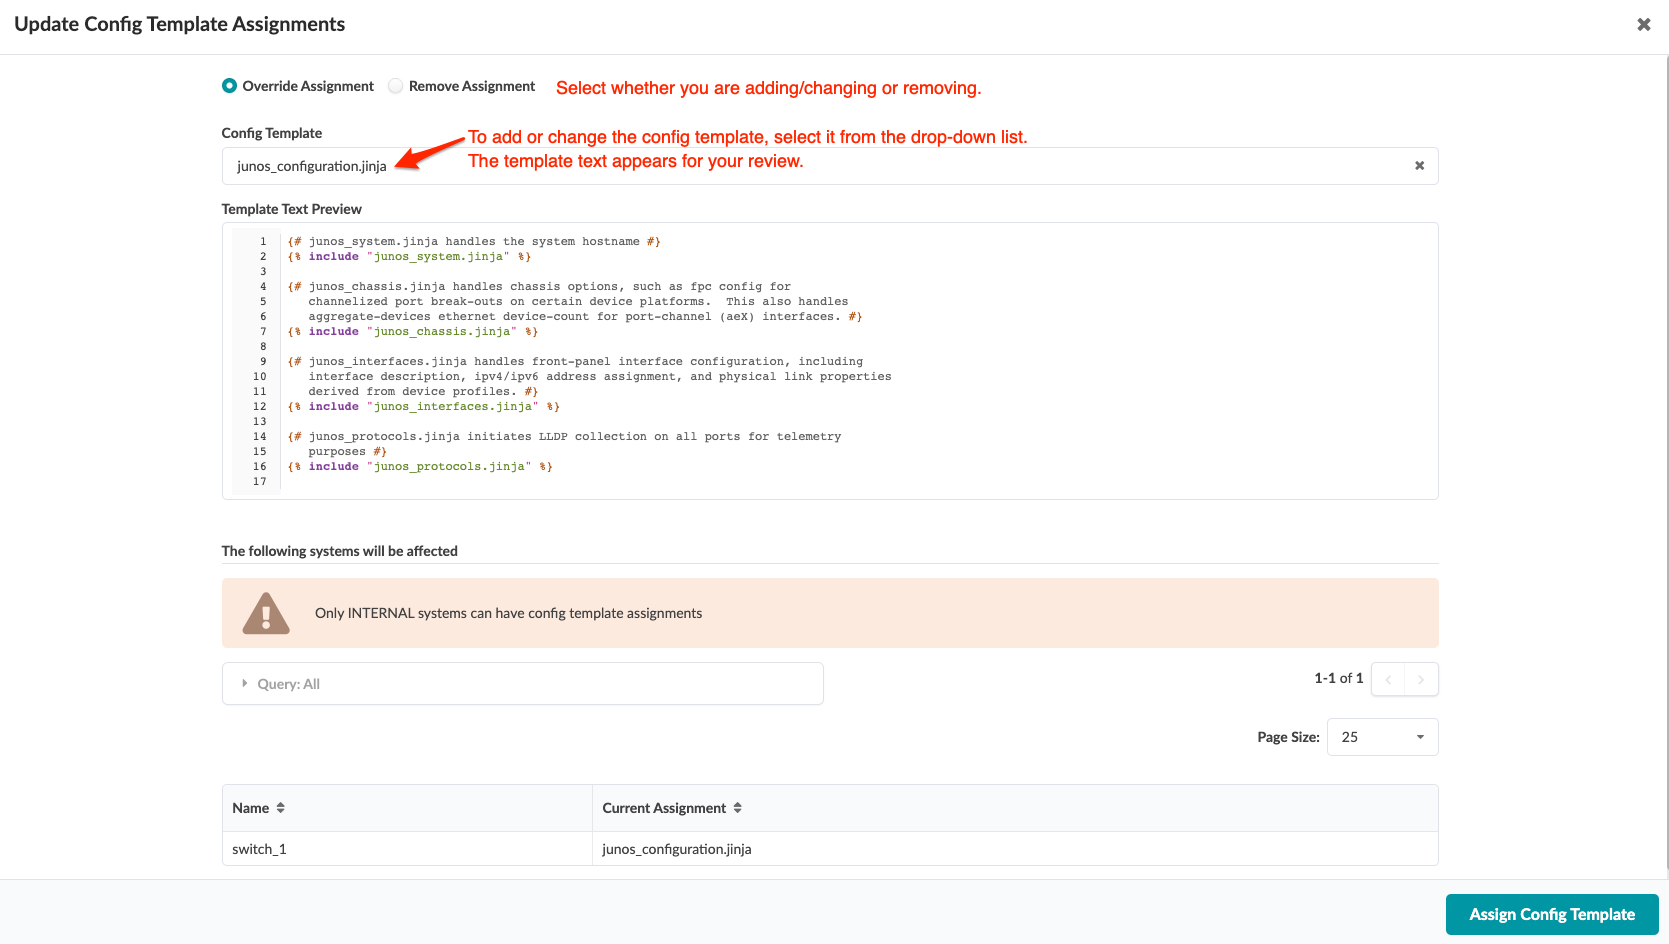
    Update Config Template Assignments interface with options to override or remove templates, config template dropdown, template preview, affected systems table, and assign button.
  5. Or, to remove a config template assignment, select Remove Assignment.
  6. Click Assign Config Template (or Remove Config Template Assignments, as applicable) to stage the changes and return to the Systems view.
When you're ready to activate your changes, commit them from the Uncommitted tab.