Install Apstra DCD on Hyper-V
These instructions are for installing Apstra DCD software on a Microsoft Hyper-V hypervisor. For information about using Hyper-V in general, refer to Microsoft's Hyper-V documentation.
-
Start Hyper-V Manager, select the server for the VM and navigate to
Actions > New > Virtual Machine. The
New Virtual Machine Wizard opens.

-
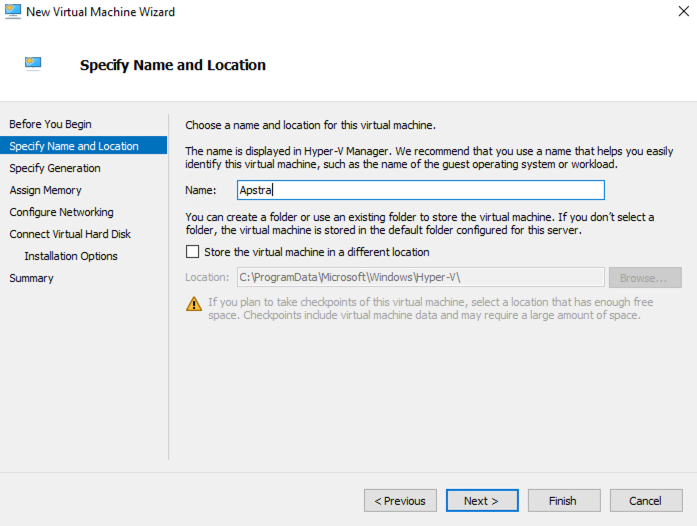
Specify a VM name and location, then click Next.
-
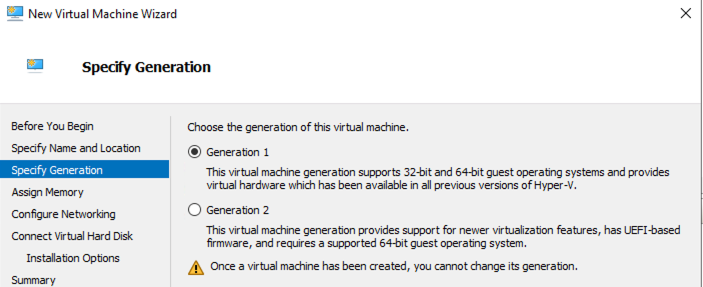
Specify Generation 1, then click
Next.
-
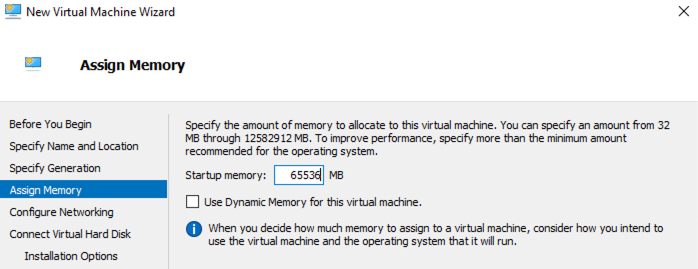
Specify required memory based on your environment, then click
Next.
-
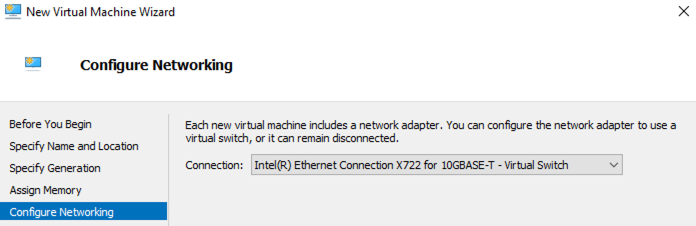
Configure the virtual switch as required for your deployment environment, then
click Next.
-
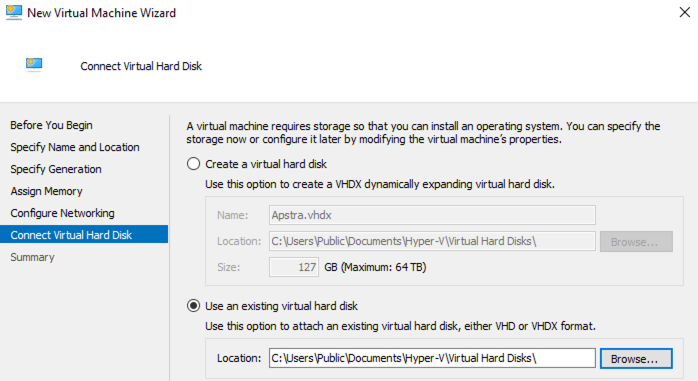
Select Use an existing virtual hard disk and browse to
the extracted file, then click Finish.
-
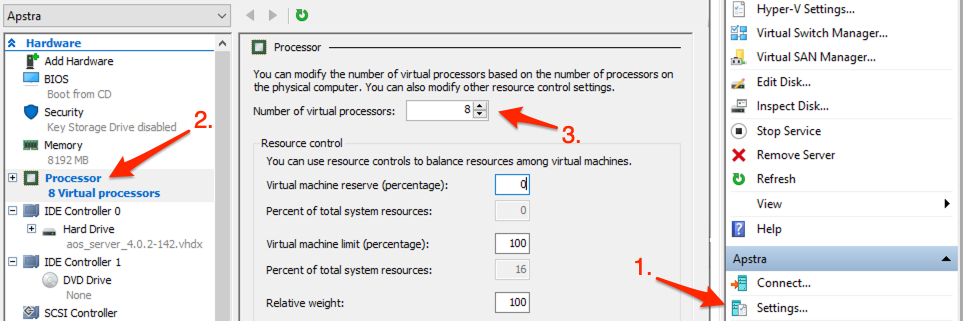
Click Settings (right panel), click
Processor (left panel), specify the number of virtual
processors based on required VM resources, then click OK.
You're ready to configure the Apstra DCD server. (When the Apstra DCD server is configured, the Docker daemon runs properly.)