Enable Packet Capture on a Switch
Packet capture (PCAP) is a tool that helps you to analyze network traffic and troubleshoot network problems. The packet capture tool captures real-time data packets traveling over the network for monitoring and logging.
You can enable on-demand PCAP on switches that have CloudX running. For the list of switches that support CloudX, refer to Juniper CloudX Overview.
The PCAP feature captures both control traffic (the traffic handled by the device CPU) and transit traffic (the traffic forwarded by network processors) that pass through switches at a site.
-
To capture transit traffic, a switch must have the secure PCAP feature enabled. Currently, only the EX4400, EX4100, EX4000 switches support this feature. PCAP captures only ingress transit traffic, not egress traffic.
-
You may see IRB (Integrated Routing and Bridging) packets in packet captures even when they are not destined for the interface you are examining. This is because certain protocol flows, such as the full DHCP exchange, require visibility into traffic that passes through IRB interfaces. To provide complete end‑to‑end protocol visibility, the system automatically includes relevant IRB traffic in the capture.
Packets are captured as binary data, without modification. You can read the packet information offline with a packet analyzer such as Wireshark or tcpdump.
To enable PCAP on a switch:
-
Click the + icon next to the Add Switch field, and select the
switch on which you want to enable packet capture.
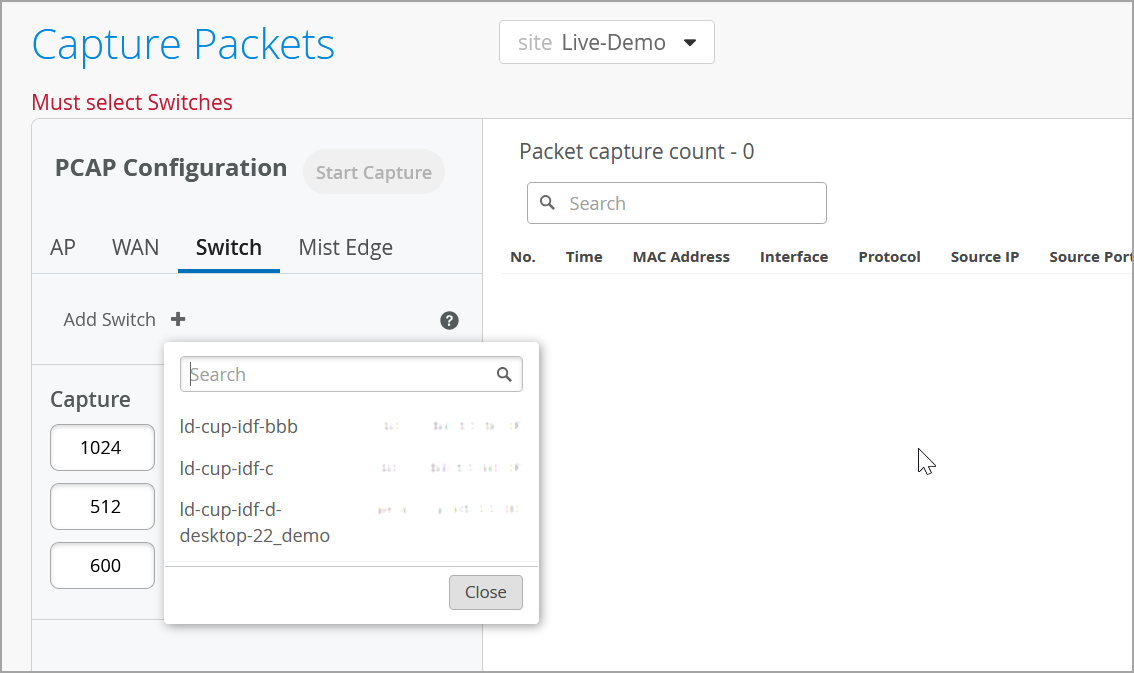 You can select multiple switches for a single packet capture operation.
 -
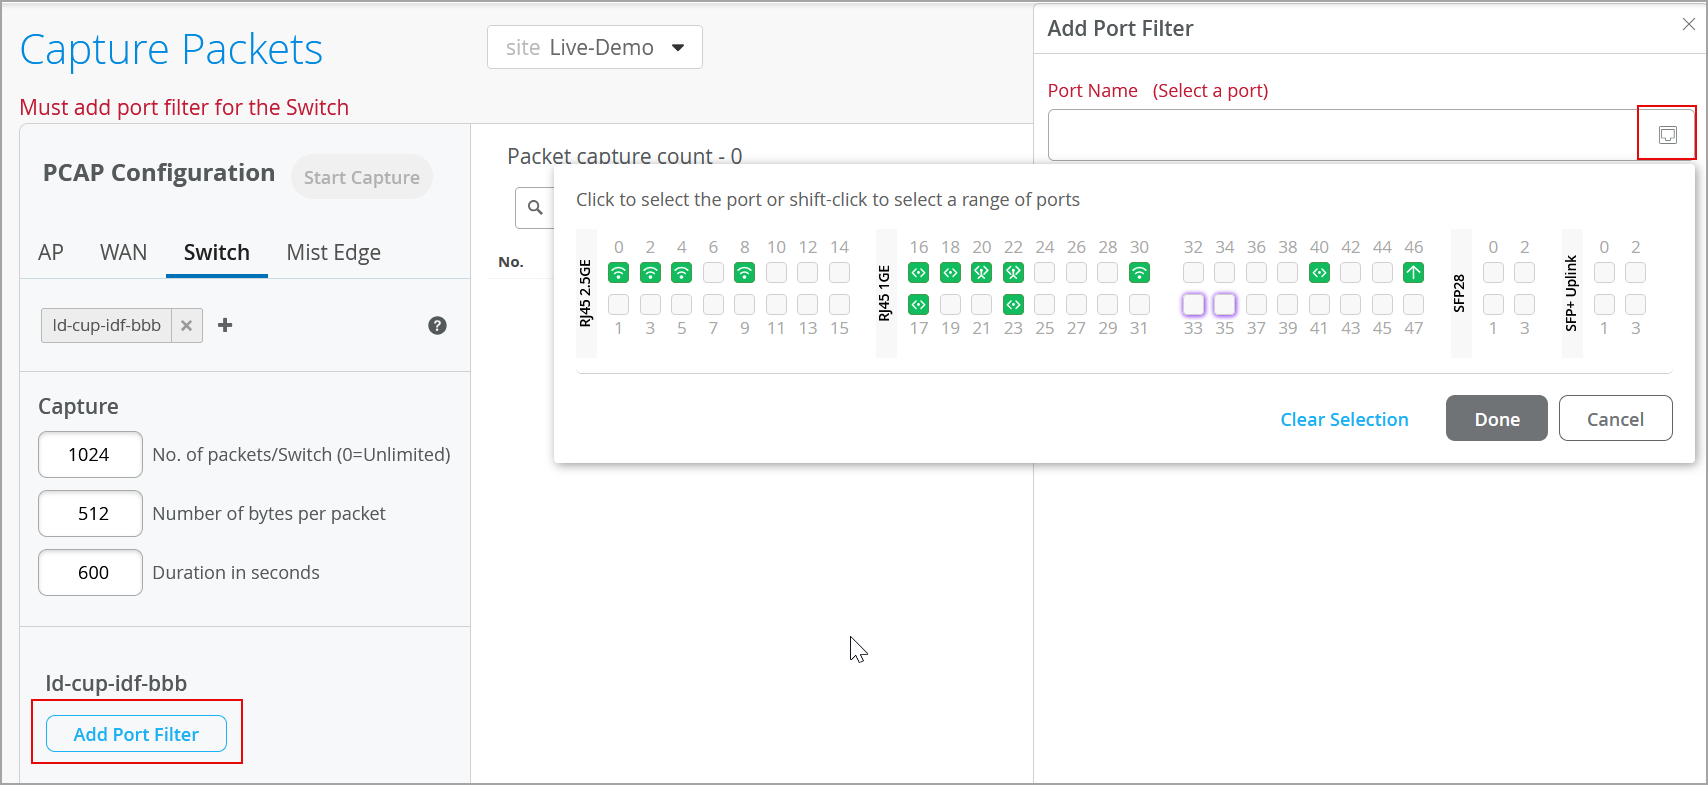
Configure a port filter for packet capture. To do that follow the steps below:
-
Click the port icon in the Port Name field, select a port on
which you want to enable packet capture, and then click
Done.
-
You can select multiple ports from multiple switches in a single packet capture configuration.
-
For CX switches, packet capture is supported only on individual physical ports and is not supported on LAG ports or LAG member ports.
-
-
Click the port icon in the Port Name field, select a port on
which you want to enable packet capture, and then click
Done.
After the packet capture is complete, you can download the file for inspection. To do that, click Captured File on the upper right of the screen.

To know more about how to view the packet capture in Wireshark, refer to Configure IEEE 802.11 on Wireshark and View Wireless Packet Captures in Wireshark.