Monitor Administrator Activities (Audit Logs)

Use the Audit Logs page to monitor logins and to see what actions were taken by each user.

Overview

On the Audit Logs page, you can see who logged in to the Juniper Mist™ portal, when they logged in, and what they did.

When you first open this page, it shows all logins for all users and all sites on the current date. You can use the drop-down lists at the top of the page to select the time period, filter by users, filter by sites, or search for certain types of activities.

Find the Audit Logs Page

From the left menu, select Organization > Admin > Audit Logs.

Select the Time Period

To select the time period: Use the first drop-down menu.
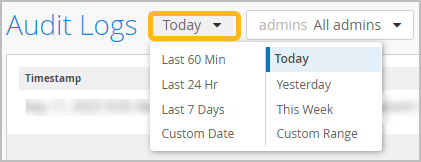
Audit Logs interface with filters for time range and admin users. Time range dropdown expanded, Today selected. Timestamp column blurred.

Table 1: Time Period Options
Time Period Description
Last 60 Min From 60 minutes ago to the current time.
Last 24 Hr From 24 hours ago to the current time.
Last 7 Days From the midnight 7 days ago to the current date and time.
Today From midnight to the current time today.
Yesterday From midnight to 11:59 PM on the previous day.
This Week From midnight Sunday to the current date and time.
Custom Date

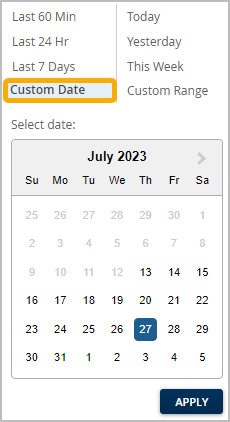
Select a date within the past 180 days. The Audit Logs page will show all logs from midnight to 11:59 PM on the selected date.

Custom Date Example

Date selection interface with options like Last 60 Min, Last 24 Hr, Last 7 Days, Today, Yesterday, This Week, and Custom Range. Custom Date is selected with July 27, 2023 highlighted on the July 2023 calendar. APPLY button below to confirm.

Custom Range

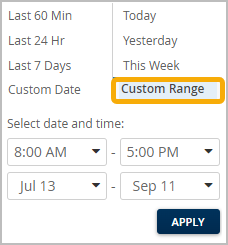
Specify a range of dates within the past 180 days. On the left, enter the start time and date. On the right, enter the end time and date.

Custom Range Example

Date and time range selection interface with predefined ranges like Last 60 Min and Custom Range highlighted, dropdowns for specific time and date ranges, and an APPLY button.

Filter by Users

  1. At the top of the page, click the Admins drop-down menu.

    Example
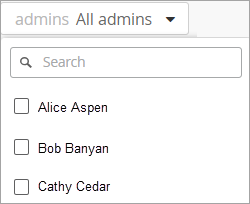
    Dropdown menu labeled admins with All admins selected, search bar below, and list of names with checkboxes for Alice Aspen, Bob Banyan, and Cathy Cedar.

  2. Select the check box for the user whose logins you want to see.

    The page reloads, showing the logins for the selected user.

    Tip:
    • To select additional users, repeat the previous steps until the page shows all the users that you want to see.

    • To quickly find a user, start typing in the Search box. As you type, the drop-down list shows only the names that match your search string. Select the check box for the user that you want to include.

    • To deselect a user, click the Admins drop-down menu, and clear the check box from the user's name.

Filter by Sites

  1. At the top of the page, click the site drop-down menu.
  2. Select the check box for the site that you want to include.

    The page reloads, showing the logins at the selected site.

    Tip:
    • To select additional sites, repeat the previous steps until the page shows all the sites that you want to see.

    • To quickly find a site, start typing in the Search box. As you type, the drop-down list shows only the sites that match your search string. Select the check box for the site that you want to include.

    • To deselect a site, click the site drop-down menu, and clear the check box from the site name.

Filter by Users' Tasks

Use the Search by Message box to find records for particular tasks, such as accessing the organization or updating the site settings.

To filter by users' tasks:

  1. Skim through the records to get familiar with the task descriptions in the Message column.

    Messages typically consist of a few words. These words might include:

    • An action word such as accessed, update, add, or delete.

    • The name of an organization, site, user, or other entity (such as webhook or API token) that was affected by the action.

    • The name of a feature that the user updated, such as subscription, zone, or site settings.

  2. Start typing in the Search by Message box.
    As you type, the page reloads to show only the messages that contain the specified characters.

View Details

For certain types of actions, additional details are available.

If the View details link appears, click it to see more information about the action.

To close the View details window, click X in the top right corner.

Reset the Page to the Defaults

To reset the page, click the Refresh button in the web browser's toolbar.