View Site and Device Information in the Mist AI Mobile App
Know how you can quickly access site and device details for an organization using the Mist AI mobile app.
View Site Details
On the home page you see the list of sites in the selected organization. You can select a site and view the details of the devices located within the site.

View Device Inventory
On the home page, tap Device Inventory to view information about all the devices (APs, switches, WAN Edges, and Mist Edges) that have been claimed into the organization.
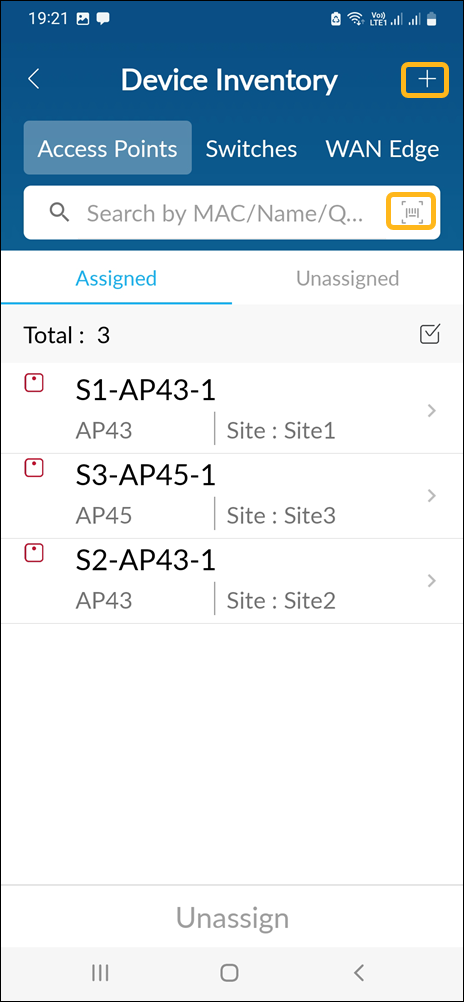
On the Device Inventory page, you can:
-
Use the tabs at the top to select a device type.
-
View assigned and unassigned devices.
-
Search for a device by entering the MAC address or device name in the text box. Alternatively, you can search for a device using the QR code. Tap the camera icon to scan a QR code.
-
Tap a device to go to the device details page.
Based on your user role, you can:
-
Unassign a device—Tap the device under the Assigned tab, and then tap Unassign.
-
Assign a device—Tap the device under the Unassigned tab, then tap Assign, and select the site to which the device needs to be assigned.
-
Add a new device—Tap + in the top-right corner. Then scan the QR code or enter the claim code.
View Device Details
From the Device Inventory page or Site page, select a device to go to the device details page. On this page, you can:
-
View the status to see if the device is connected or disconnected.
-
Site to which the device is assigned.
Based on your user role, you can:
-
Assign a device to a site or unassign a device from a site.
-
Release a device.
-
Replace a device.
Some of the data on the device details page might vary depending on the device type.
Here are a few examples of the device details page:
-
AP

Additionally, for APs you can:
-
Tap Locate to verify the AP placement. After you select this option, the LEDs on the physical AP start flashing green and purple. Tap Unlocate to stop this behavior.
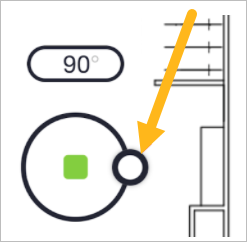
Place an AP on the floor plan. The Map field contains the Place on a map link if the AP has not yet been added to a floor plan. Tap the link and then drag the AP to its correct position. Finally, set the orientation by dragging the knob so that its position corresponds to the position of the LED on the AP. Also enter the height of the AP.
-
-
Switch

-
WAN Edge

For WAN Edges, you can:
-
Use the Send Log to Mist option to send logs to Juniper Mist Support for troubleshooting.
-
Reboot the device.
-