Marvis iOS Client
Understand how you can set up the Marvis client on your iOS device.
The Marvis client for iOS is a secure, lightweight mobile app that helps simplify and secure the process of connecting iOS devices to enterprise networks. With Juniper Mist Access Assurance, Marvis client facilitates zero-touch onboarding through certificate-based authentication, eliminating the need for passwords. The Marvis client allows employees, guests, and contractors to access the organization's wireless network securely and with ease.
Key features of the Marvis client for iOS include:
-
Certificate-based authentication (no passwords required)
-
Automatic installation of wireless profiles and certificates
-
One-tap provisioning
-
Auto-renewal of credentials before expiry
-
Support for BYOD, guest, and corporate devices
-
AI-driven visibility and troubleshooting through the Juniper Mist portal
Requirements
-
Device running iOS 12.0 or later
-
Juniper Mist Access Assurance subscription
-
A valid provisioning link from your organization
Privacy and Security
Juniper Mist adheres to the following guidelines:
-
Marvis client installs the wireless and certificate profiles only after authentication.
-
Juniper Mist does not share personal data with third parties.
-
Device identity is managed securely within the Juniper Mist cloud.
Marvis iOS Client Setup Overview
The Marvis iOS client setup involves a simple process:
Install the Marvis iOS client app from App Store on your device.
Click the onboarding link that you received from your organization through an e-mail, a QR code, or an onboarding portal.
Authenticate using your organization credentials through SSO such as Okta.
The Marvis client app is launched.
Click Install to install the network and Wi-Fi profiles.
The onboarding process starts automatically. A secure certificate is issued and the wireless profile is installed on your device.
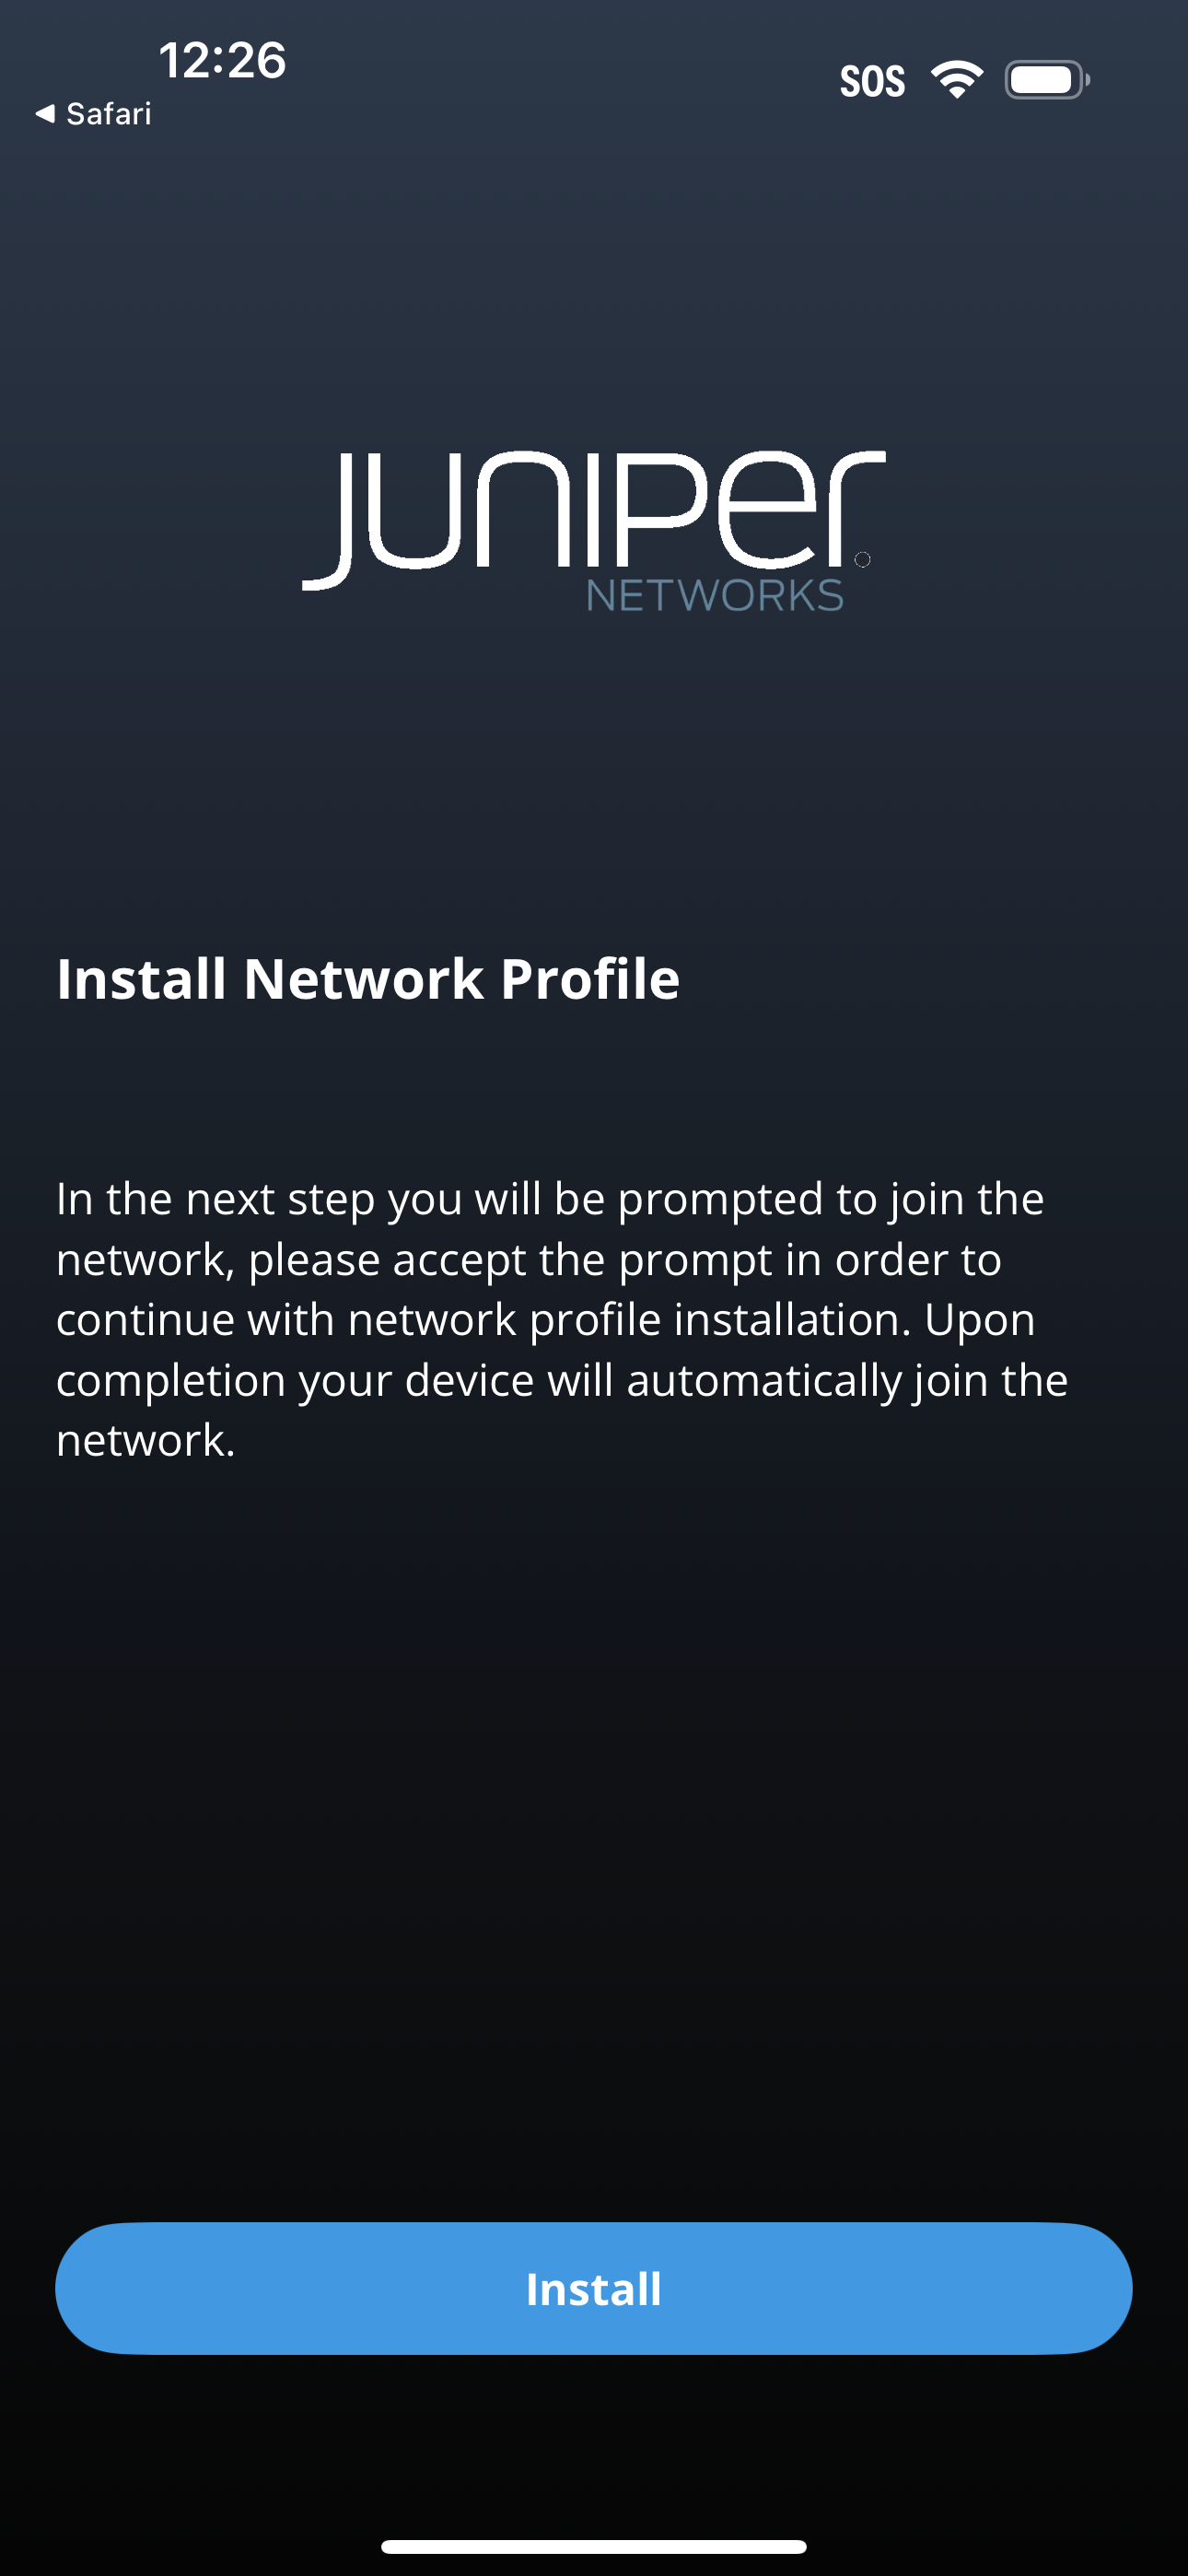
Click Join when prompted.
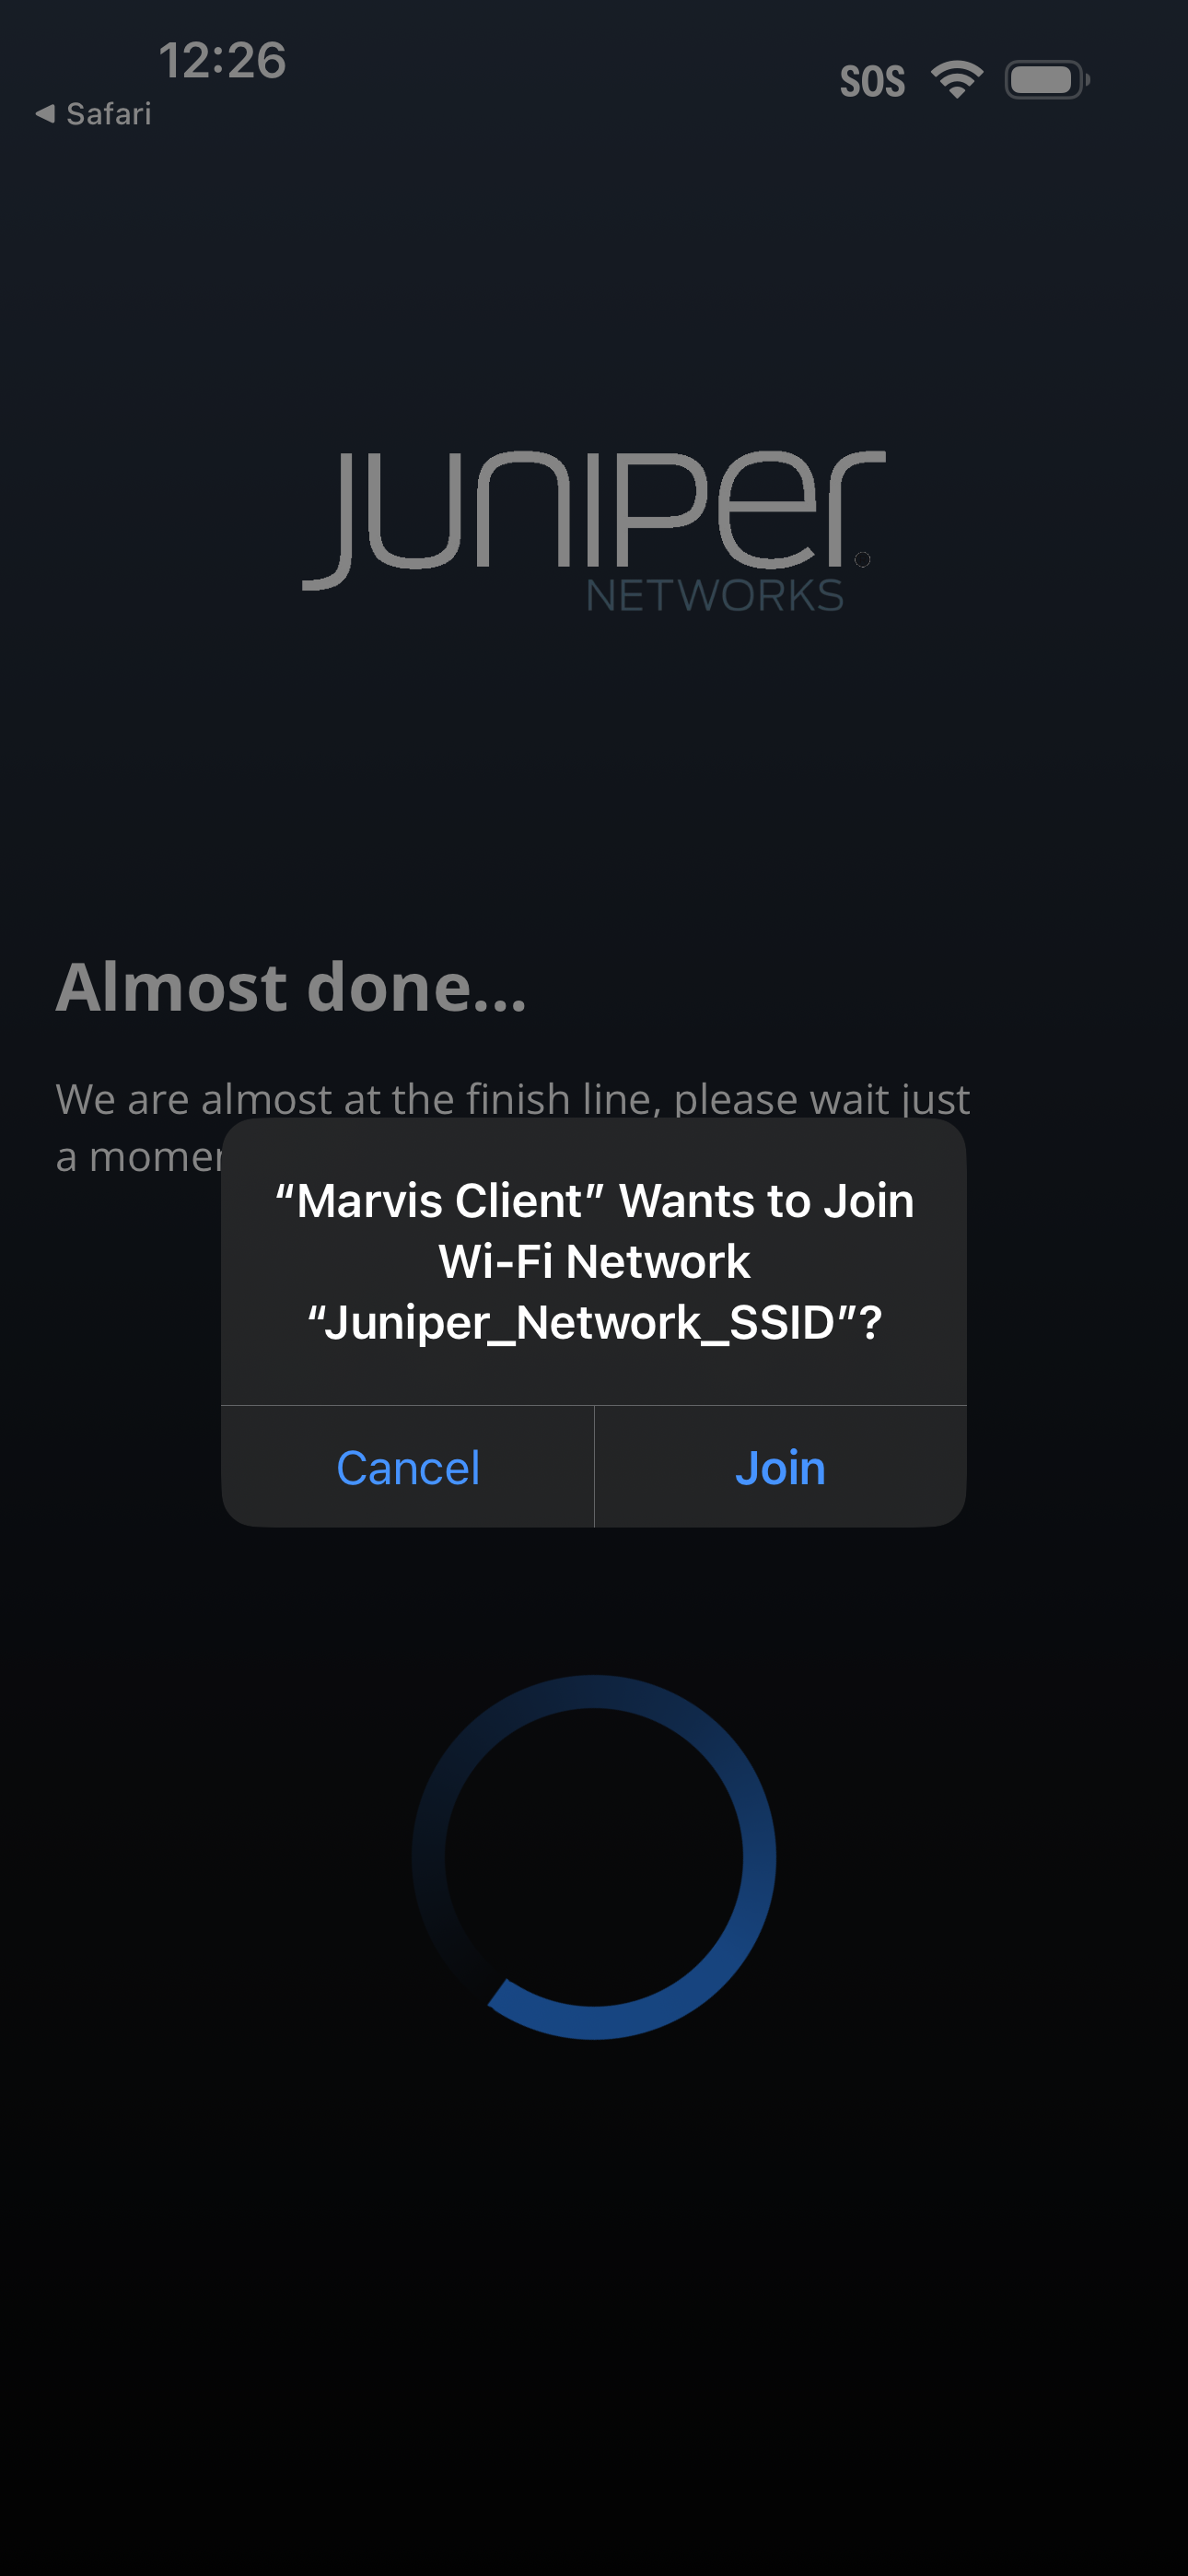
Your device connects to the Wi-Fi network and uses certificate-based access for seamless and secure connectivity.
You might see an error message stating that the SSID or Wi-Fi is not available. This might occur if the SSID is not within the range. You can try to reconnect when the SSID is within the range.
You'll see the Network Profiles page once the device is onboarded.
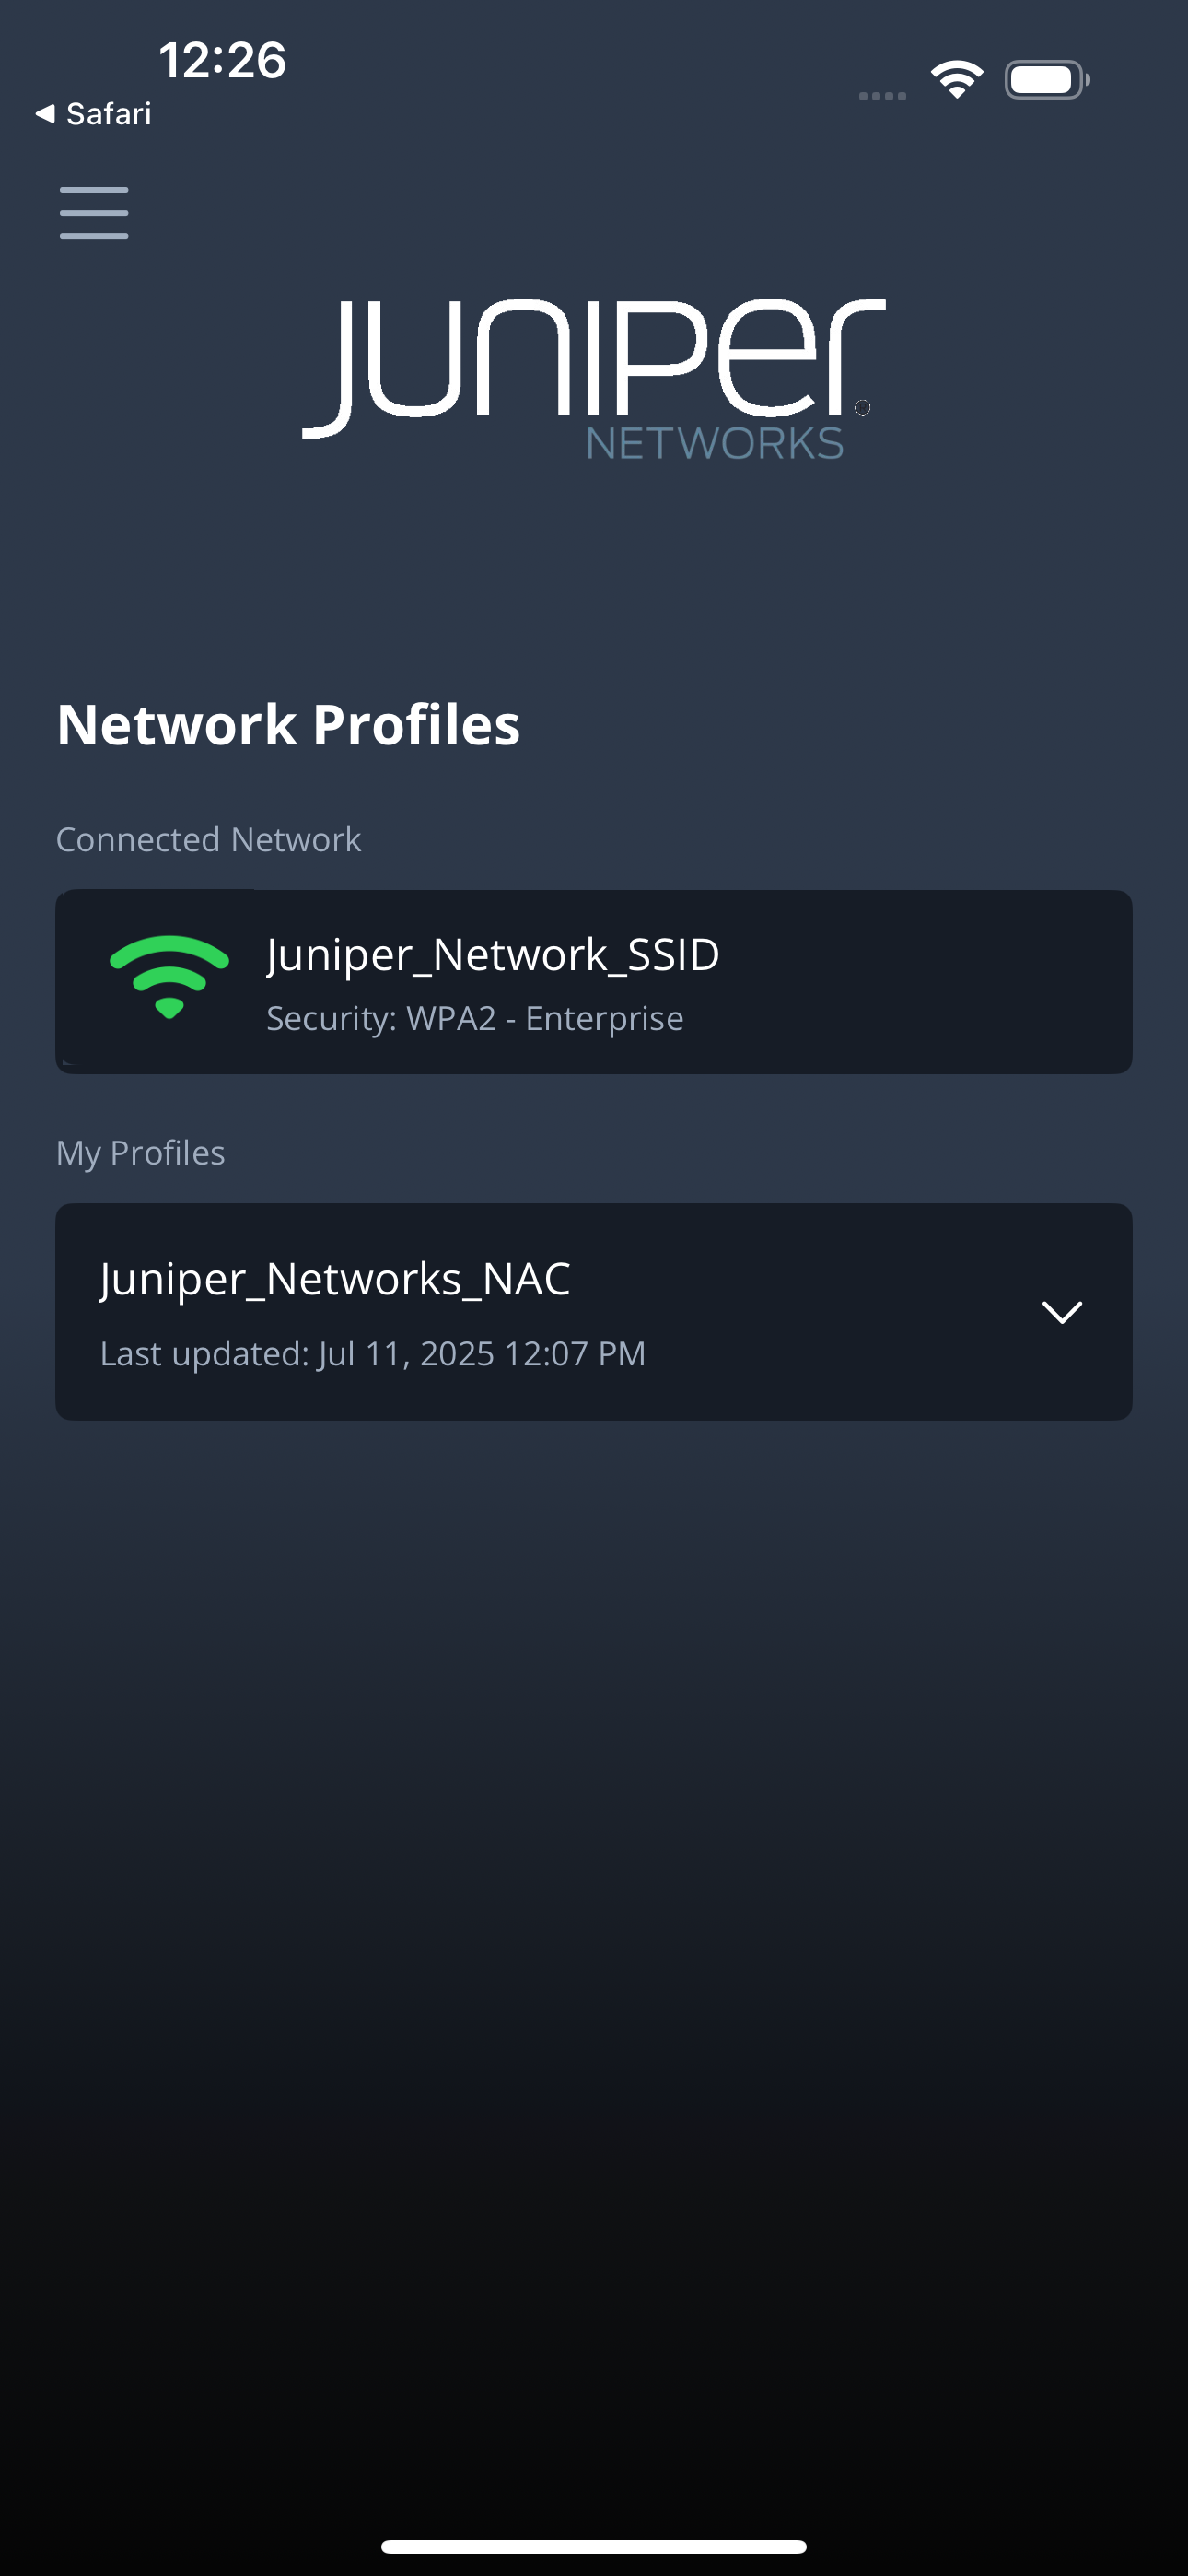
If the device onboarding fails or if you're unable to connect to the network, contact your support team.
For more information about Mist Access Assurance and Marvis Client, see https://www.juniper.net/us/en/products/cloud-services/marvis-ai-assistant/marvis-client.html
View Logs in the Marvis iOS Client
-
Info—General information
-
Error—Critical issues
-
Debug—Detailed data that you can use to debug issues
-
Tap the version number in the About page 7 times to
enable debug mode.
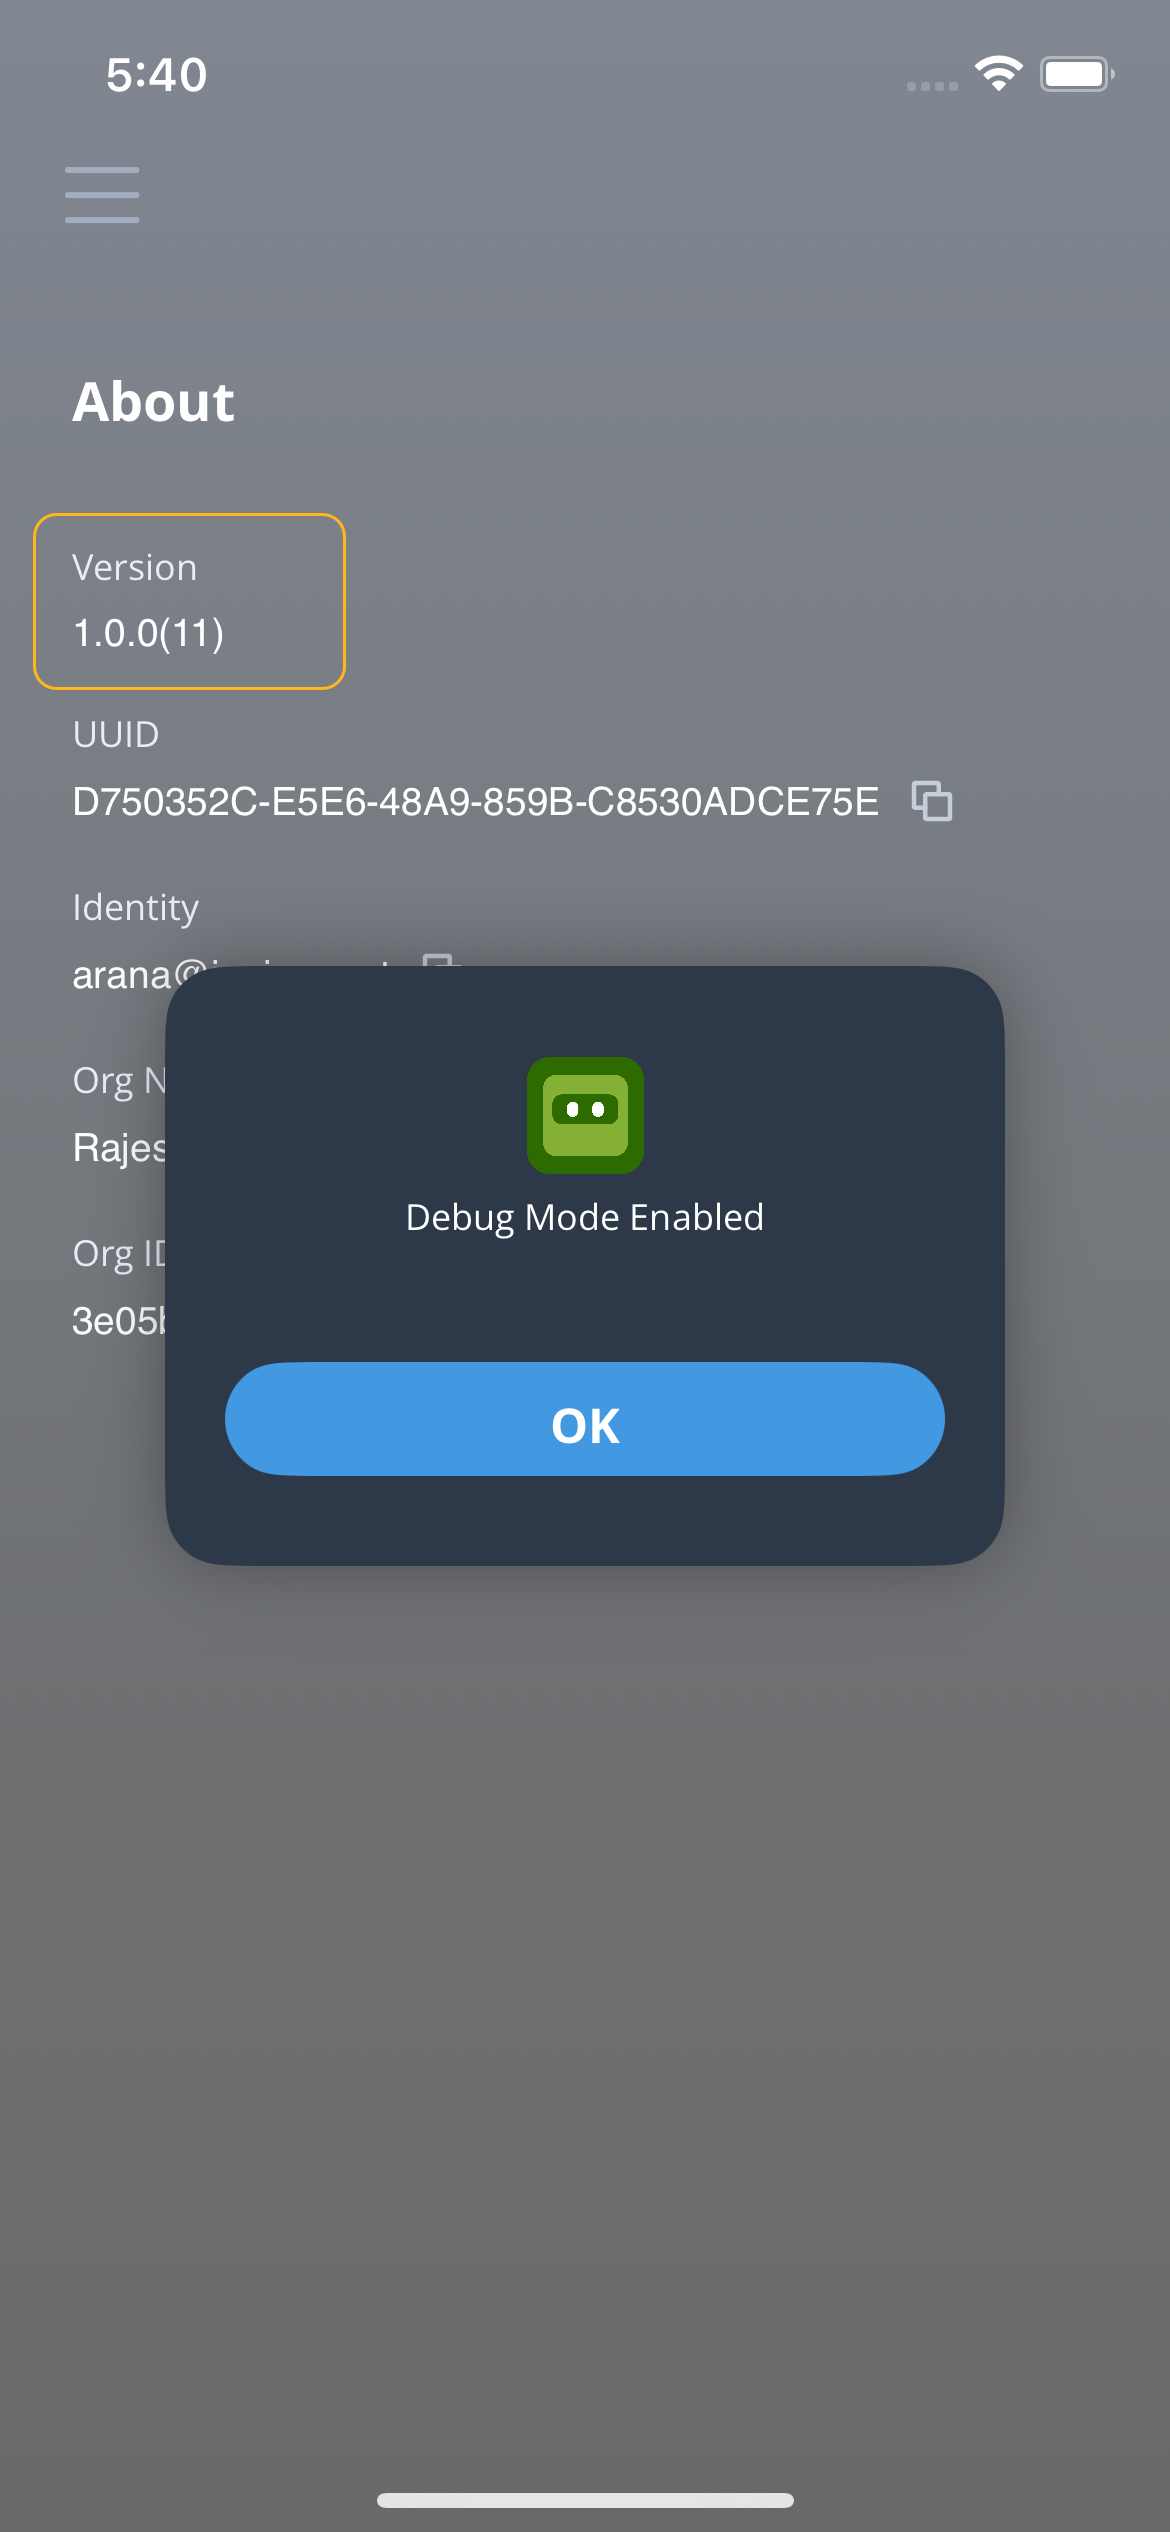
You'll see the Logs option listed in the menu after the debug mode is enabled.
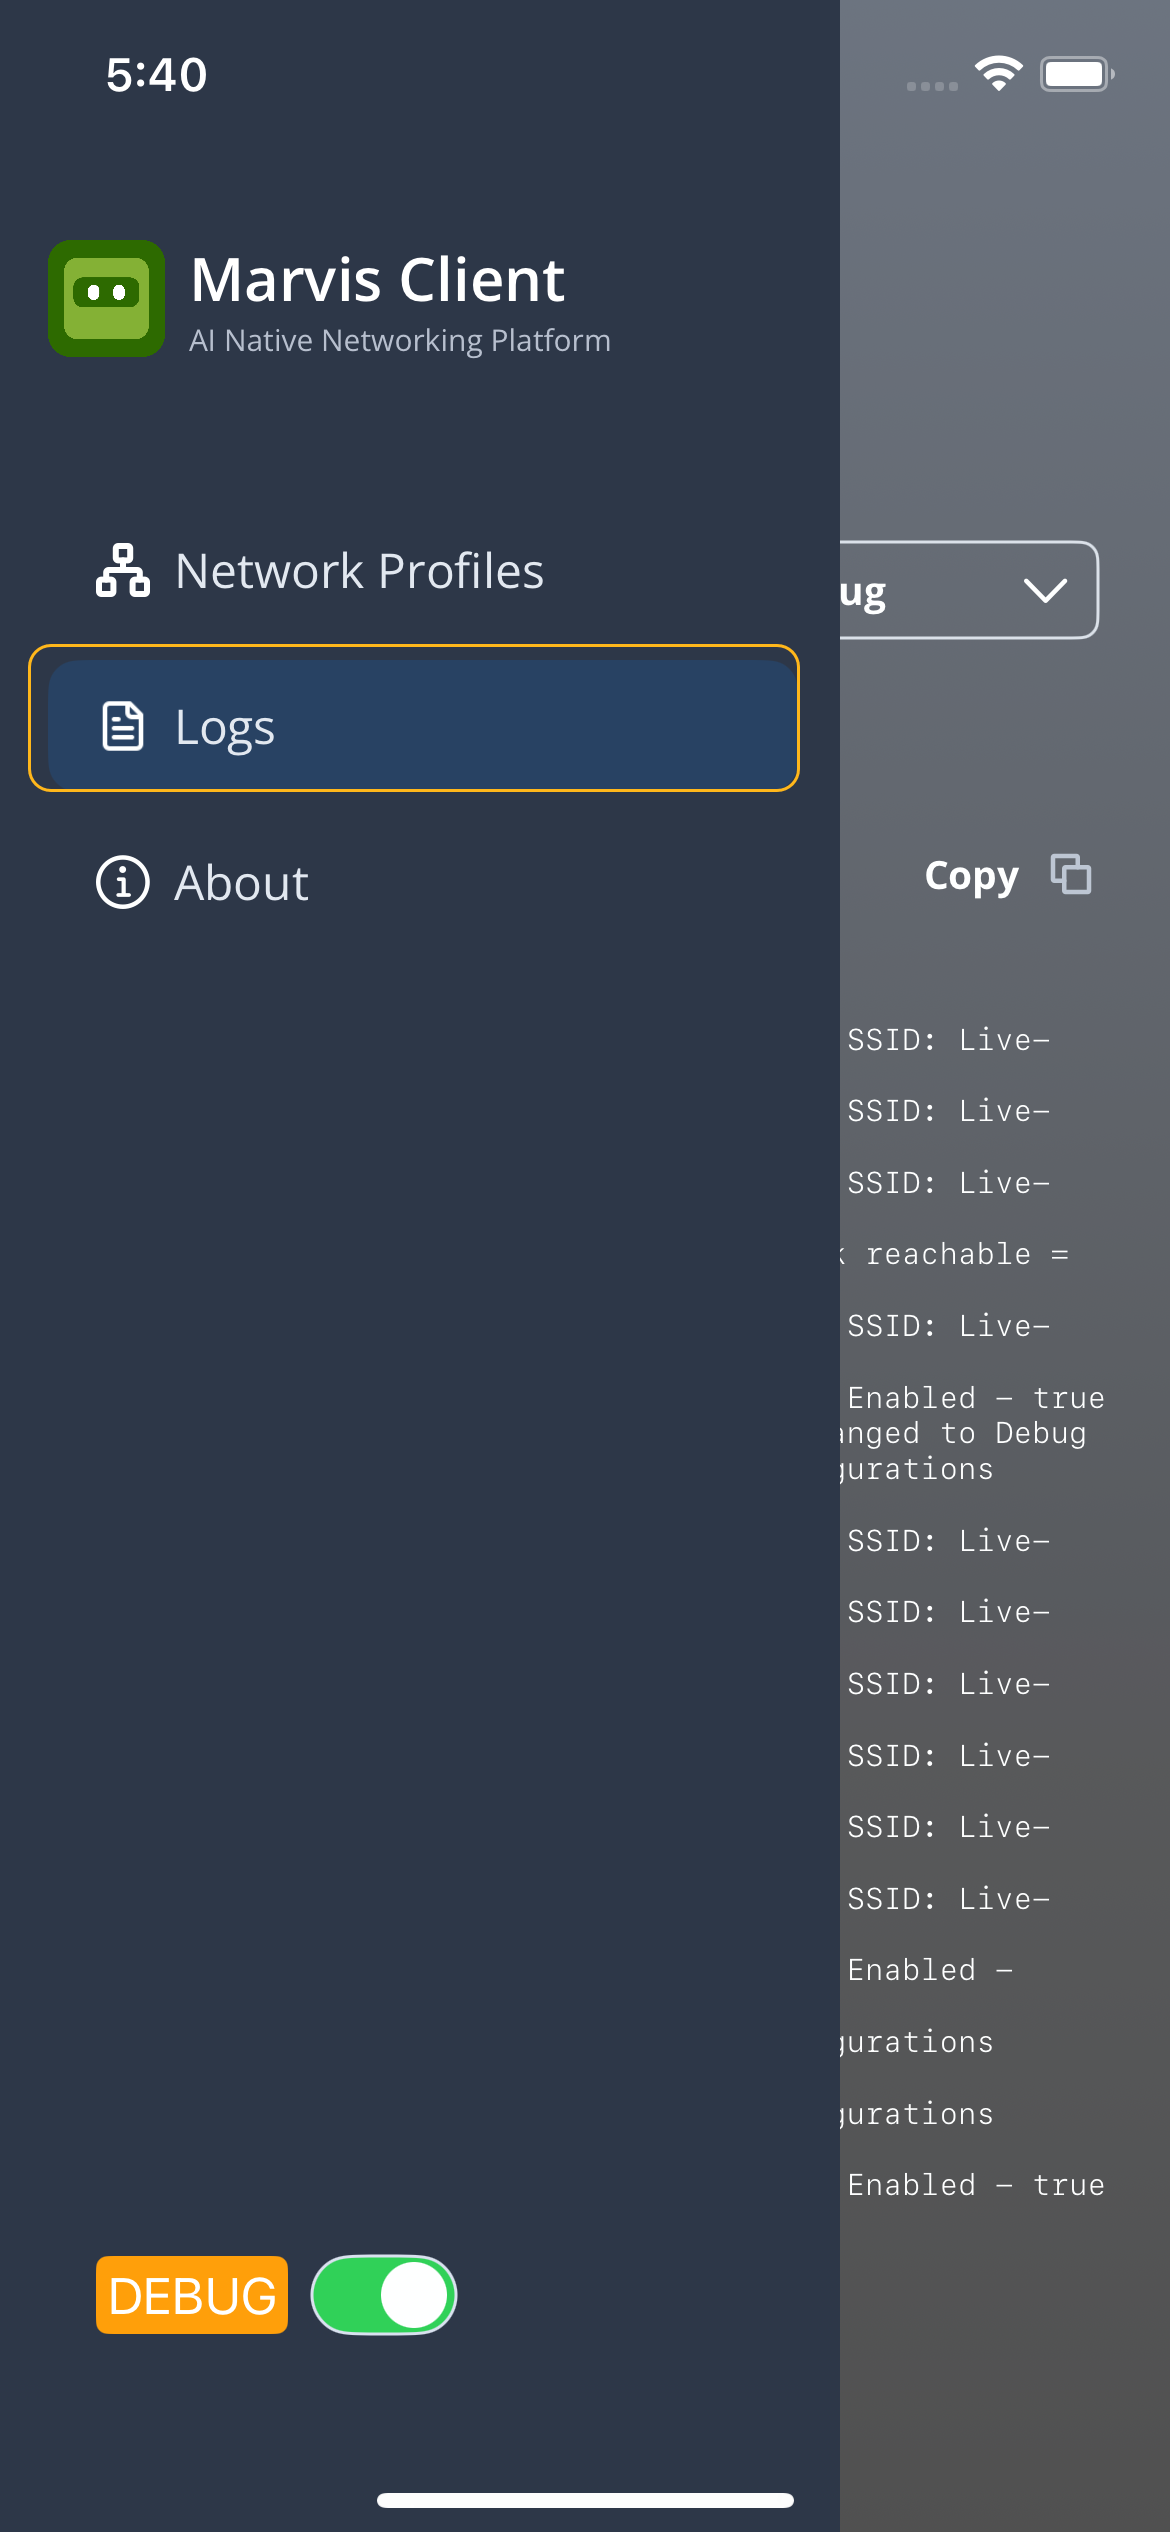
-
Select Logs. Select the log category from the
Log Level drop-down list.
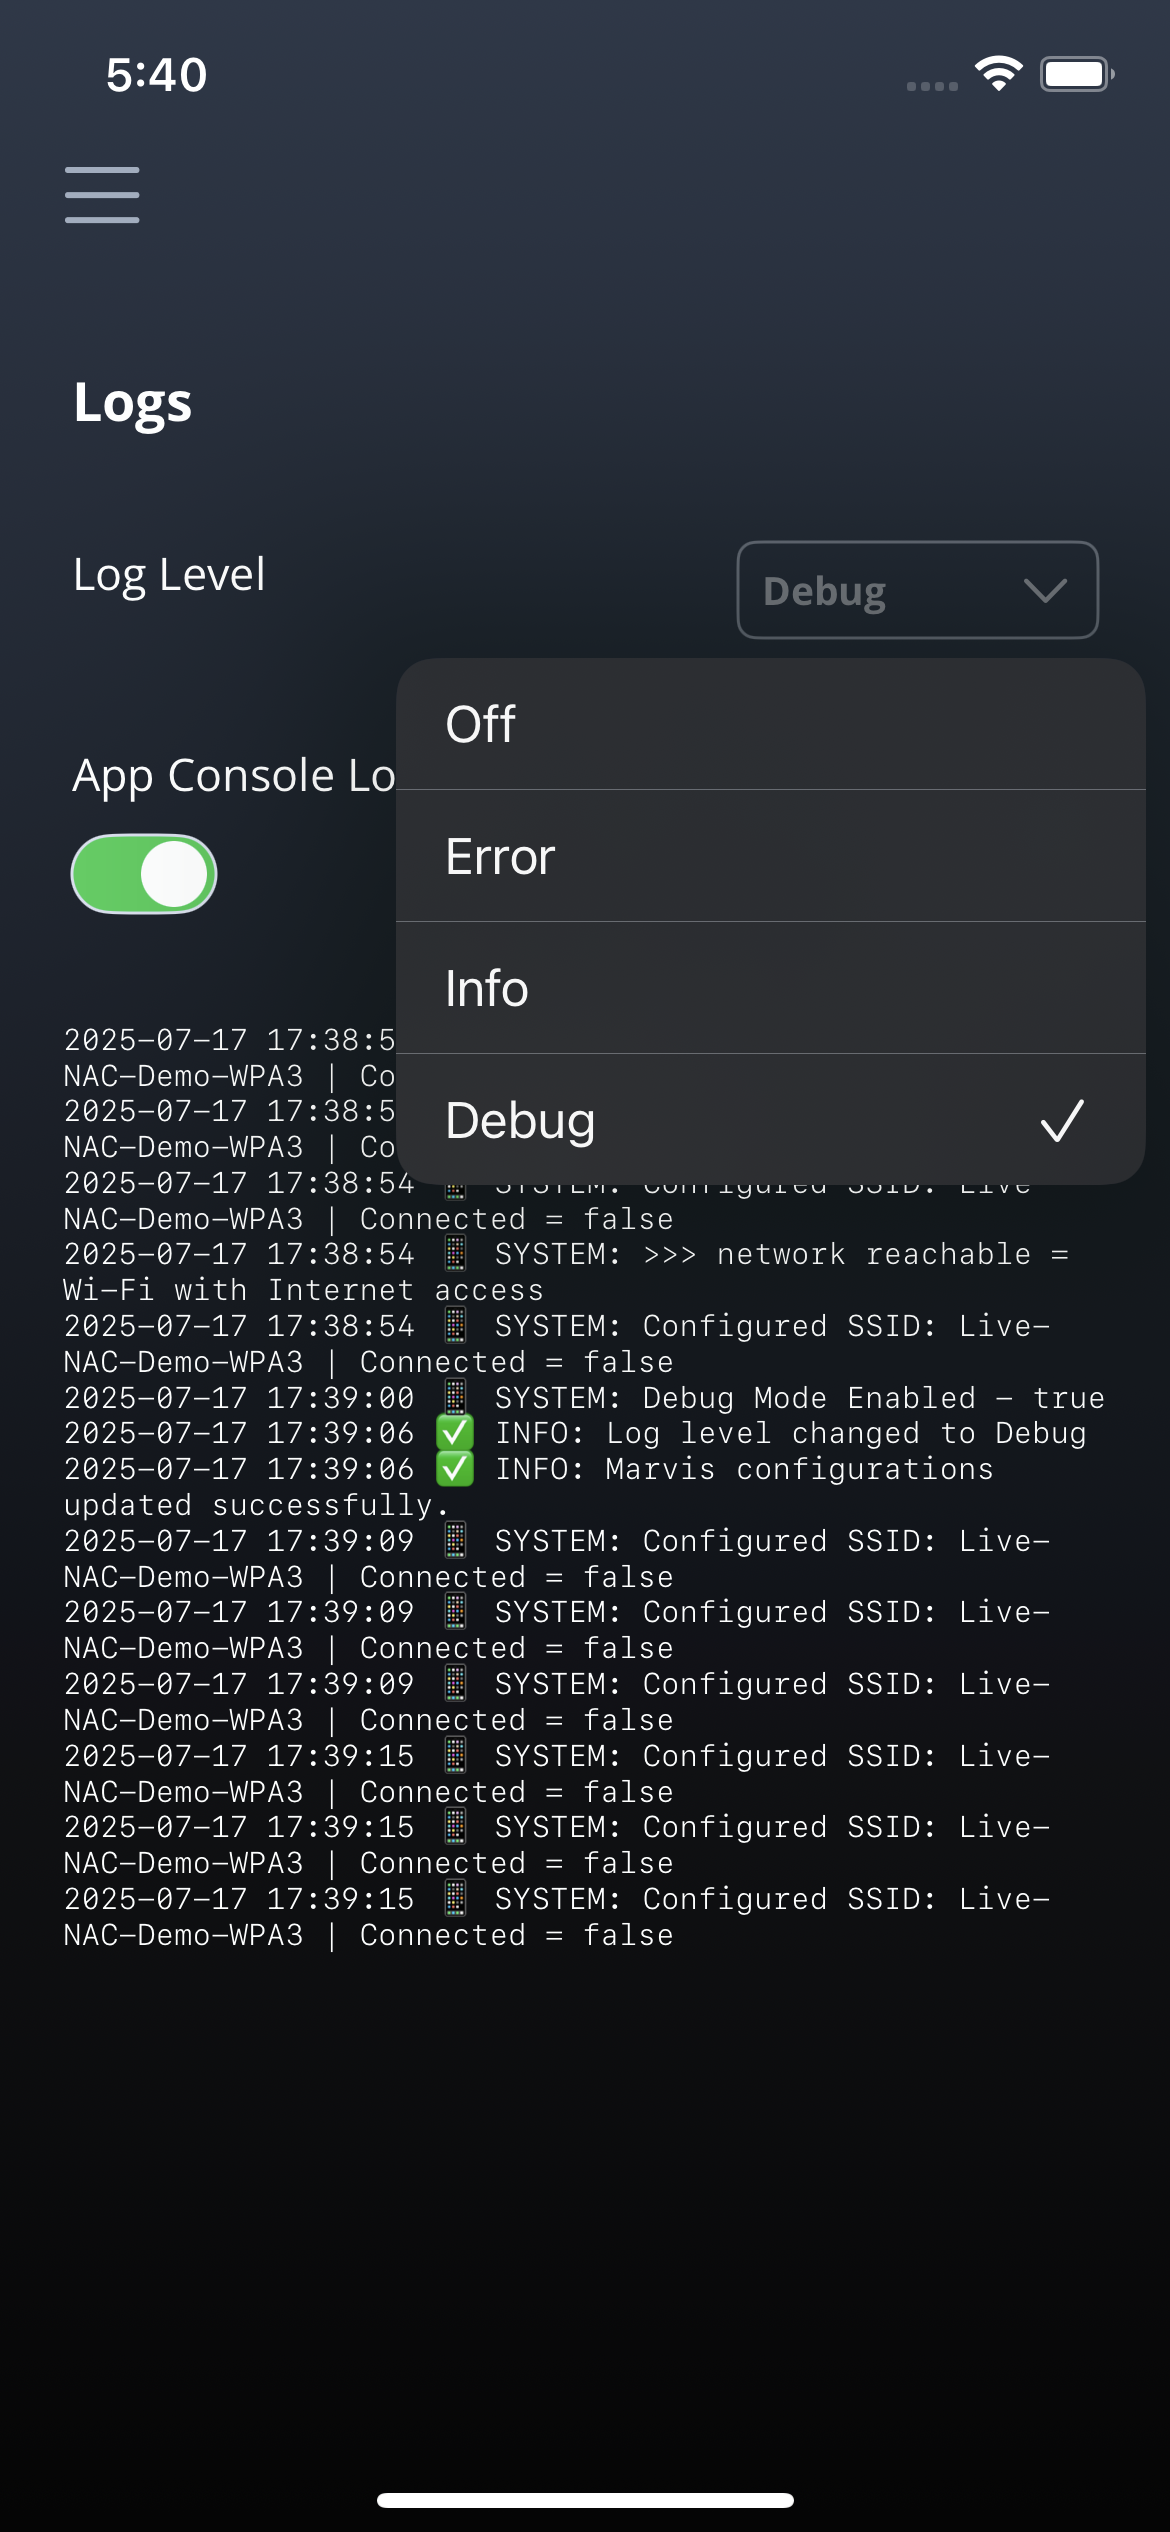 You'll see recent logs based on the selected log level. You can click the Copy button to copy the log details and send the information to the support team for troubleshooting.