Configure EAP-TEAP Authentication for a Windows Device
To secure your network, follow these steps to configure a client device for EAP-TEAP (Tunneled Extensible Authentication Protocol) authentication.
Tunneled Extensible Authentication Protocol (TEAP) is a tunnel-based EAP method that enables secure communication between a peer and a server by using the Transport Layer Security (TLS) protocol to establish a mutually authenticated tunnel. Within the tunnel, TLV objects are used to convey authentication-related data between the EAP peer and the EAP server. (RFC 7170 - Tunnel Extensible Authentication Protocol )
Juniper Mist Access Assurance supports EAP-TEAP with EAP-TLS as the authentication method for both machine and user authentication.
By default, Windows authenticates the machine at startup and does not automatically re-authenticate using user credentials after a user signs in. To enable automatic user authentication, configure Wireless 802.1X Single Sign-On (SSO)—either pre-logon or post-logon—in the Wi-Fi profile through a Group Policy, an MDM, or an XML profile. If SSO is not enabled, user authentication typically occurs only after the wireless connection is manually disconnected and then reconnected. See Single Sign-On profile sample.
Currently TEAP support is available for Windows 10 Version and above.
You can configure wireless and wired profile with TEAP manually or through scripts, which can be distributed using MDM or GPO. Current MDM solutions do not provide out-of-the box support for TEAP configuration.
To configure wireless EAP-TEAP on a Windows device:
-
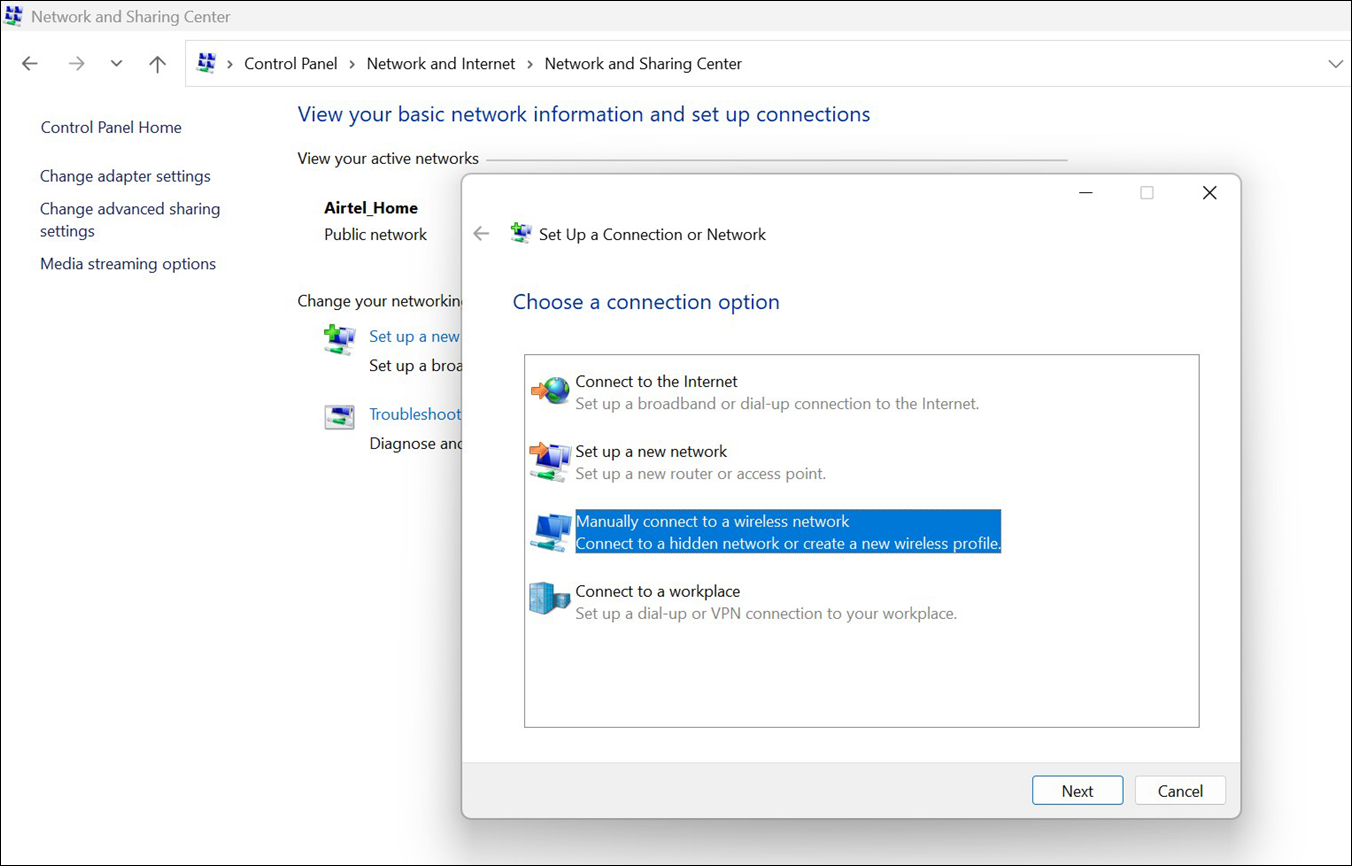
Select Manually connect to a wireless network and click
Next.
-
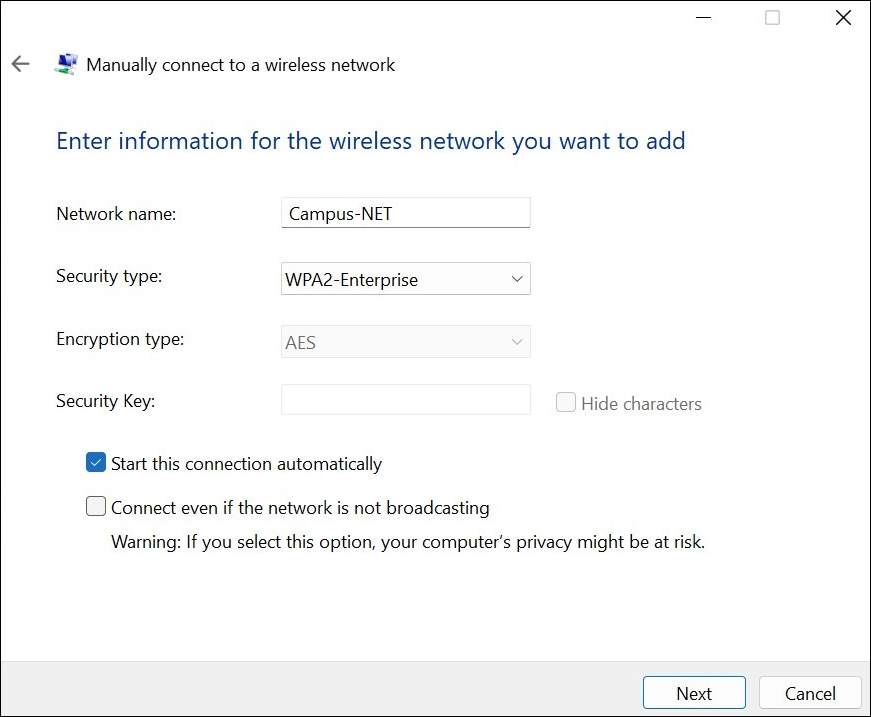
Enter the following details for the wireless network and click
Next:
-
Network name—Provide an SSID name.
-
Security type—Select the WPA2-Enterprise or WPA3-Enterprise option.
-
-
Click Change connection settings.
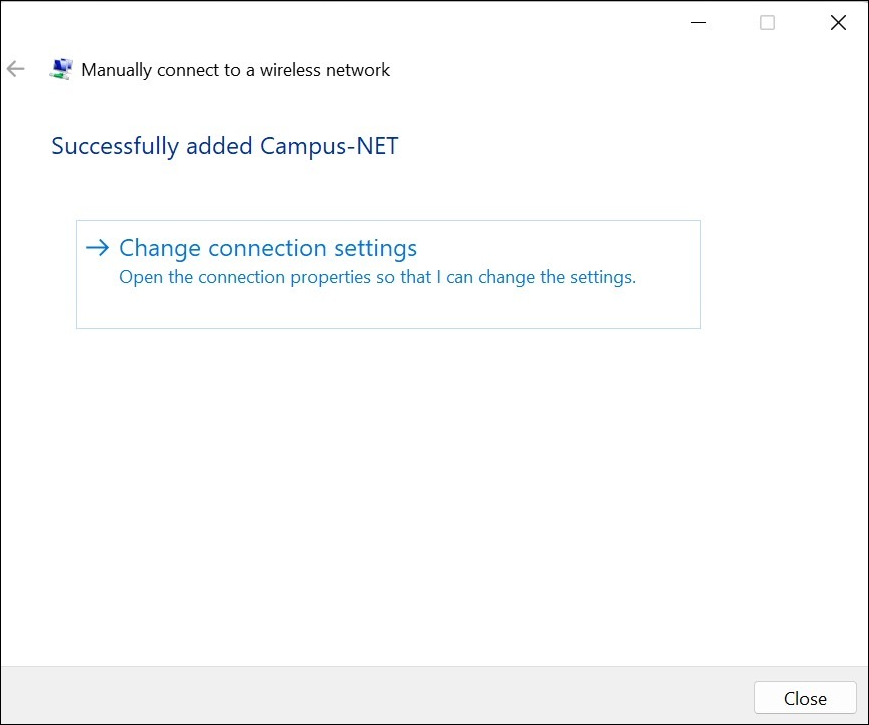
The Wireless Network Properties dialog box appears.
-
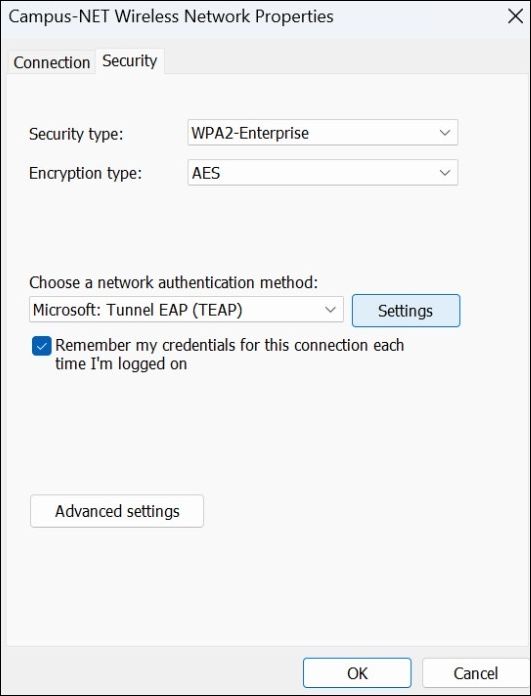
Select the Security tab and select TEAP under Choose
a network authentication method. Then, click
Settings.
-
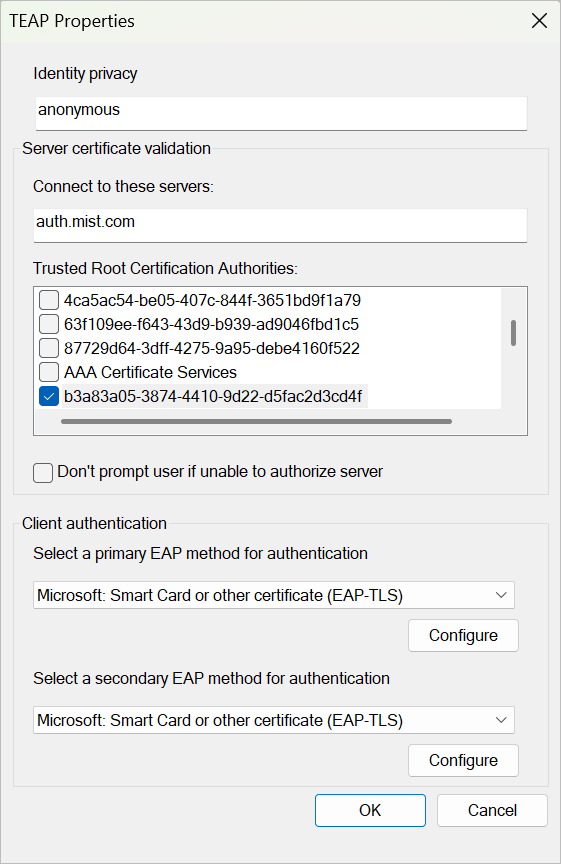
Select the following options in the TEAP Properties dialog box:
- Identity privacy—The Identity is set to anonymous by default, but you can override it to the desired identity if necessary.
- Connect to these servers—Enter auth.mist.com if you're using the default Mist Access Assurance server certificate. If you're using a custom RADIUS server certificate, provide the certificate SAN:DNS name.
- Trusted Root Certification Authorities—Select the Mist Org CA certificate (or your custom RADIUS server certificate).
- Authentication Method—Select Microsoft: Smart Card or other certificate (EAP-TLS) as the Primary and Secondary EAP methods for authentication.
-
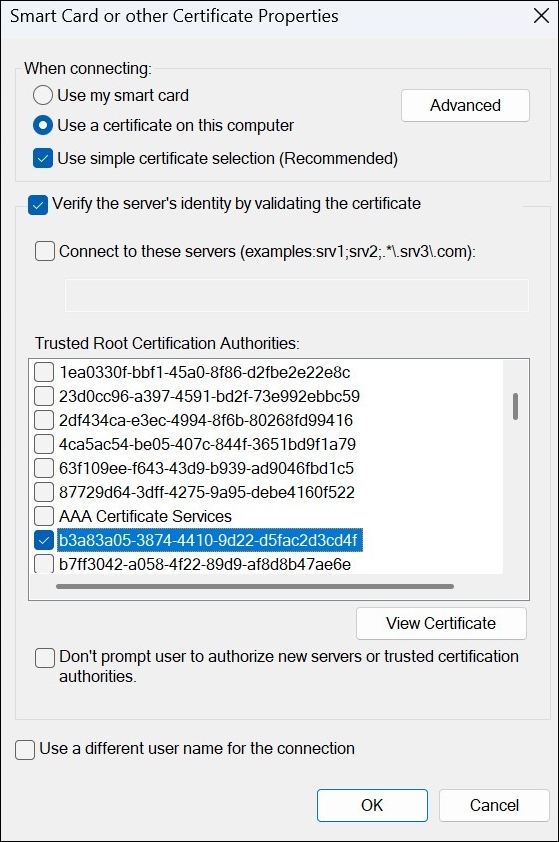
Click Configure for both the primary and secondary EAP methods.
In the Smart Card or other certificate Properties dialog box that appears for each:
-
Ensure that the Use simple certificate selection (Recommended) option is selected.
-
Select the trusted root Certificate Authority (CA) that enables the client to trust the Mist Access Assurance server certificate. Ensure that you select the same CA for both the primary and secondary EAP methods
-
Click OK.
-
-
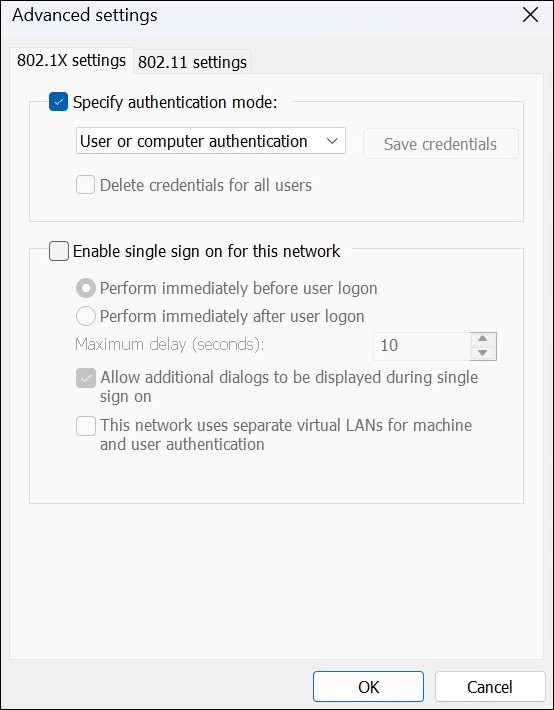
In the Advanced settings dialog box:
- Select the Specify authentication mode check box and choose User or Computer authentication.
- Click OK and then click Close.
-
Verify the configuration:
-
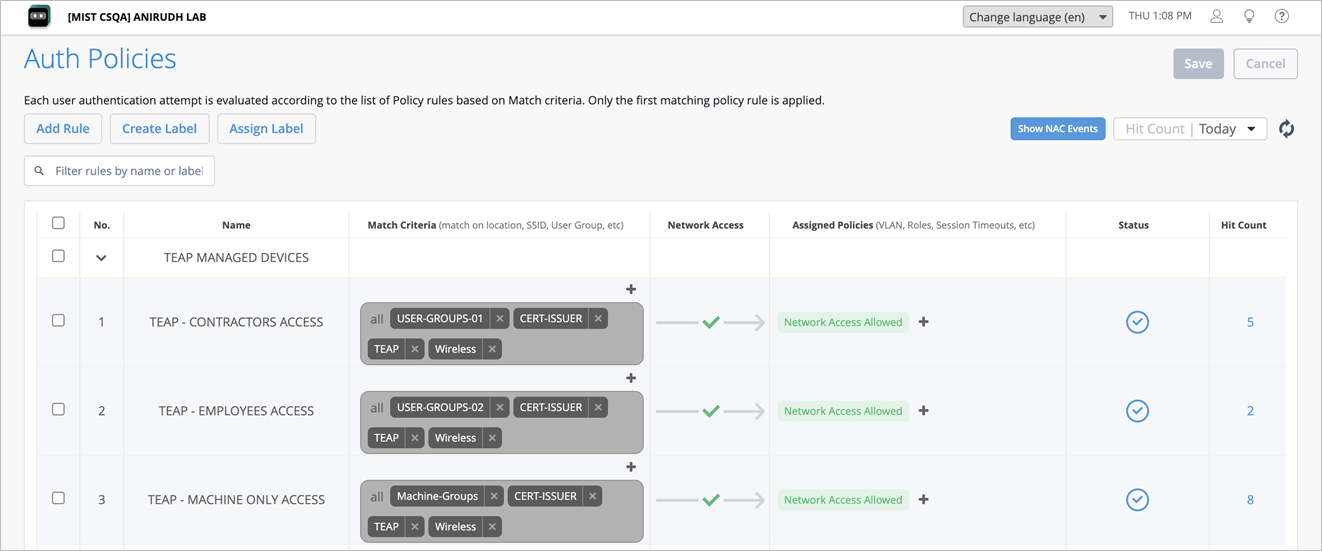
In the Juniper Mist portal, configure auth policy rules to permit EAP-TEAP client
authentication.
-
Click Show NAC Events on the Auth Policies page and verify
the NAC Client authentication events.
You can also view the NAC Client authentication events by selecting the NAC Client on the Insights page (Monitor>Service Levels>Insights).
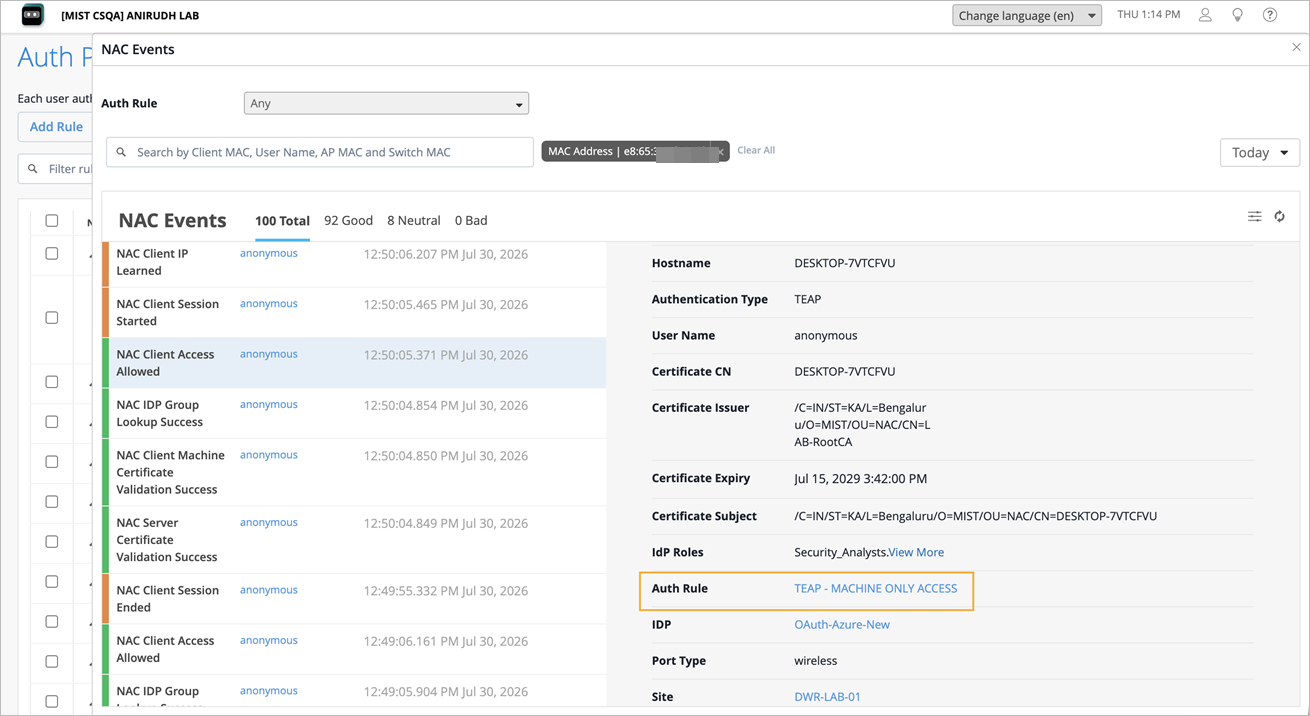
The following example shows a client that authenticated through EAP-TEAP using only the machine certificate.
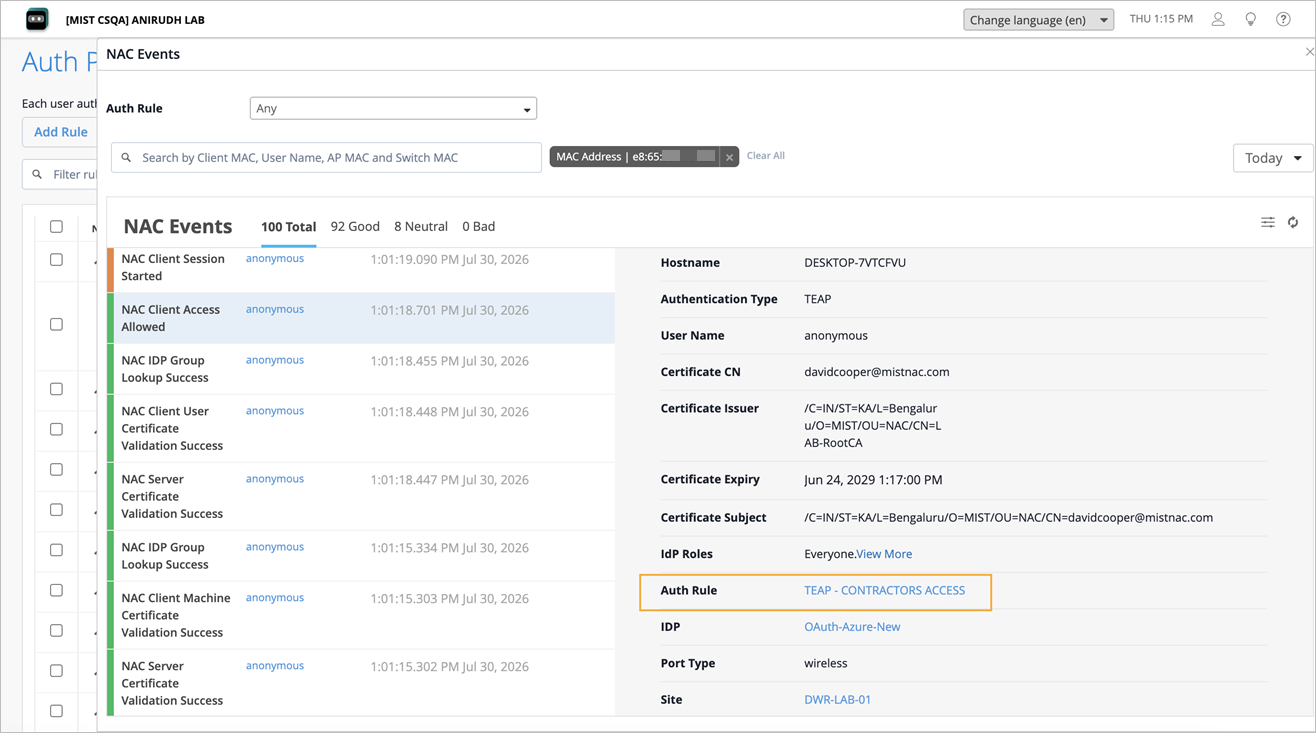
The following example shows a client that authenticated through EAP-TEAP after user logon, with successful validation of both machine and user certificates.
-
In the Juniper Mist portal, configure auth policy rules to permit EAP-TEAP client
authentication.