Bounce Ports
Juniper Routing Assurance enables administrators to bounce a router's ports. You can disable and re-enable a router's interfaces using the Bounce Port feature. You can use the Bounce Port feature to refresh network connections and to troubleshoot network issues.
Bouncing a port in a production network can disrupt services. To avoid network outages or traffic disruptions, Juniper Routing Assurance seeks confirmation from network administrators before bouncing a port. Also, if the selected port is the management port, Juniper Routing Assurance recognizes this and notifies administrators before bouncing the port.
You can access the Bounce Port feature from two locations:
-
The Router Utilities on the Routers:Router Name page.
-
The Front Panel Tab on the Routers:Router Name page.
To use the Bounce Port feature, the router must be in Connected state.
Bounce a Port from Router Utilities
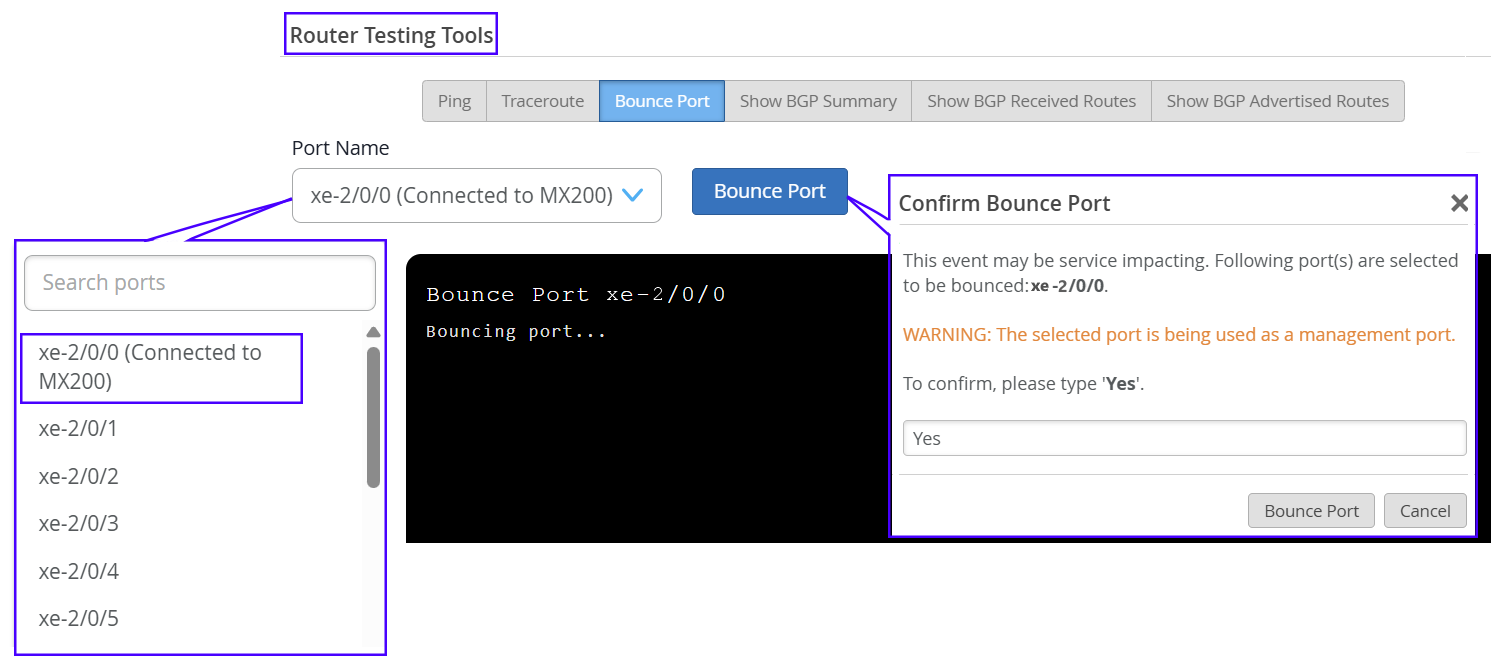
You can bounce a router's port using the Testing Tools feature available under router Utilities.
To disable and re-enable an interface:
-
Click Bounce Port.
The port is disabled and then immediately enabled.Note: The port name drop-down list displays interface descriptions configured on the router, alongside interface names providing additional context and reducing the risk of selecting the wrong port for a bounce operation.Figure 1: Bounce Port from Router Utilities
Bounce a Port from the Routers:Router Name Page
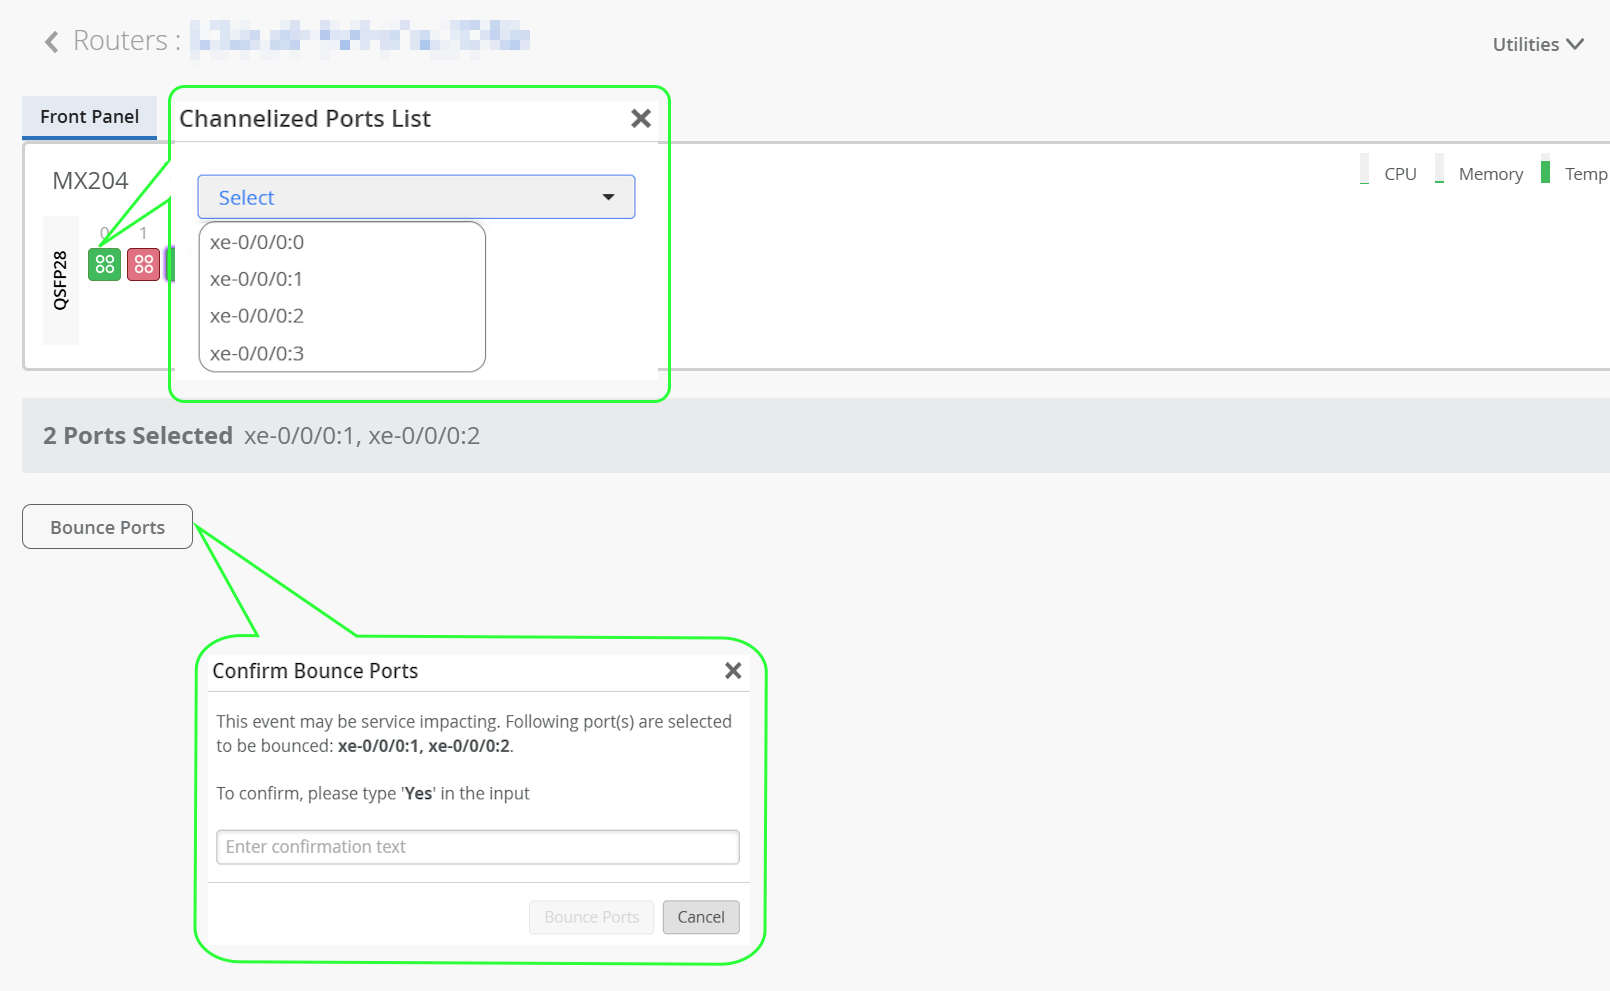
The Bounce Ports feature on the Routers:Router Name page enables you to bounce one or more ports on a router at the same time.
To bounce one or more ports:
-
Click Bounce Ports.
The port is disabled and then immediately enabled.Figure 2: Bounce Port from Router:Router Name Page