Configure ztp.json with Configurator
The HPE Networking Apstra Data Center Director ZTP Configurator is a GUI for configuring the ztp.json file.
The preferred method for configuring ztp.json is with the Apstra DC Director ZTP Configurator. Using the Configurator reduces the chance of human error. The steps below show you how to access the Configurator. Refer to the ztp.json Keys page for details about all the keys.
Access the ztp.json Configurator
-
If you're using the wizard, step 3 is to configure the
ztp.jsonfile. (You can skip this step for now and come back later to complete this configuration.) If you're not using the wizard, then from the left navigation menu of the Apstra DC Director ZTP GUI, click ztp.json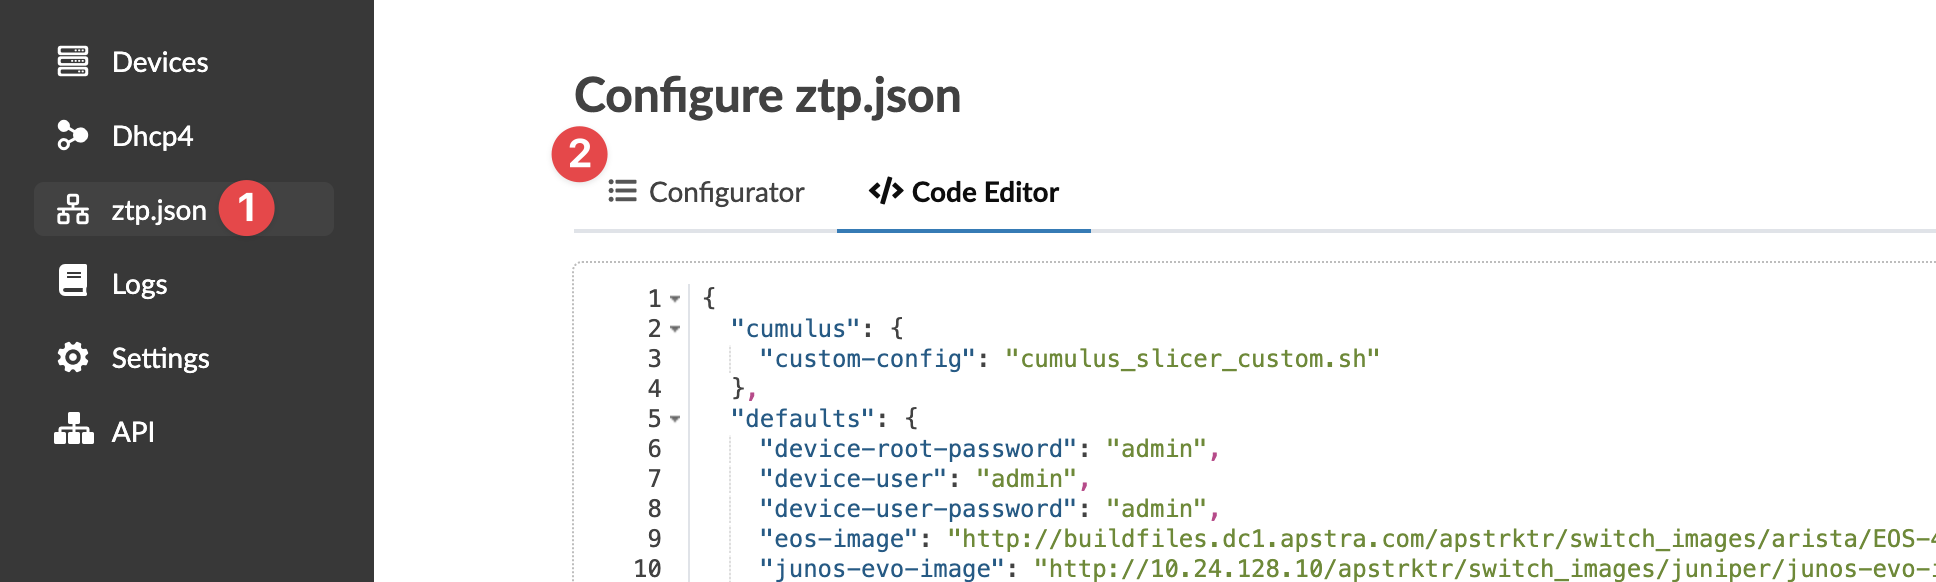 The default screen goes to the Code Editor page.
 -
Click Configurator.
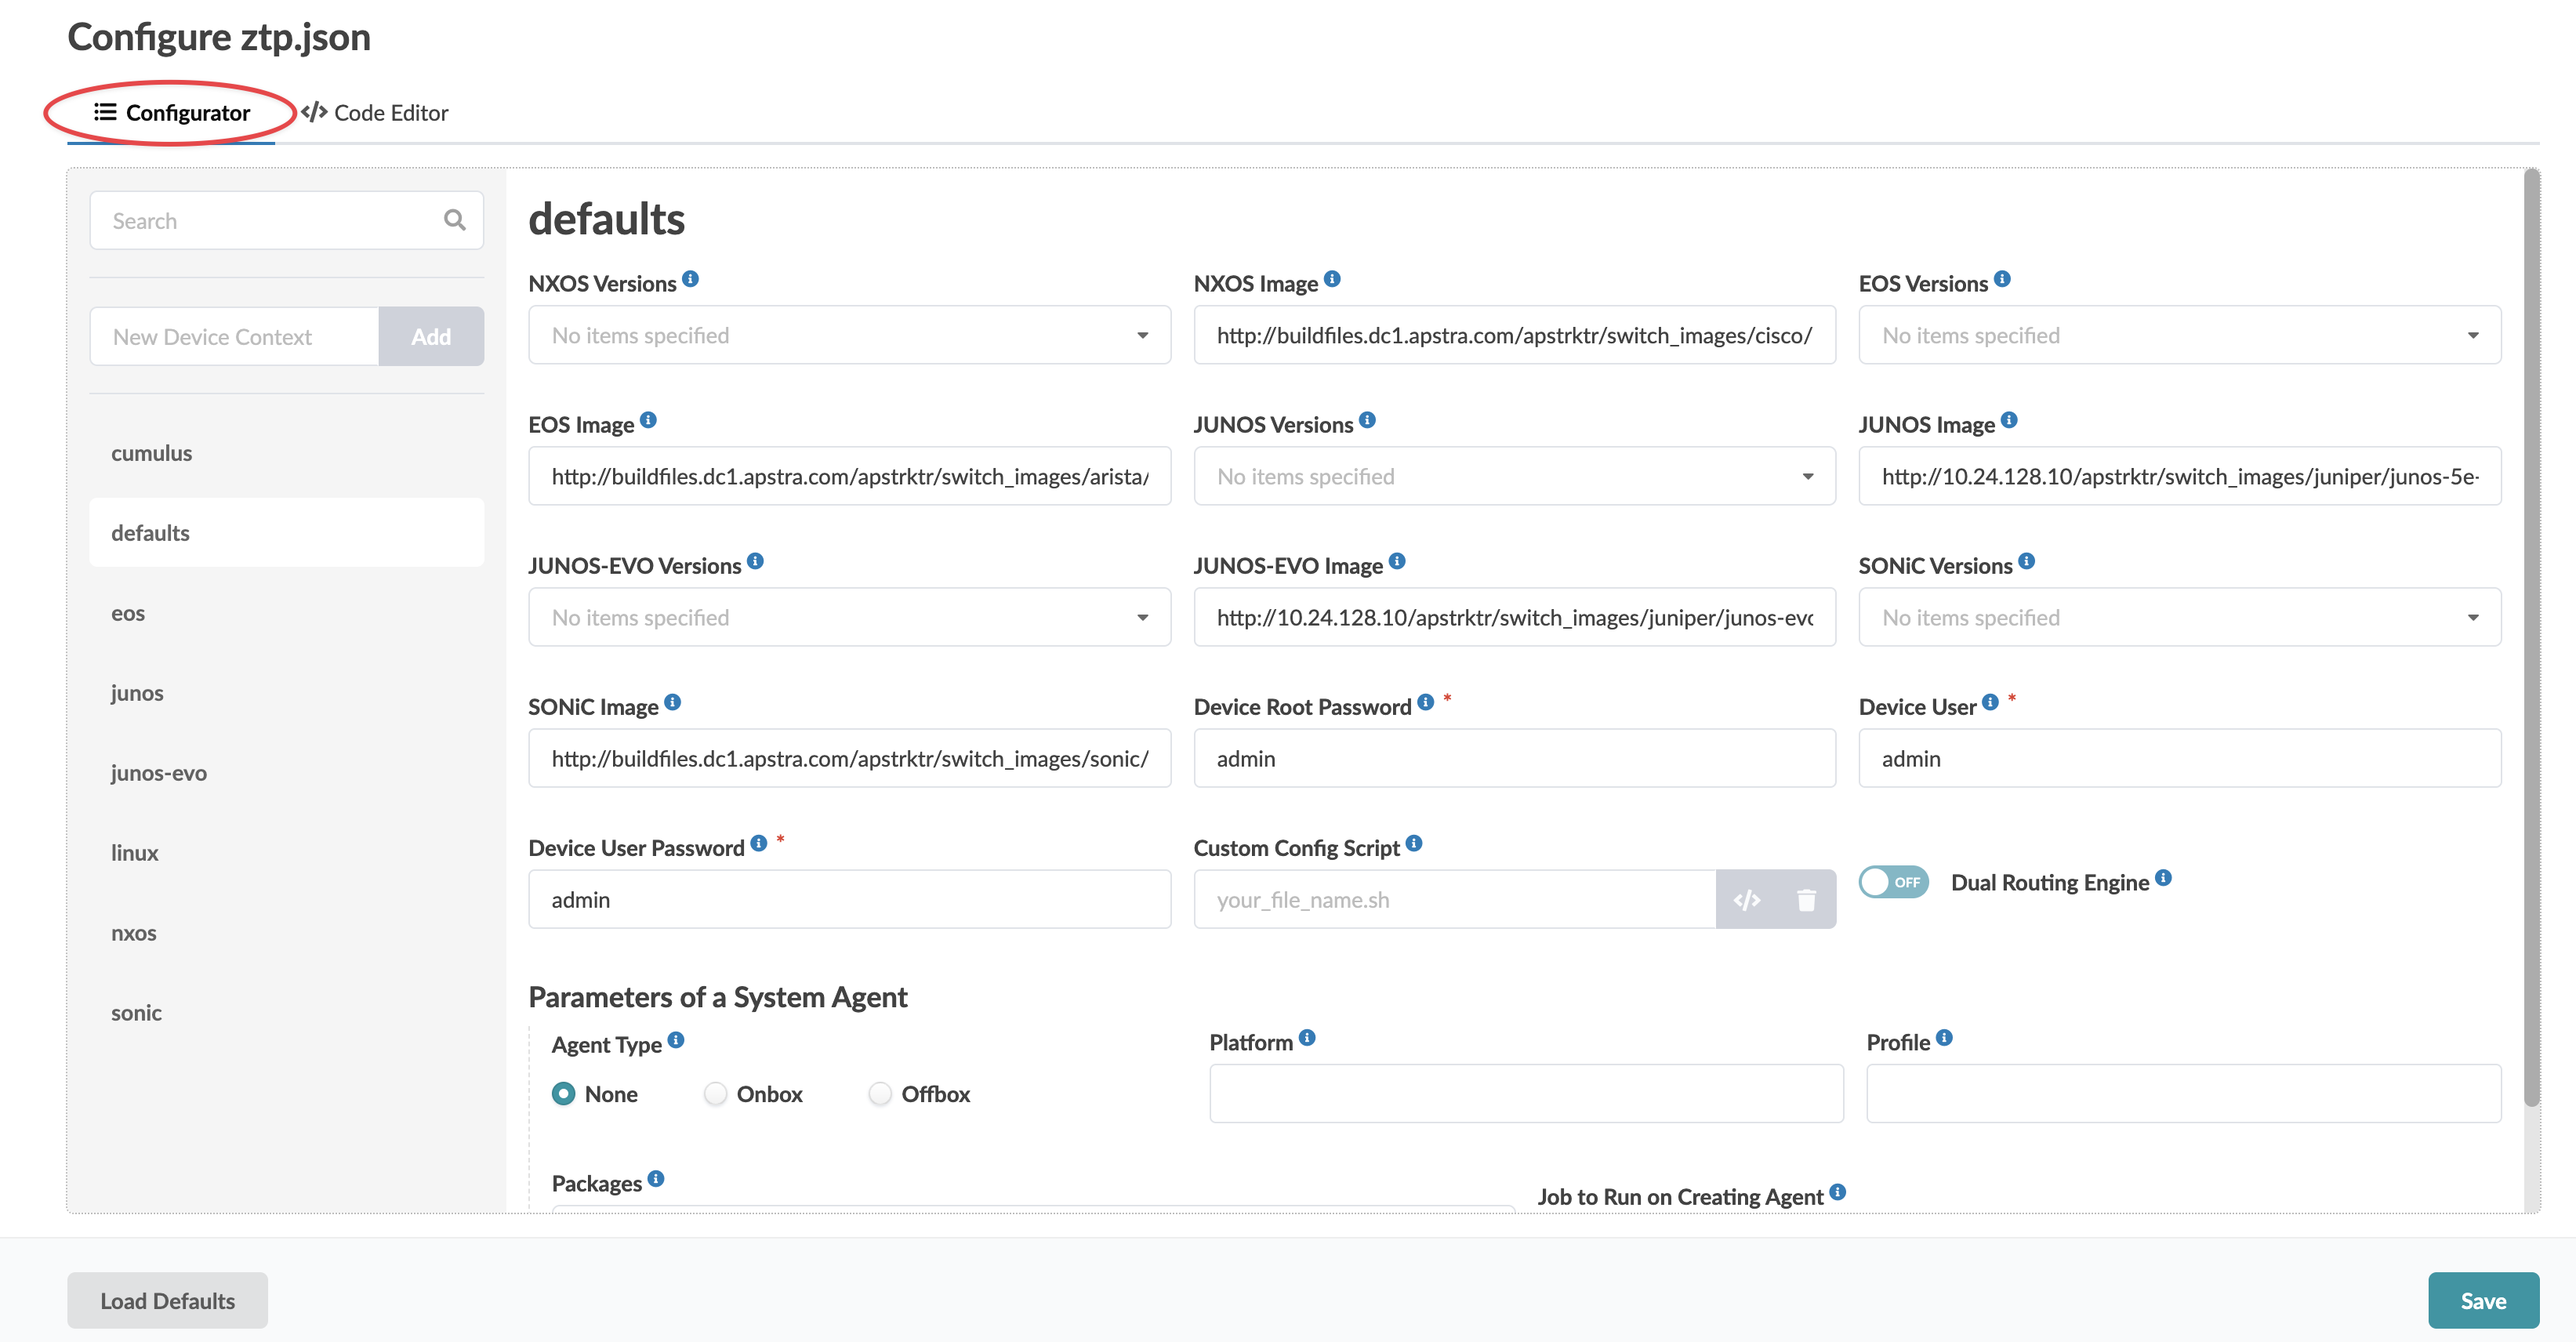 The Configurator page appears, which has sections for defaults and the various vendor platforms.