Move Virtual Network to Different Routing Zone
You can move one or more virtual networks from one routing zone to another (as of version 5.0.0). This is traffic-impacting for any endpoints that are part of the selected virtual networks (since the VNs need to be deleted from one RZ and recreated in the other one).
Move One Virtual Network to a Different Routing Zone
-
From the blueprint, navigate to Staged > Virtual > Virtual
Networks and click the Edit button in
the Actions panel for the virtual network to
move.
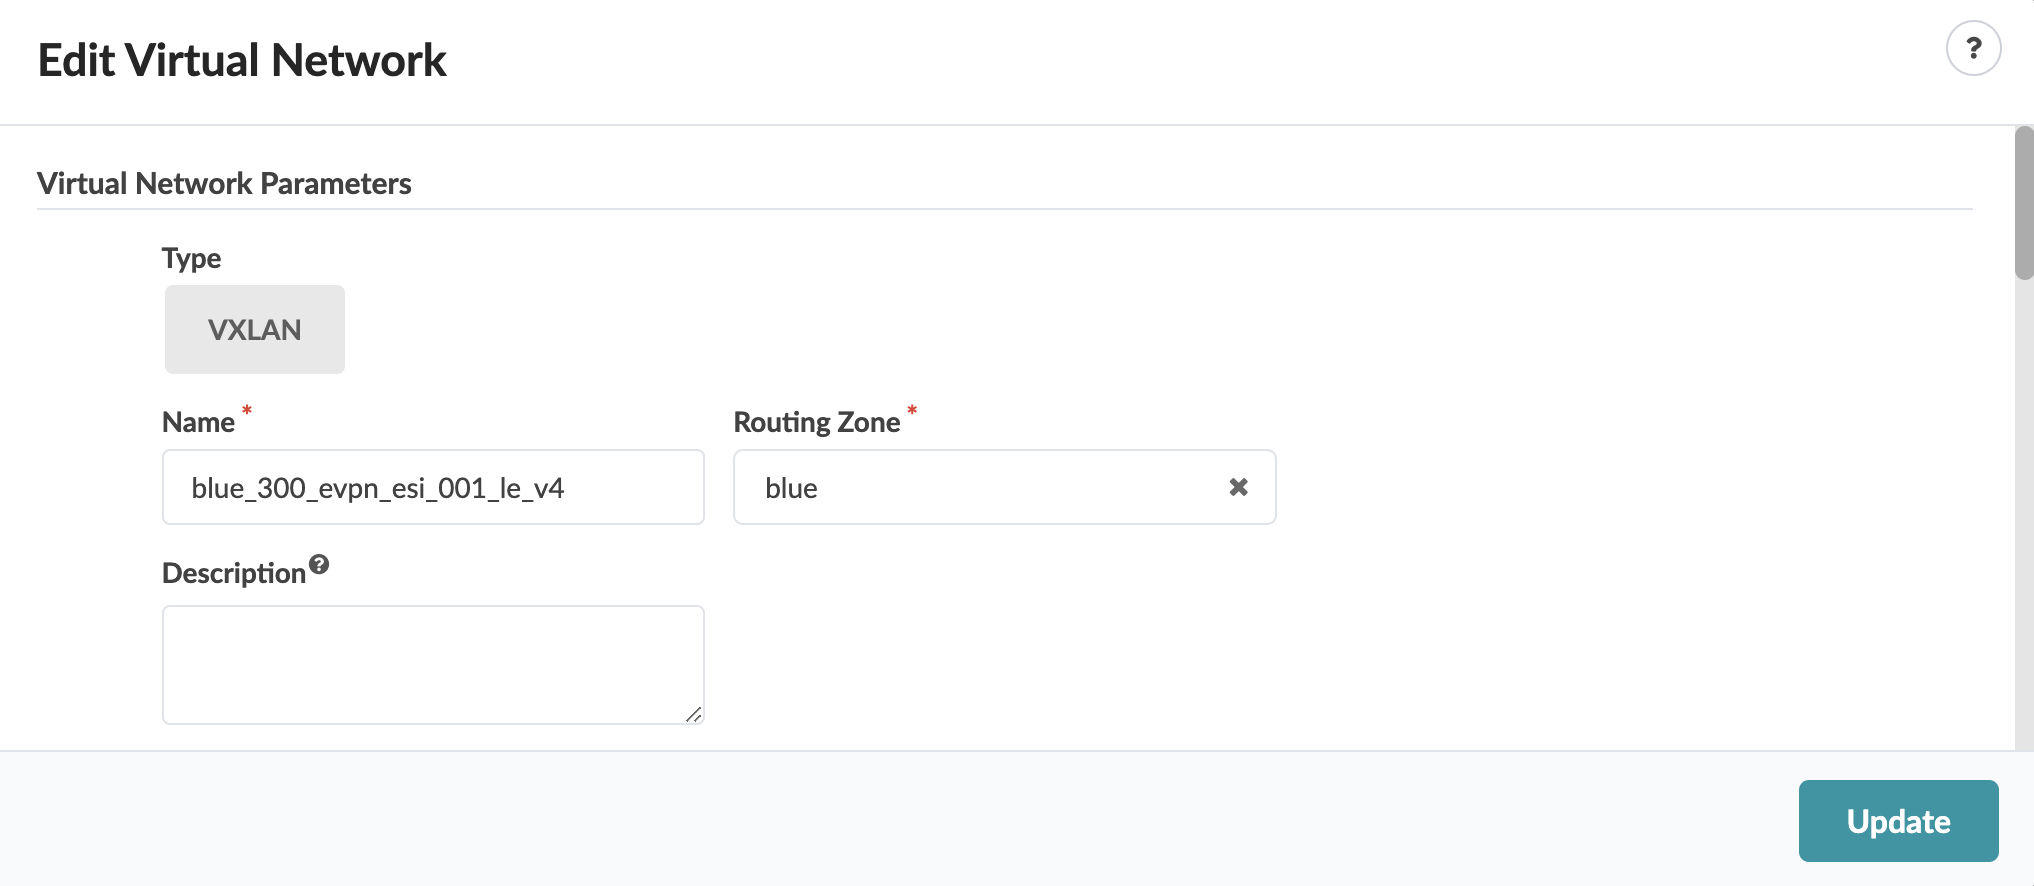
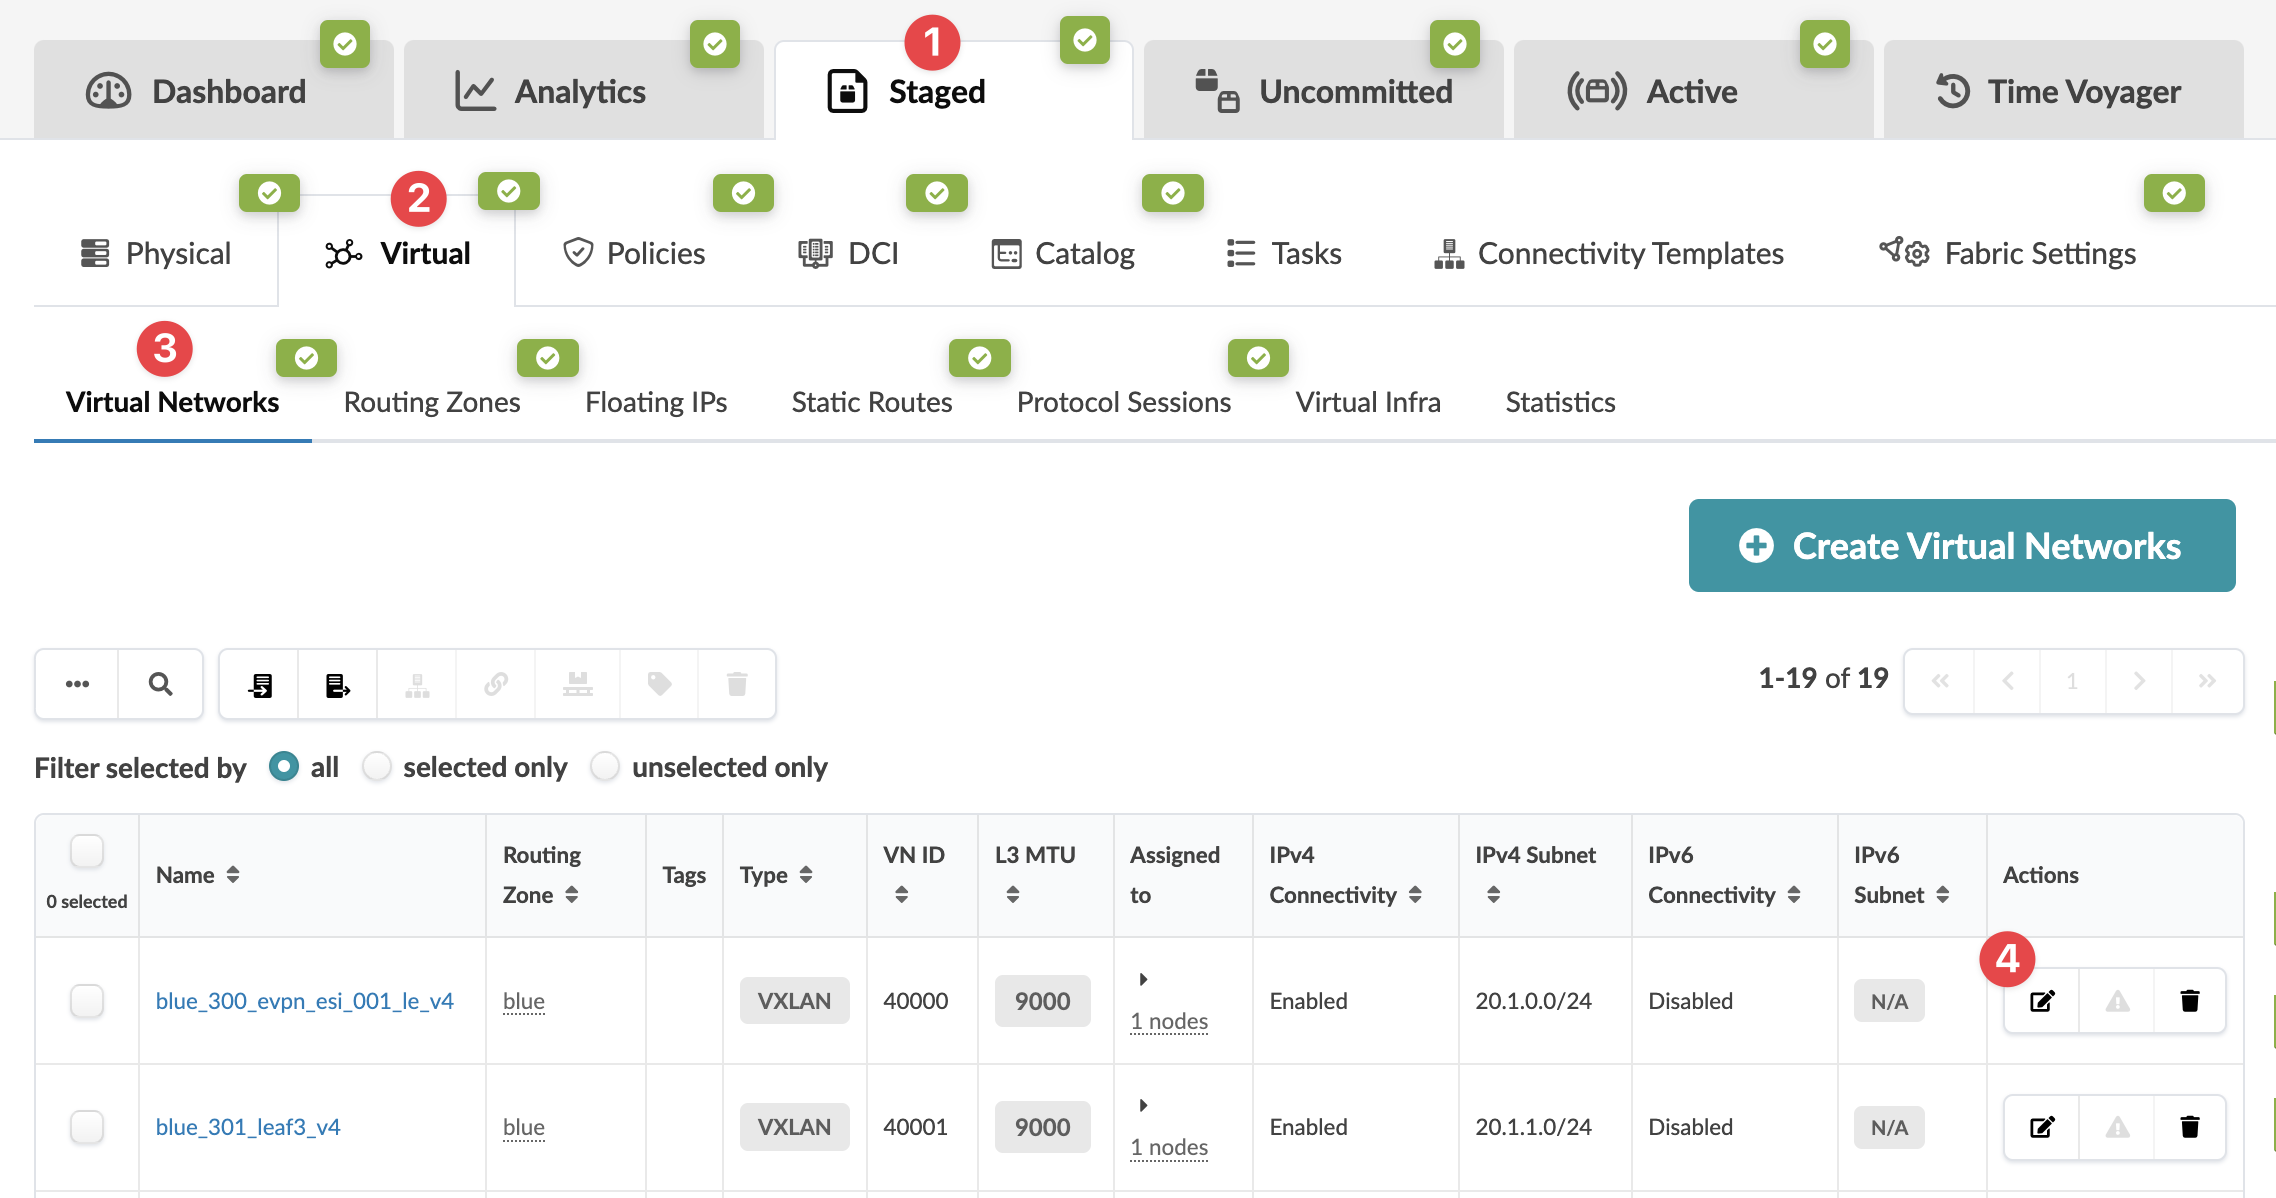 The Edit Virtual Network dialog opens.
 -
From the Routing Zone drop-down list, select the
routing zone that you want to move the virtual network to. (The virtual
network subnet IP, gateway IP (if the VN is IP-enabled) and VLAN ID of the
source virtual network will be preserved, so these need to "free of use" in
the destination routing zone.)
When you're ready to activate your changes, go to the Uncommitted tab to review and commit (or discard) your changes.
Move Multiple Virtual Networks to a Different Routing Zone
-
From the blueprint, navigate to Staged > Virtual > Virtual
Networks, select the check boxes for one or more virtual
networks to move, then click the Migrate selected Virtual
Networks... button that becomes available above the
table.
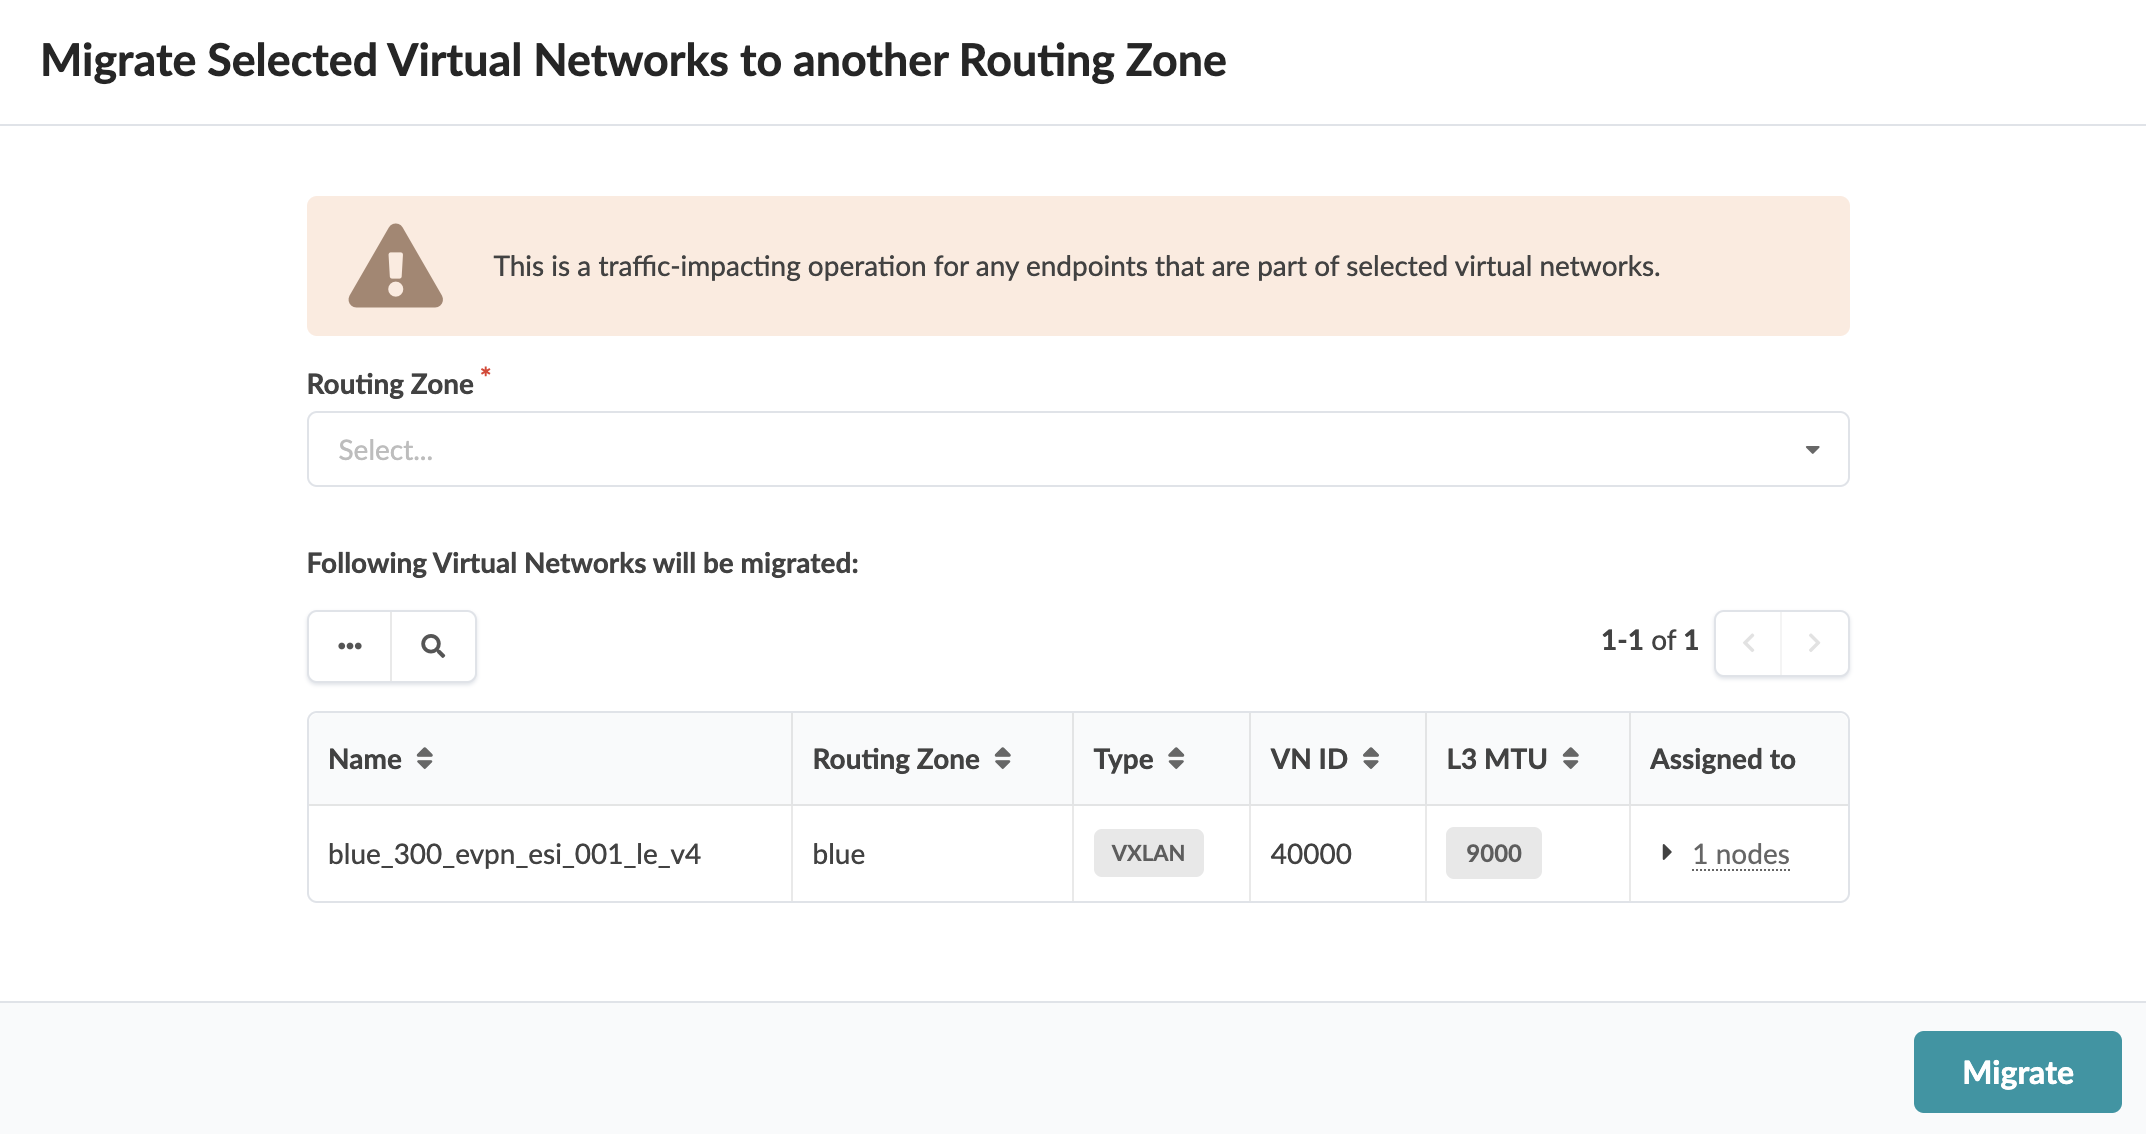
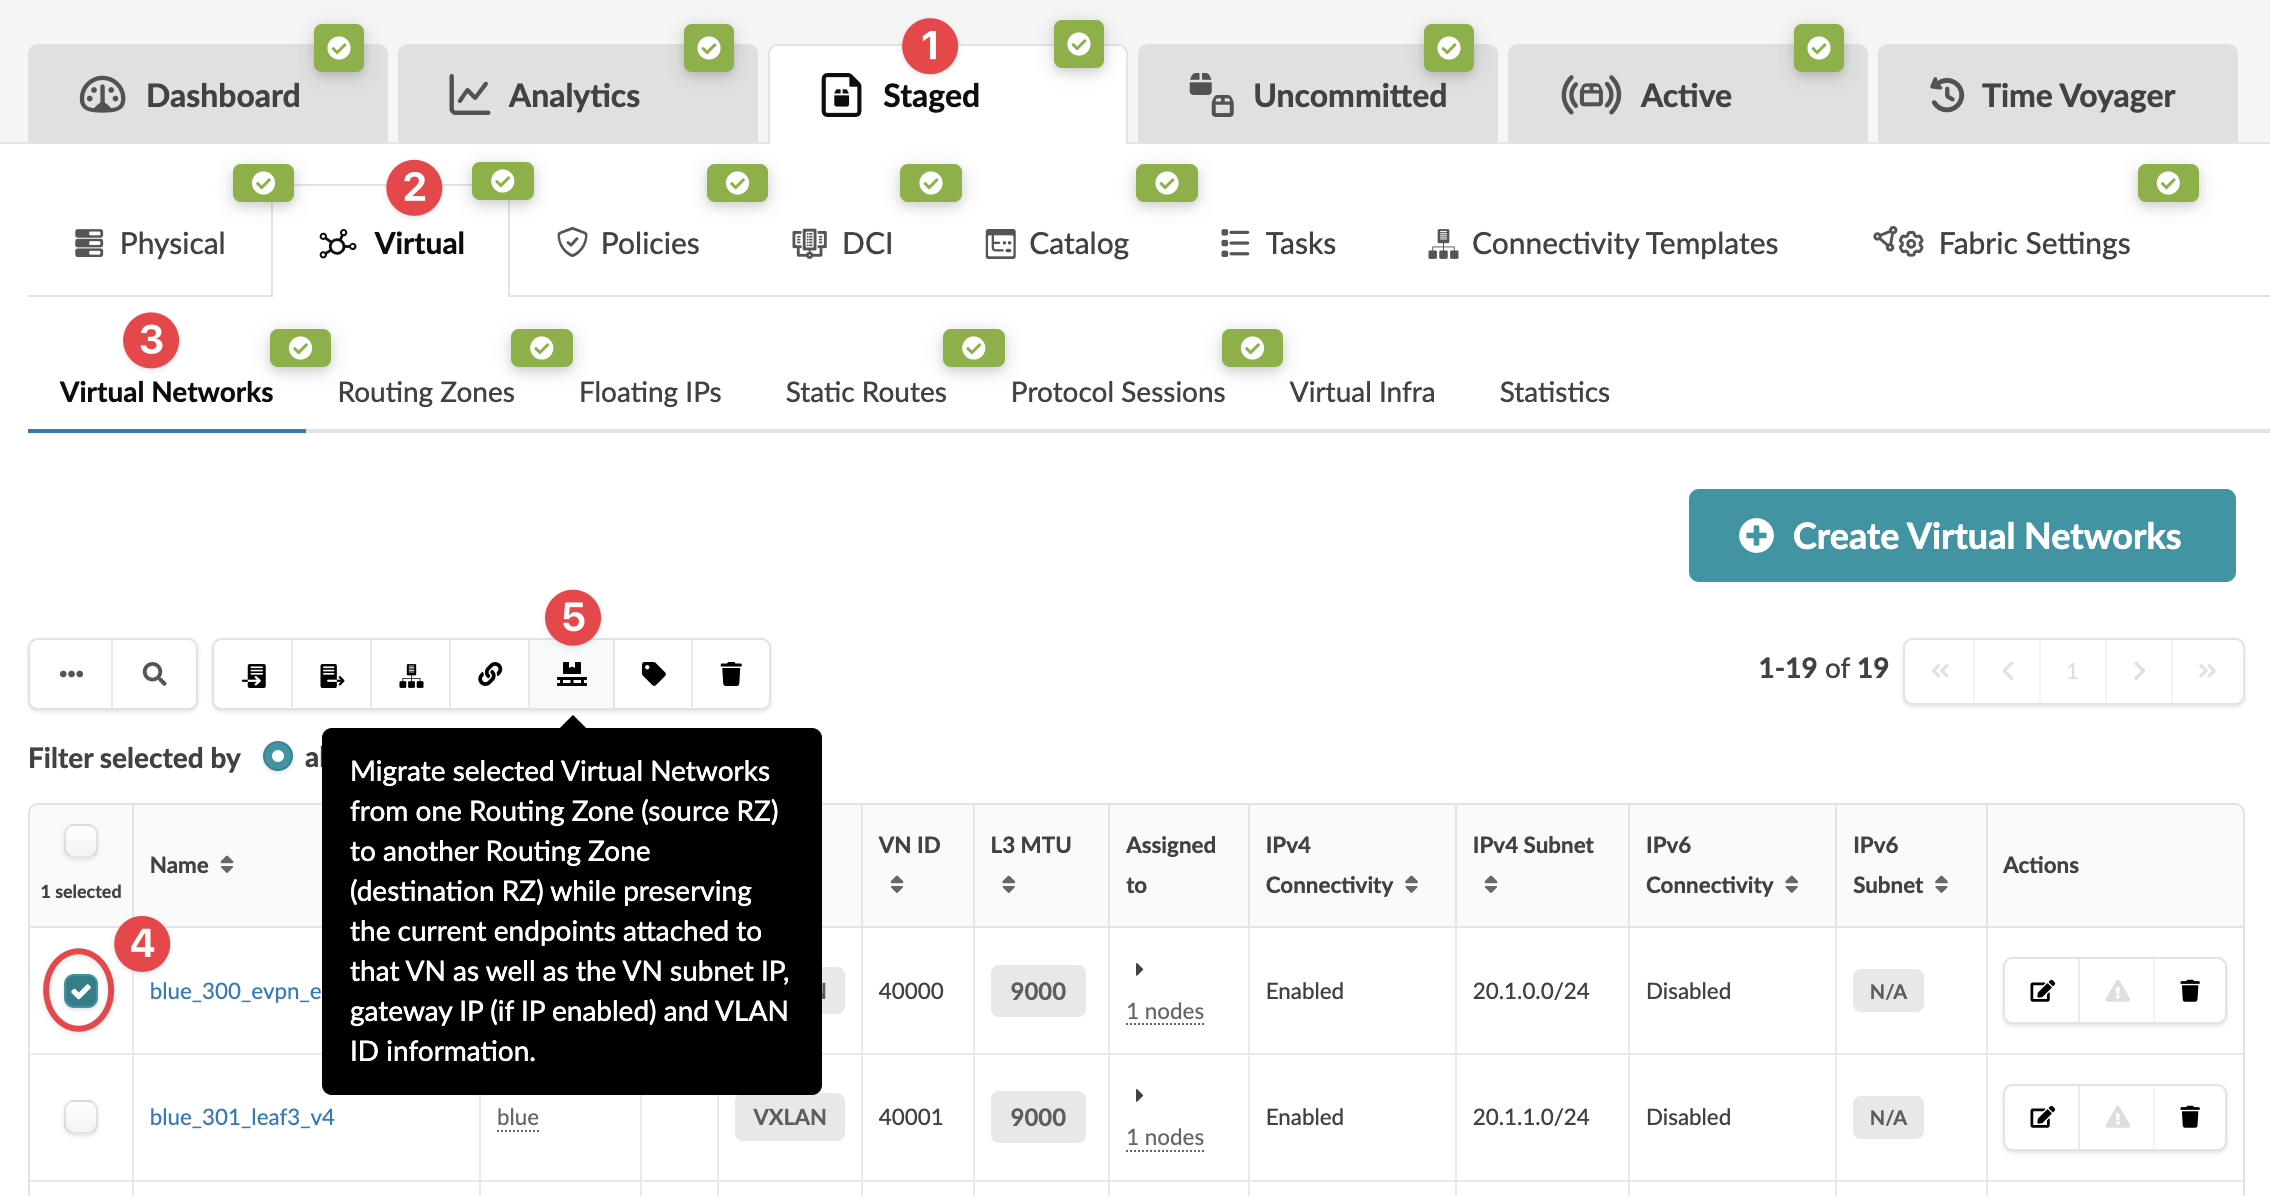 The Migrate Selected Virtual Networks to another Routing Zone dialog opens.
 -
From the Routing Zone drop-down list, select a
different routing zone. (The virtual network subnet IP, gateway IP (if the
VN is IP-enabled) and VLAN ID of the source virtual networks will be
preserved, so these need to "free of use" in the destination routing
zone.)
When you're ready to activate your changes, go to the Uncommitted tab to review and commit (or discard) your changes.