Change Virtual Network Details

Edit One Virtual Network

  1. From the blueprint, navigate to Staged > Virtual > Virtual Networks and click the Edit button in the Actions panel for the virtual network to edit.
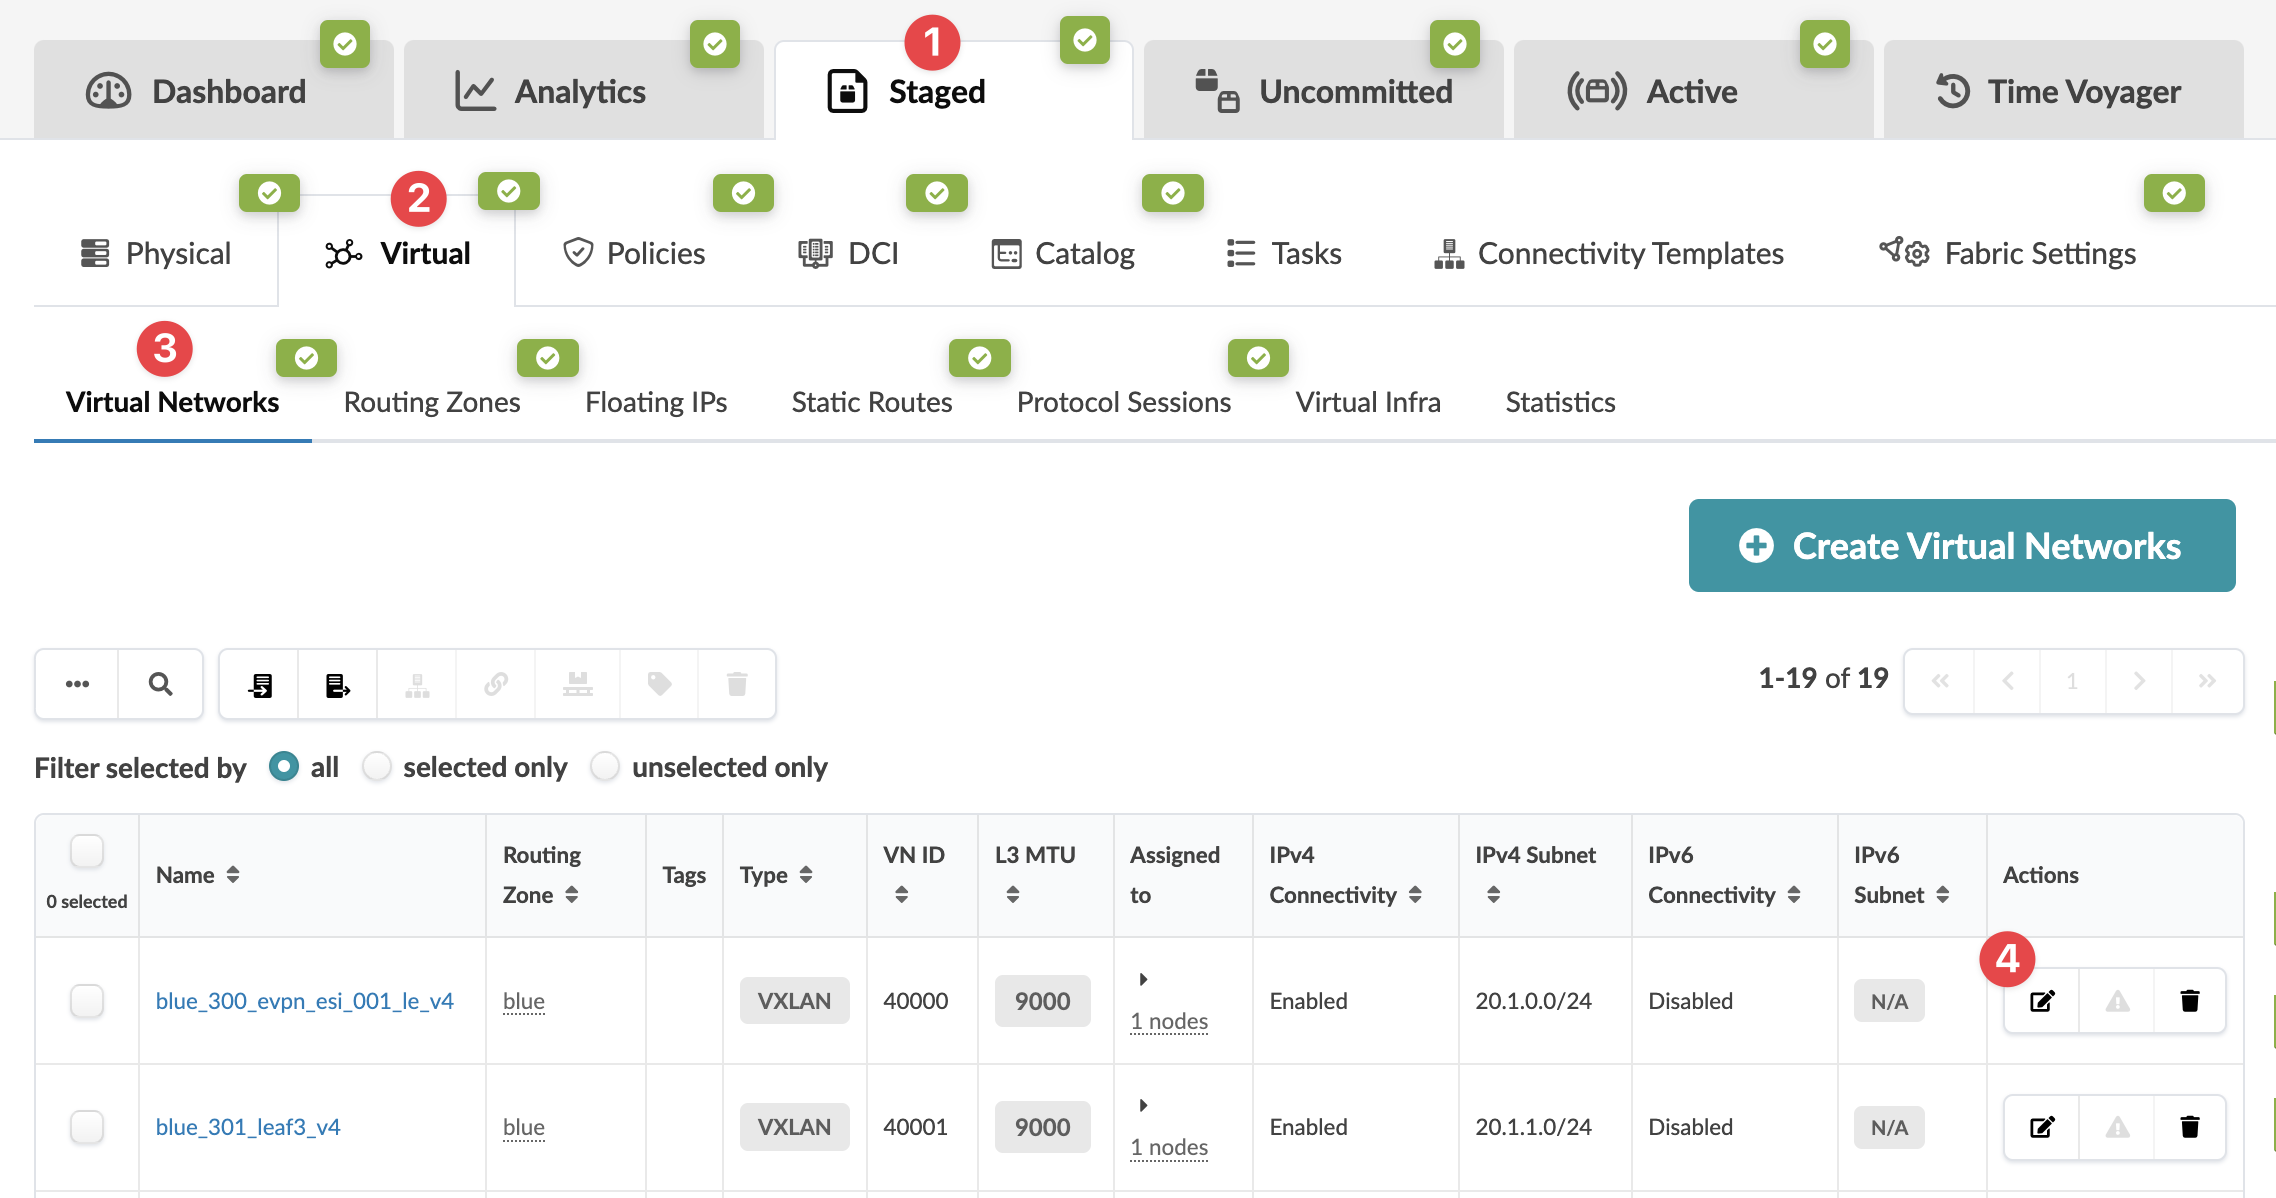
    User interface for managing virtual networks with tabs, navigation menu, table listing networks by name, routing zone, type, ID, connectivity, and actions, plus options to create and filter networks.
  2. Make your changes.
  3. Click Update to stage your changes and return to the table view.

When you're ready to activate your changes, go to the Uncommitted tab to review and commit (or discard) your changes.

Edit Multiple Virtual Networks

You can update many virtual networks quickly by exporting them in a CSV file, updating the file, then importing the file back into your blueprint.
  1. From the blueprint, navigate to Staged > Virtual > Virtual Networks.
  2. To export all virtual networks, click the Export all virtual networks button.
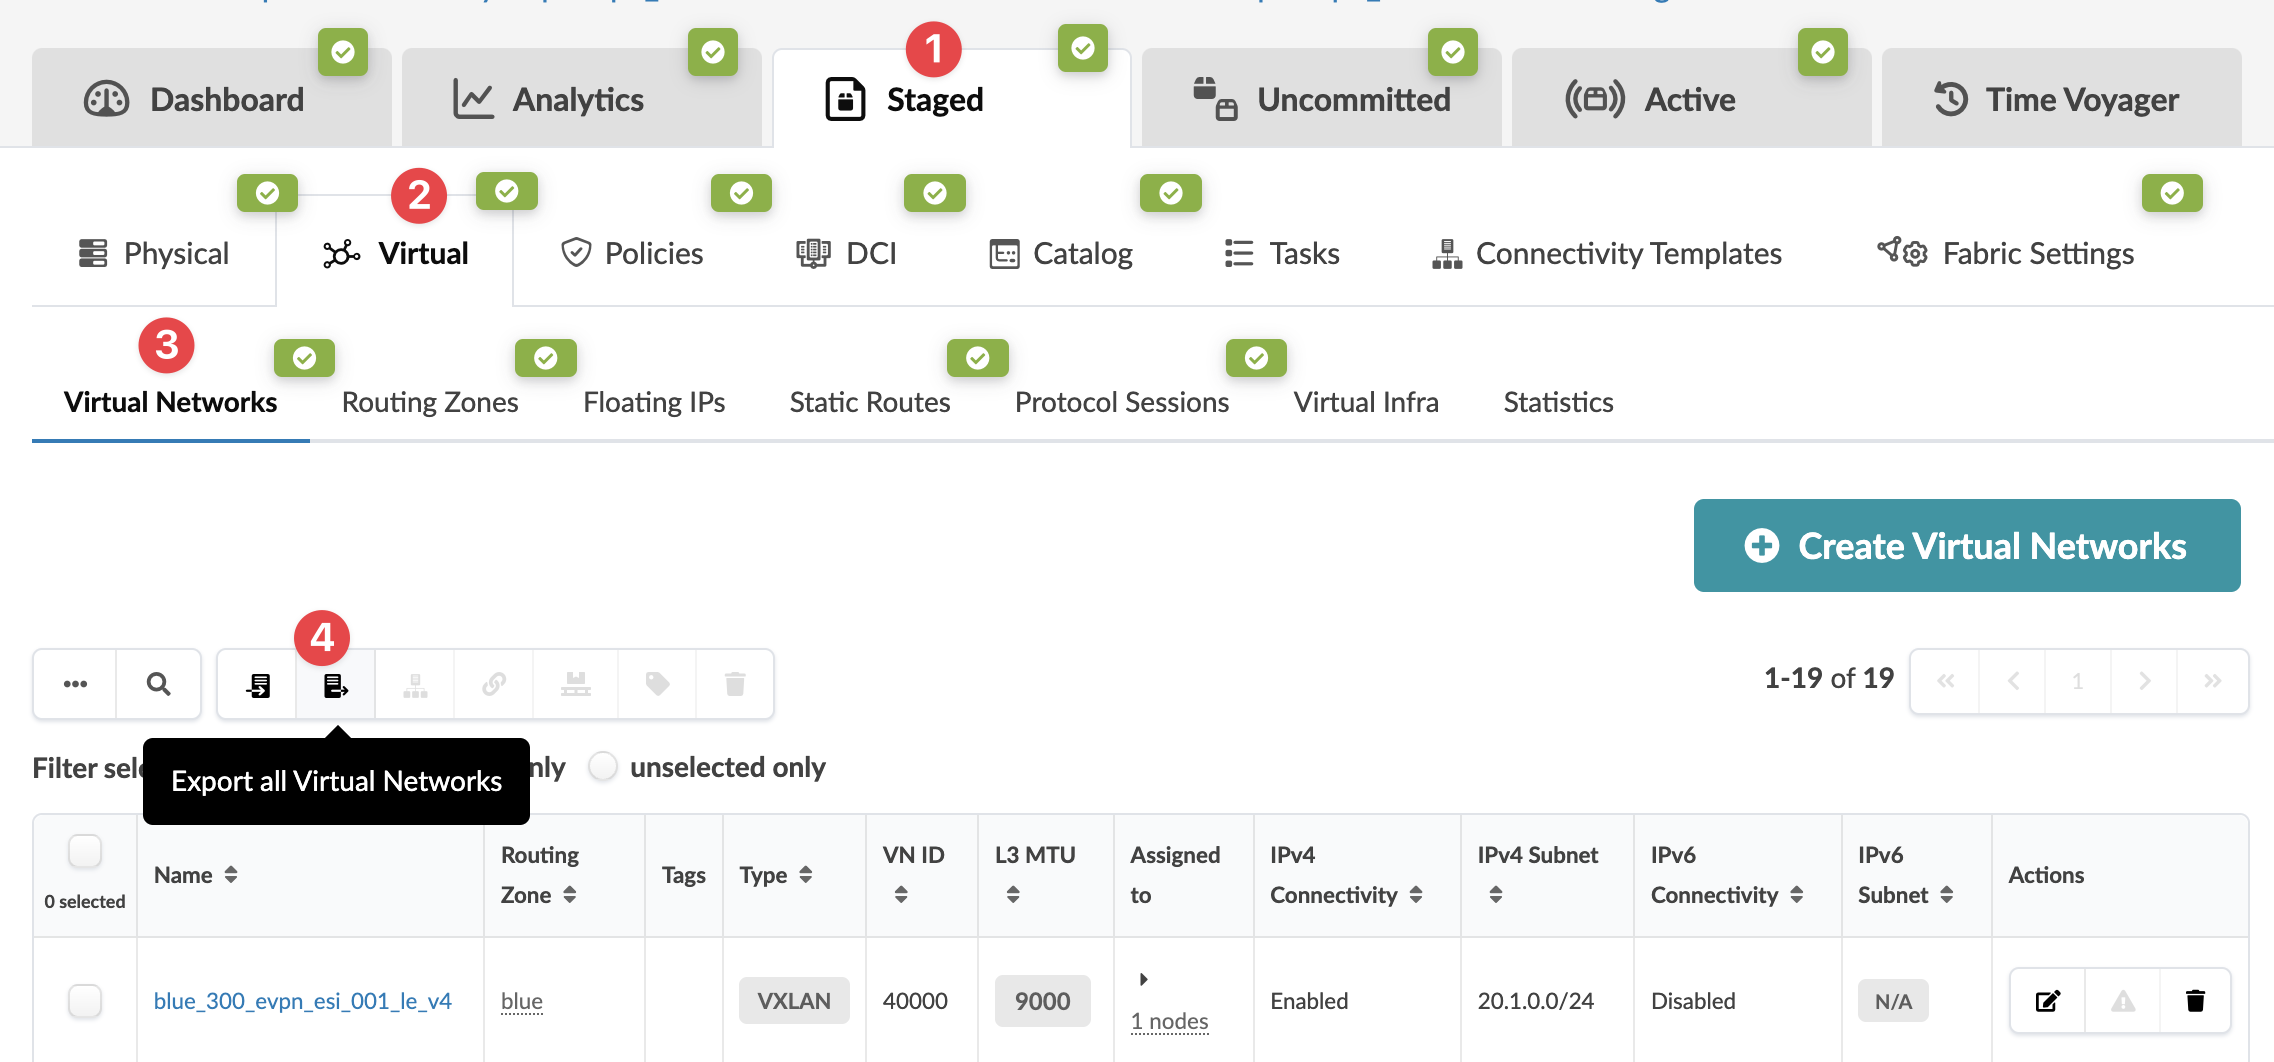
    Network management UI with tabs for Dashboard, Analytics, Staged, Uncommitted, Active, Time Voyager, and options like Physical, Virtual, Policies, DCI, Catalog, Tasks, Connectivity Templates, Fabric Settings. Virtual Networks section selected, showing a list with details like name, routing zone, type, VN ID, MTU, IPv4 IPv6 connectivity, and subnets. Export all Virtual Networks tooltip visible. Create Virtual Networks button displayed. Table lists virtual networks with parameters such as routing zone and connectivity status.
  3. Or to export specific virtual networks instead of all of them, check their check boxes, then click the same button as in the previous step (now called Export selected virtual networks).
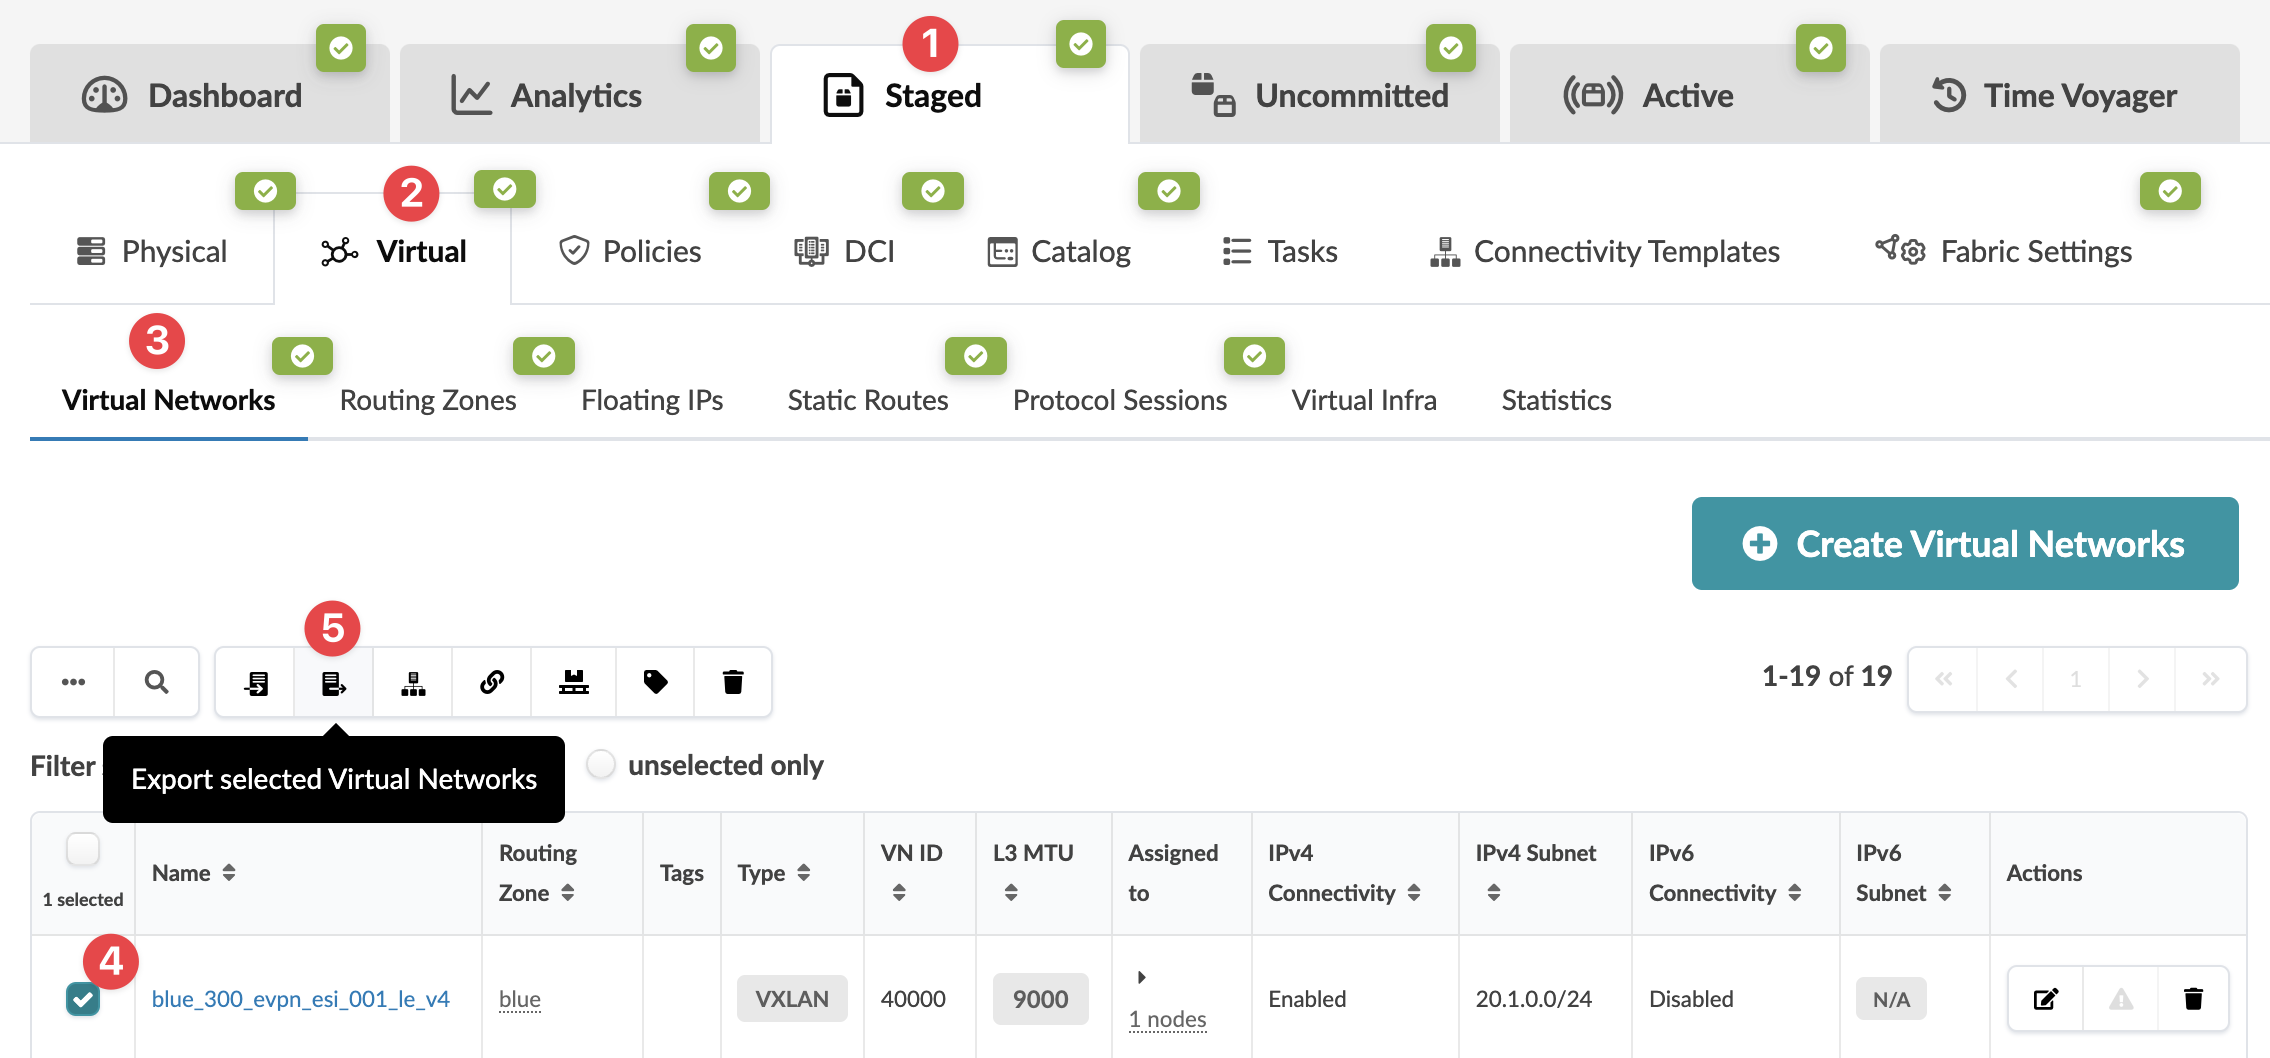
    Network management interface with tabs for Dashboard, Analytics, and more. Virtual section selected, showing Virtual Networks with details like Name and Routing Zone. Options for exporting, editing, and creating networks.
  4. Click Copy to copy the contents, or click Save As File to download the file.
  5. When you've copied or downloaded the virtual networks, close the dialog to return to the table view.
  6. Paste the contents, or open the CSV file, in a spreadsheet program (such as Google Sheets or Microsoft Excel).
  7. Update virtual networks as needed, then save the file.
  8. In the HPE Networking Apstra Data Center Director GUI, navigate to Staged > Virtual > Virtual Networks and click the Import virtual networks button.
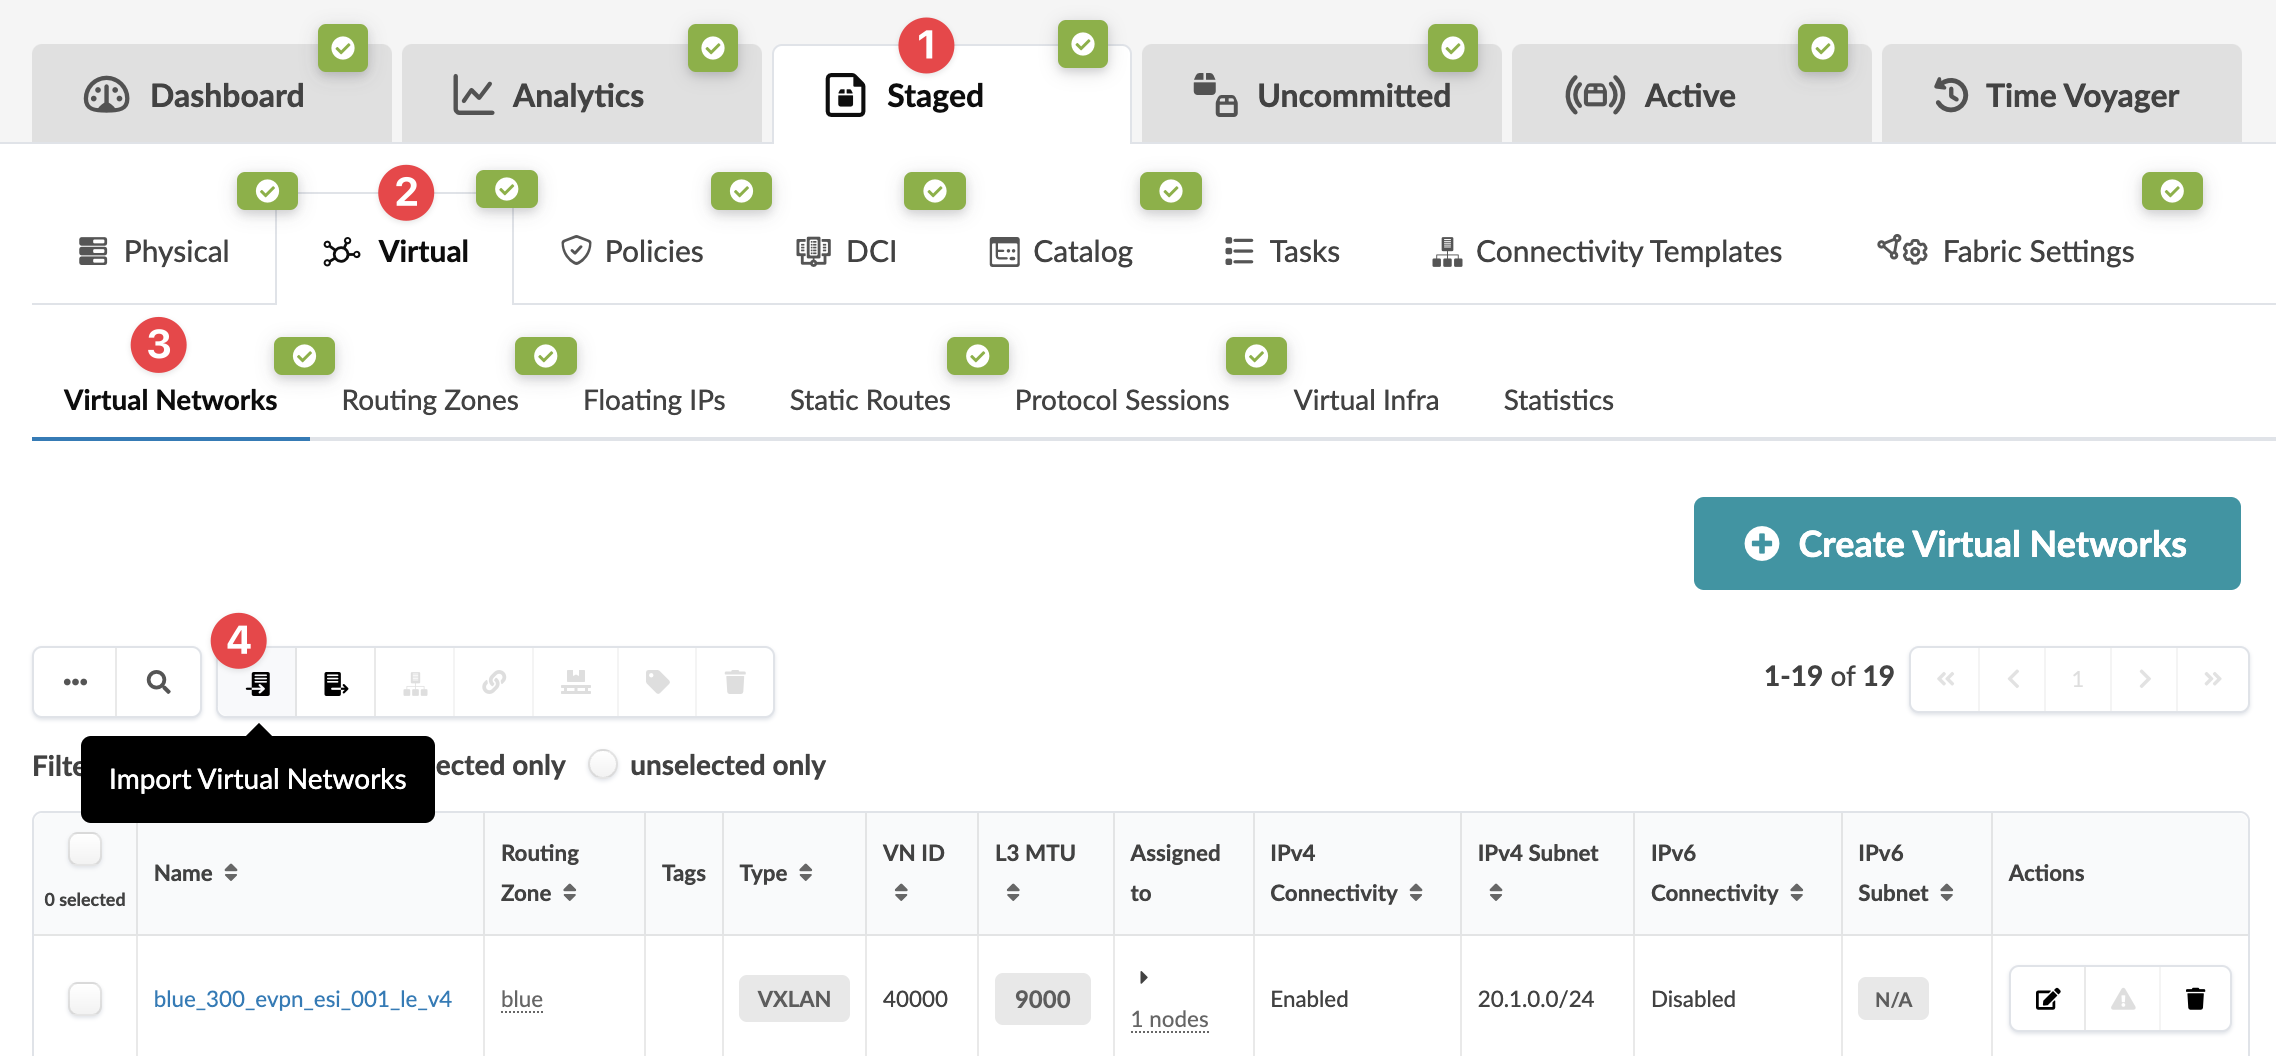
    Screenshot of network management interface with tabs for sections like Dashboard and Analytics. Staged tab selected. Navigation includes options like Physical and Virtual. Virtual Networks section shows details like Name, Routing Zone, and Type. Create Virtual Networks button visible.
  9. Either click Choose File and navigate to the file on your computer, or drag and drop the file onto the dialog window, or as shown in the screenshot below, directly paste CSV file contents. Virtual network details are displayed for your review.
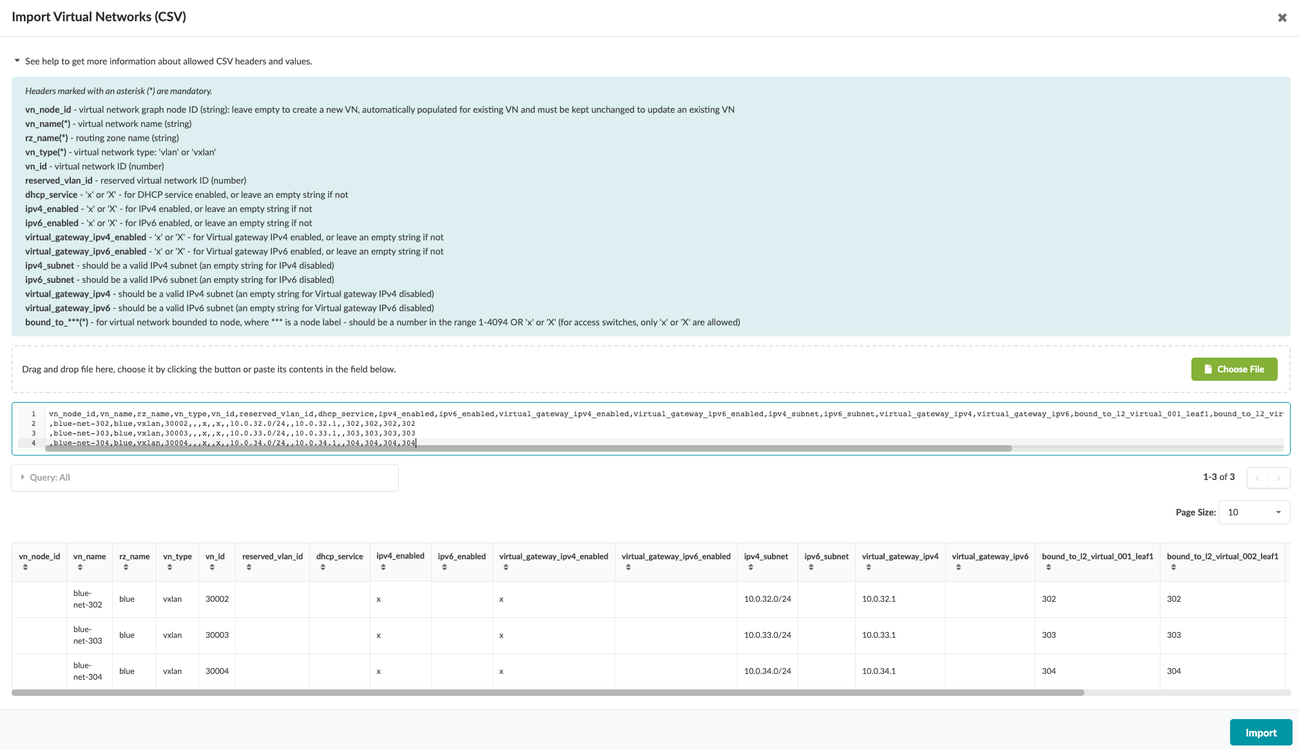
    User interface for importing virtual networks via CSV with headers, CSV input area, parsed data table, file upload and import buttons.
  10. Click Import to import the virtual networks, stage the changes, and return to the table view.

When you're ready to activate your changes, go to the Uncommitted tab to review and commit (or discard) your changes.