Update System Name (Freeform)
You can change Freeform system names from the Topology or Systems view.
Update System Name (from Topology)
-
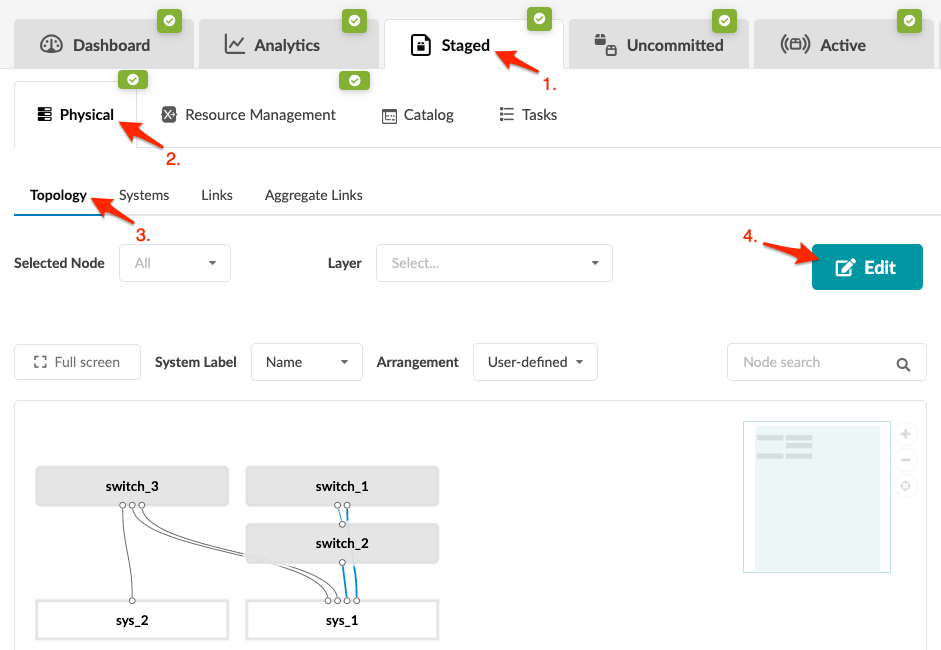
From the blueprint, navigate to Staged > Physical >
Topology and click Edit to open the
topology editor.
 CAUTION:
Be careful. If you click away from the topology editor after making changes without clicking Save, your changes are discarded.
-
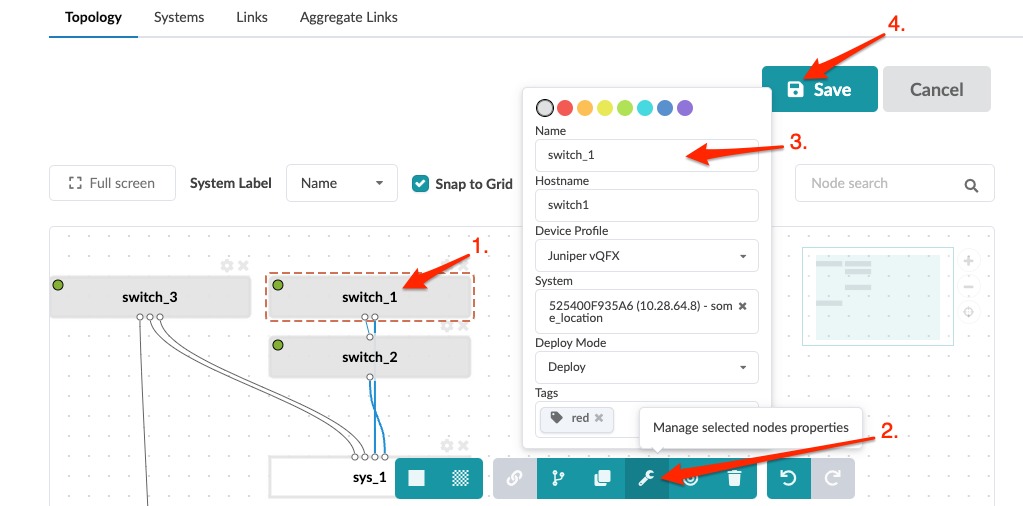
In the topology editor, click the system to change, then click the
Manage selected nodes properties button that
becomes available. (You can also open the same dialog by clicking the
settings button for the selected system. It's the gear at the top-right of
the system.)
When you're ready to activate your changes, commit
them from the Uncommitted tab.
Update System Name (from Systems)
-
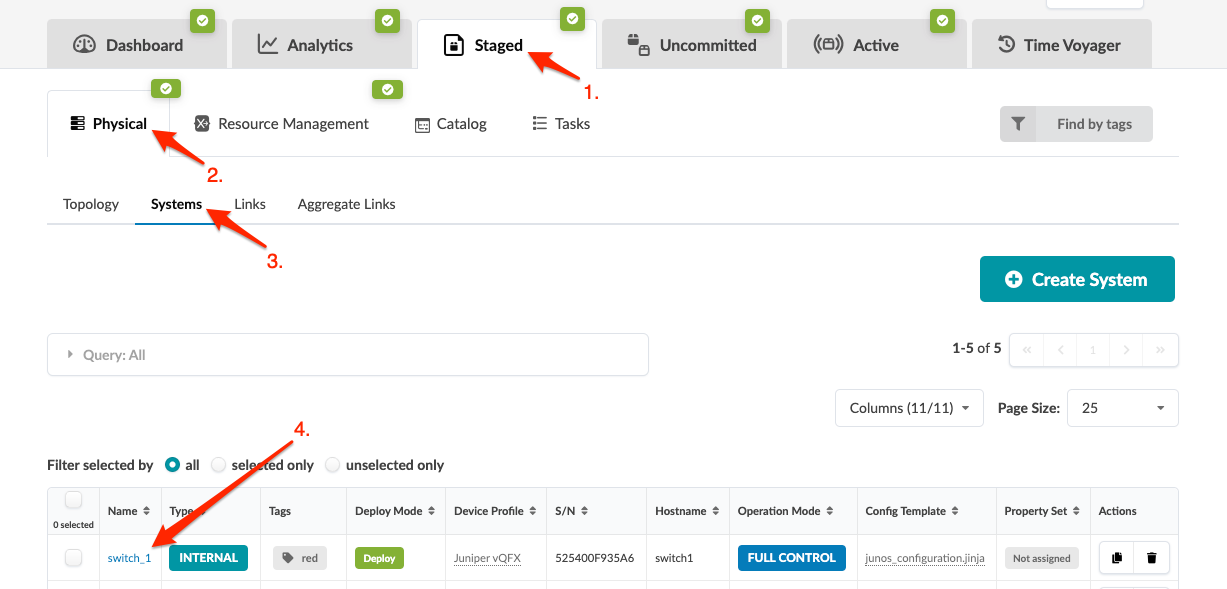
From the blueprint, navigate to Staged > Physical >
Systems and click the system name to go to details for that
system.
 Note:
Note:You can also get to the Systems details page from the Topology view. From the blueprint, navigate to Staged > Physical > Topology and select the system to update.
-
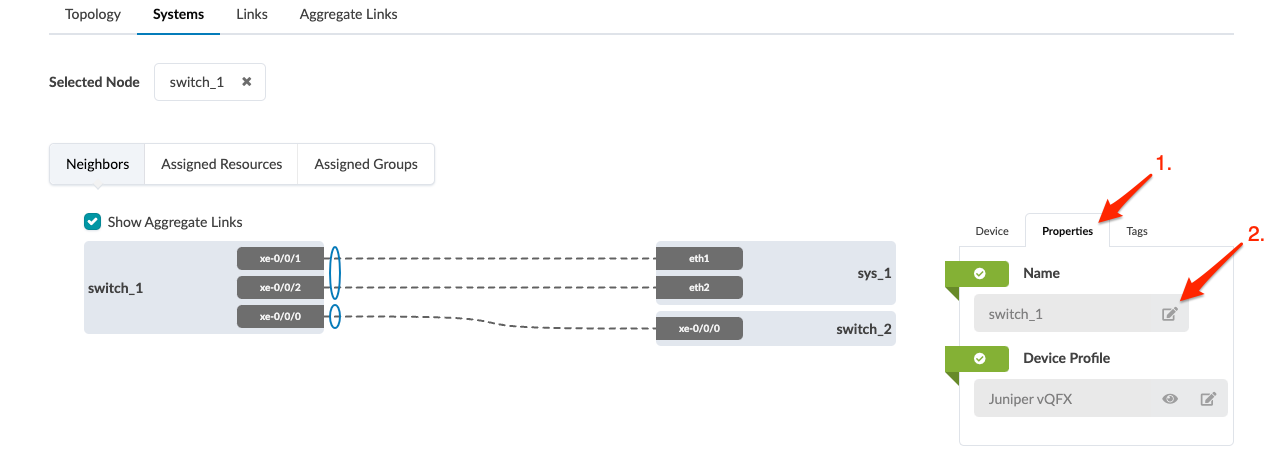
In the panel on the right, click the Properties tab,
then click the Edit button for the
Name field.
-
Enter the new name and click the Save button. (To
cancel the change, click the gray discard button.)
 The panel shows the values for the active blueprint and the staged blueprint.
When you're ready to activate your changes, commit
them from the Uncommitted tab.