Change Routing Zone Details

You can change a routing zone's description, VLAN ID, VNIs, routing policies and symmetric IRB mode for Junos EVPN. You can change one routing zone at a time or, with the help of CSV files, you can edit multiple routing zones.

Update One Routing Zone

  1. From the blueprint, navigate to Staged > Virtual > Routing Zones and click the name of the routing zone to edit.
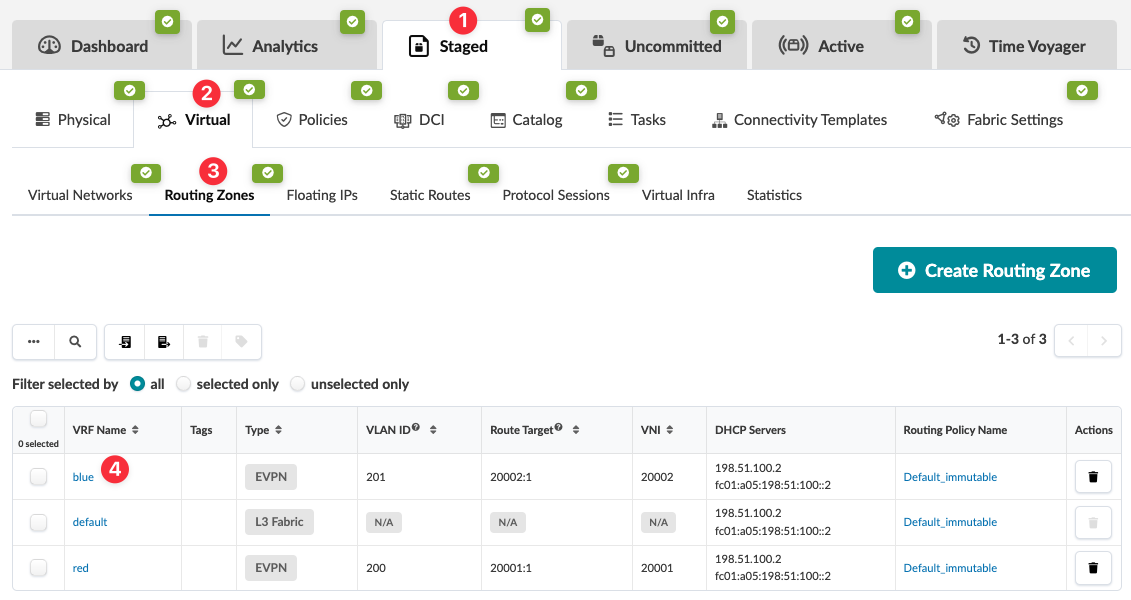
    Screenshot of a network management interface showing the Routing Zones tab in the Virtual section. A table lists routing zones with columns for VRF Name, Tags, Type, VLAN ID, Route Target, VNI, DHCP Servers, and Routing Policy Name. The blue VRF name row is highlighted with details including Type EVPN, VLAN ID 201, Route Target 20002:1, VNI 20002, and DHCP Servers 198.51.100.2 and fc01:a05:198:51:100::2. A Create Routing Zone button is visible on the right side.
  2. Click the Edit button (upper-right) for the selected routing zone.

    Network management interface with tabs for Virtual Networks, Routing Zones selected, Floating IPs, and more. Red-circled Edit button highlighted.
  3. In the dialog that opens, make the required changes. For details about each field, see What are Routing Zones.
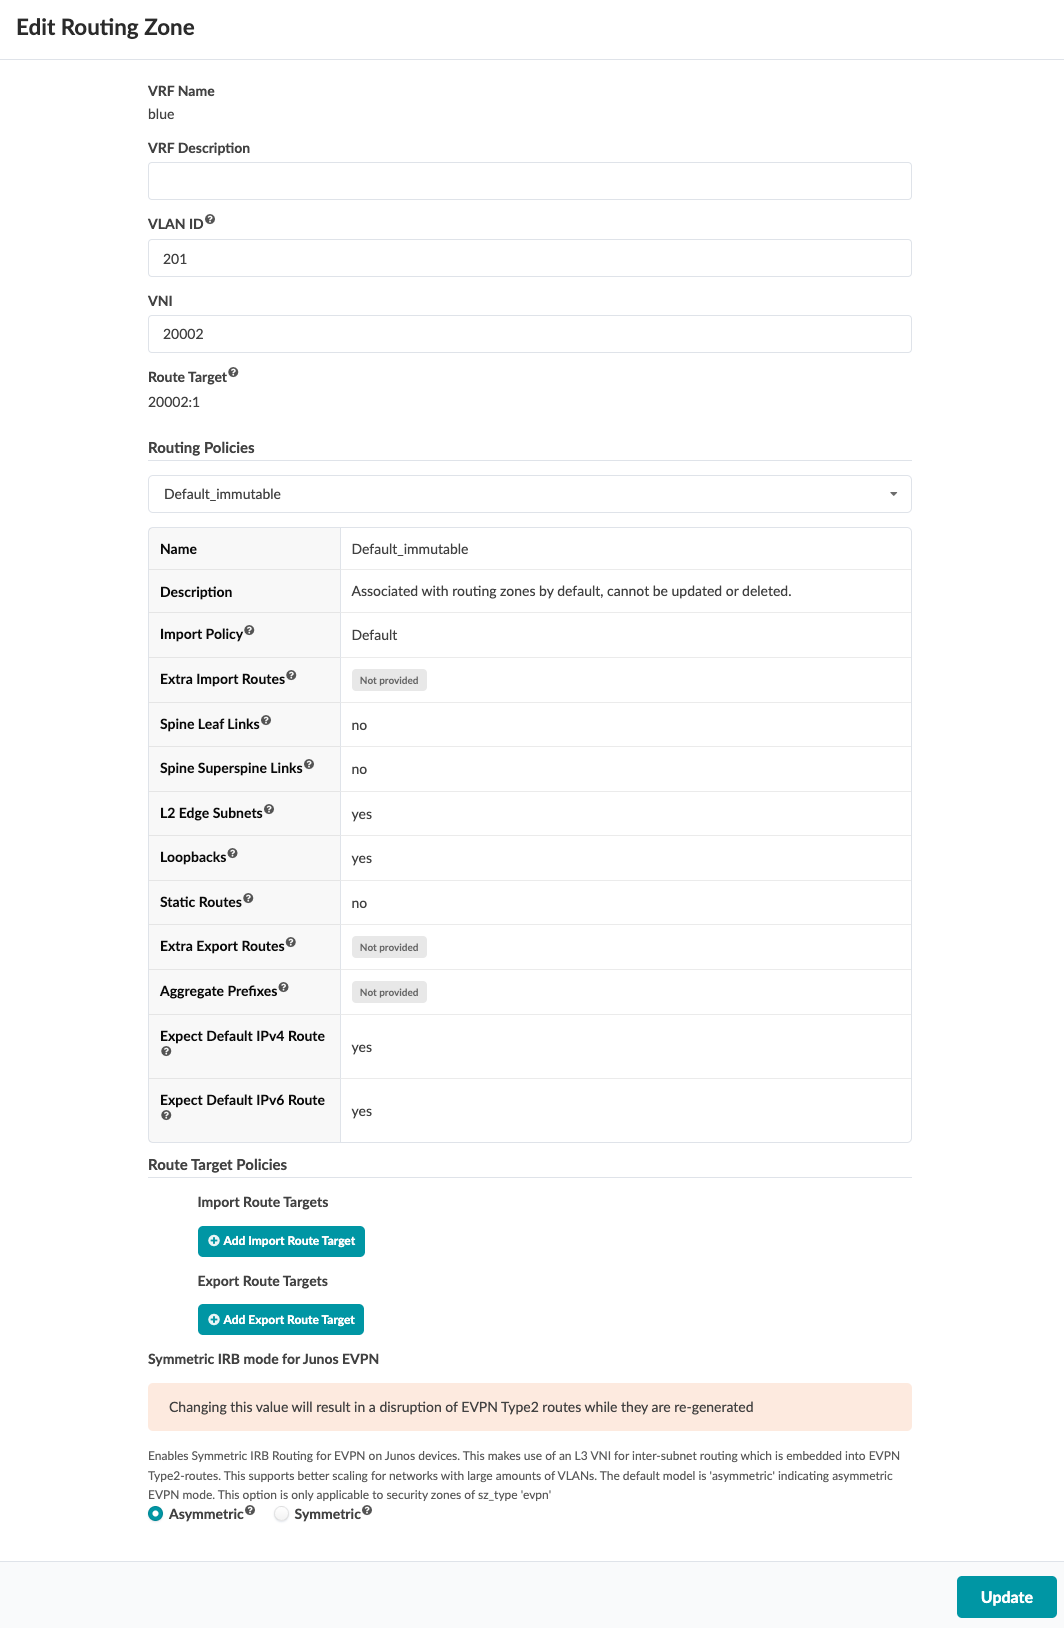
    Configuration interface for editing a routing zone. VRF name is blue with an empty description. VLAN ID 201, VNI 20002, Route Target 20002:1. Routing policy is Default_immutable with default import policy and L2 Edge Subnets and Loopbacks set to yes. Symmetric IRB Mode set to Symmetric with warning about EVPN disruption. Update button available to save changes.
  4. Click Update to stage your changes and return to routing zone details.

When you're ready to activate your changes, commit them from the Uncommitted tab.

Update Multiple Routing Zones

You can update all routing zones, or a selected few, by exporting them to a CSV file, updating the file, then importing the file back into your blueprint.
  1. From the blueprint, navigate to Staged > Virtual > Routing Zones.
  2. To export all routing zones, click the Export all routing zones button, which is above the table.
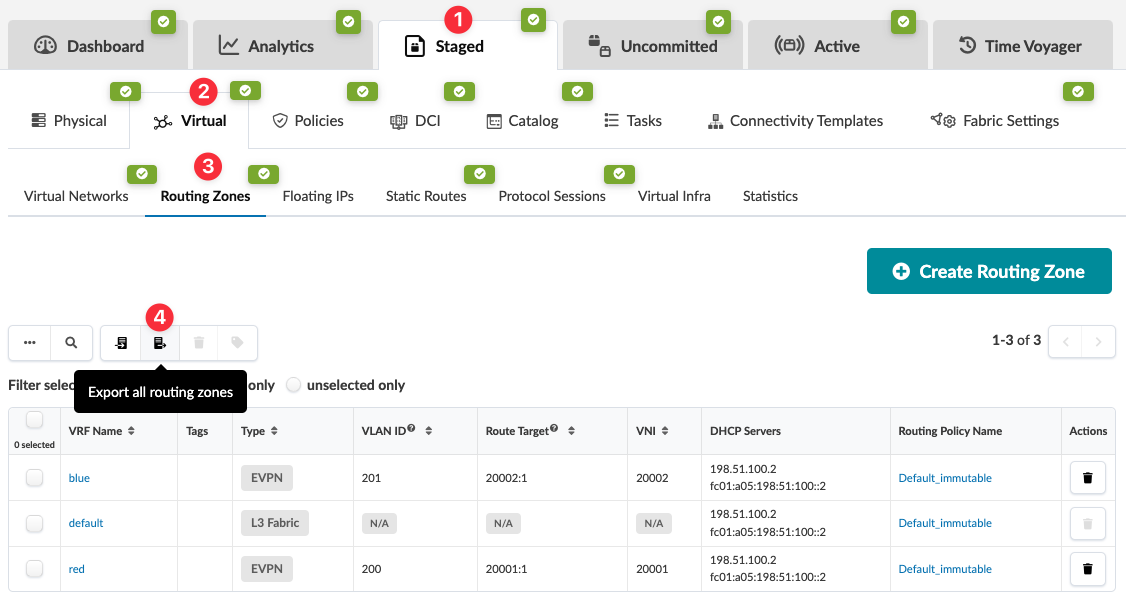
    Network management interface with tabs for Staged, Uncommitted, Active, and Time Voyager. The Virtual submenu shows Routing Zones selected. A table displays routing zones' details like VRF Name, Tags, Type, VLAN ID, Route Target, VNI, and DHCP Servers. Action buttons include Create Routing Zone and export options.
  3. Or to export specific routing zones instead of all of them, select their check boxes, then click the same button as in the previous step (now called Export selected routing zones).
  4. Click Copy to copy the contents, or click Save As File to download the file.
  5. When you've copied or downloaded the routing zones, close the dialog to return to the table view.
  6. Paste the contents, or open the CSV file, in a spreadsheet program (such as Google Sheets or Microsoft Excel).
  7. Update routing zones as needed, then save the file. For details about each field, see What are Routing Zones.
  8. In the GUI, navigate to Staged > Virtual >Routing Zones and click the Import routing zones button, which is above the table.
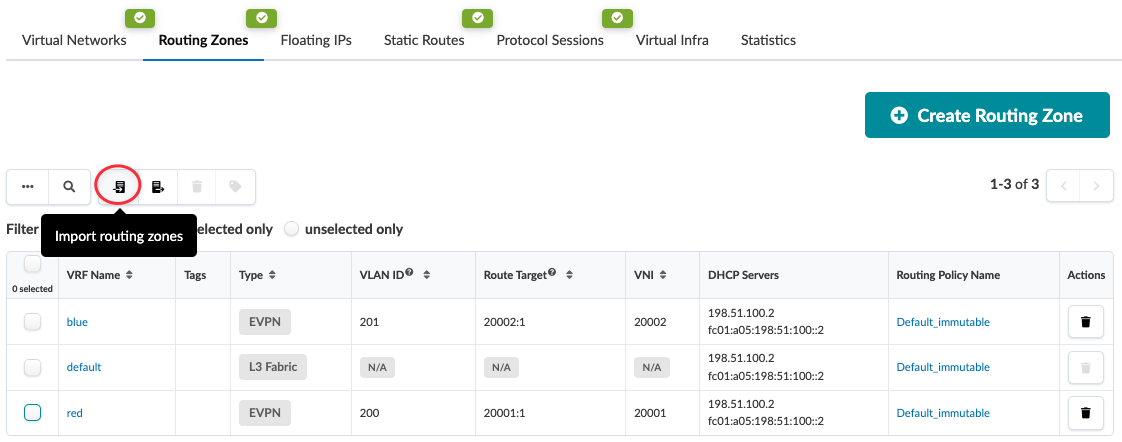
    Network management interface displaying Routing Zones with VRF Name, Tags, Type, VLAN ID, and more. Highlighted icon suggests importing routing zones.
  9. Either click Choose File and navigate to the file on your computer, or drag and drop the file onto the dialog window. Routing zone details are displayed for your review.
  10. Click Import to import the routing zones, stage the changes, and return to the table view.

When you're ready to activate your changes, commit them from the Uncommitted tab.