Update Port Channel ID Range
CAUTION:
Changing port channel range is an invasive operation and may lead to reassigning existing port channel IDs.
Update Port Channel ID Range (from Topology View)
To update the port channel ID range using the GUI:
-
From the blueprint, navigate to Staged > Physical >
Topology and select the generic system or external generic
system to update.
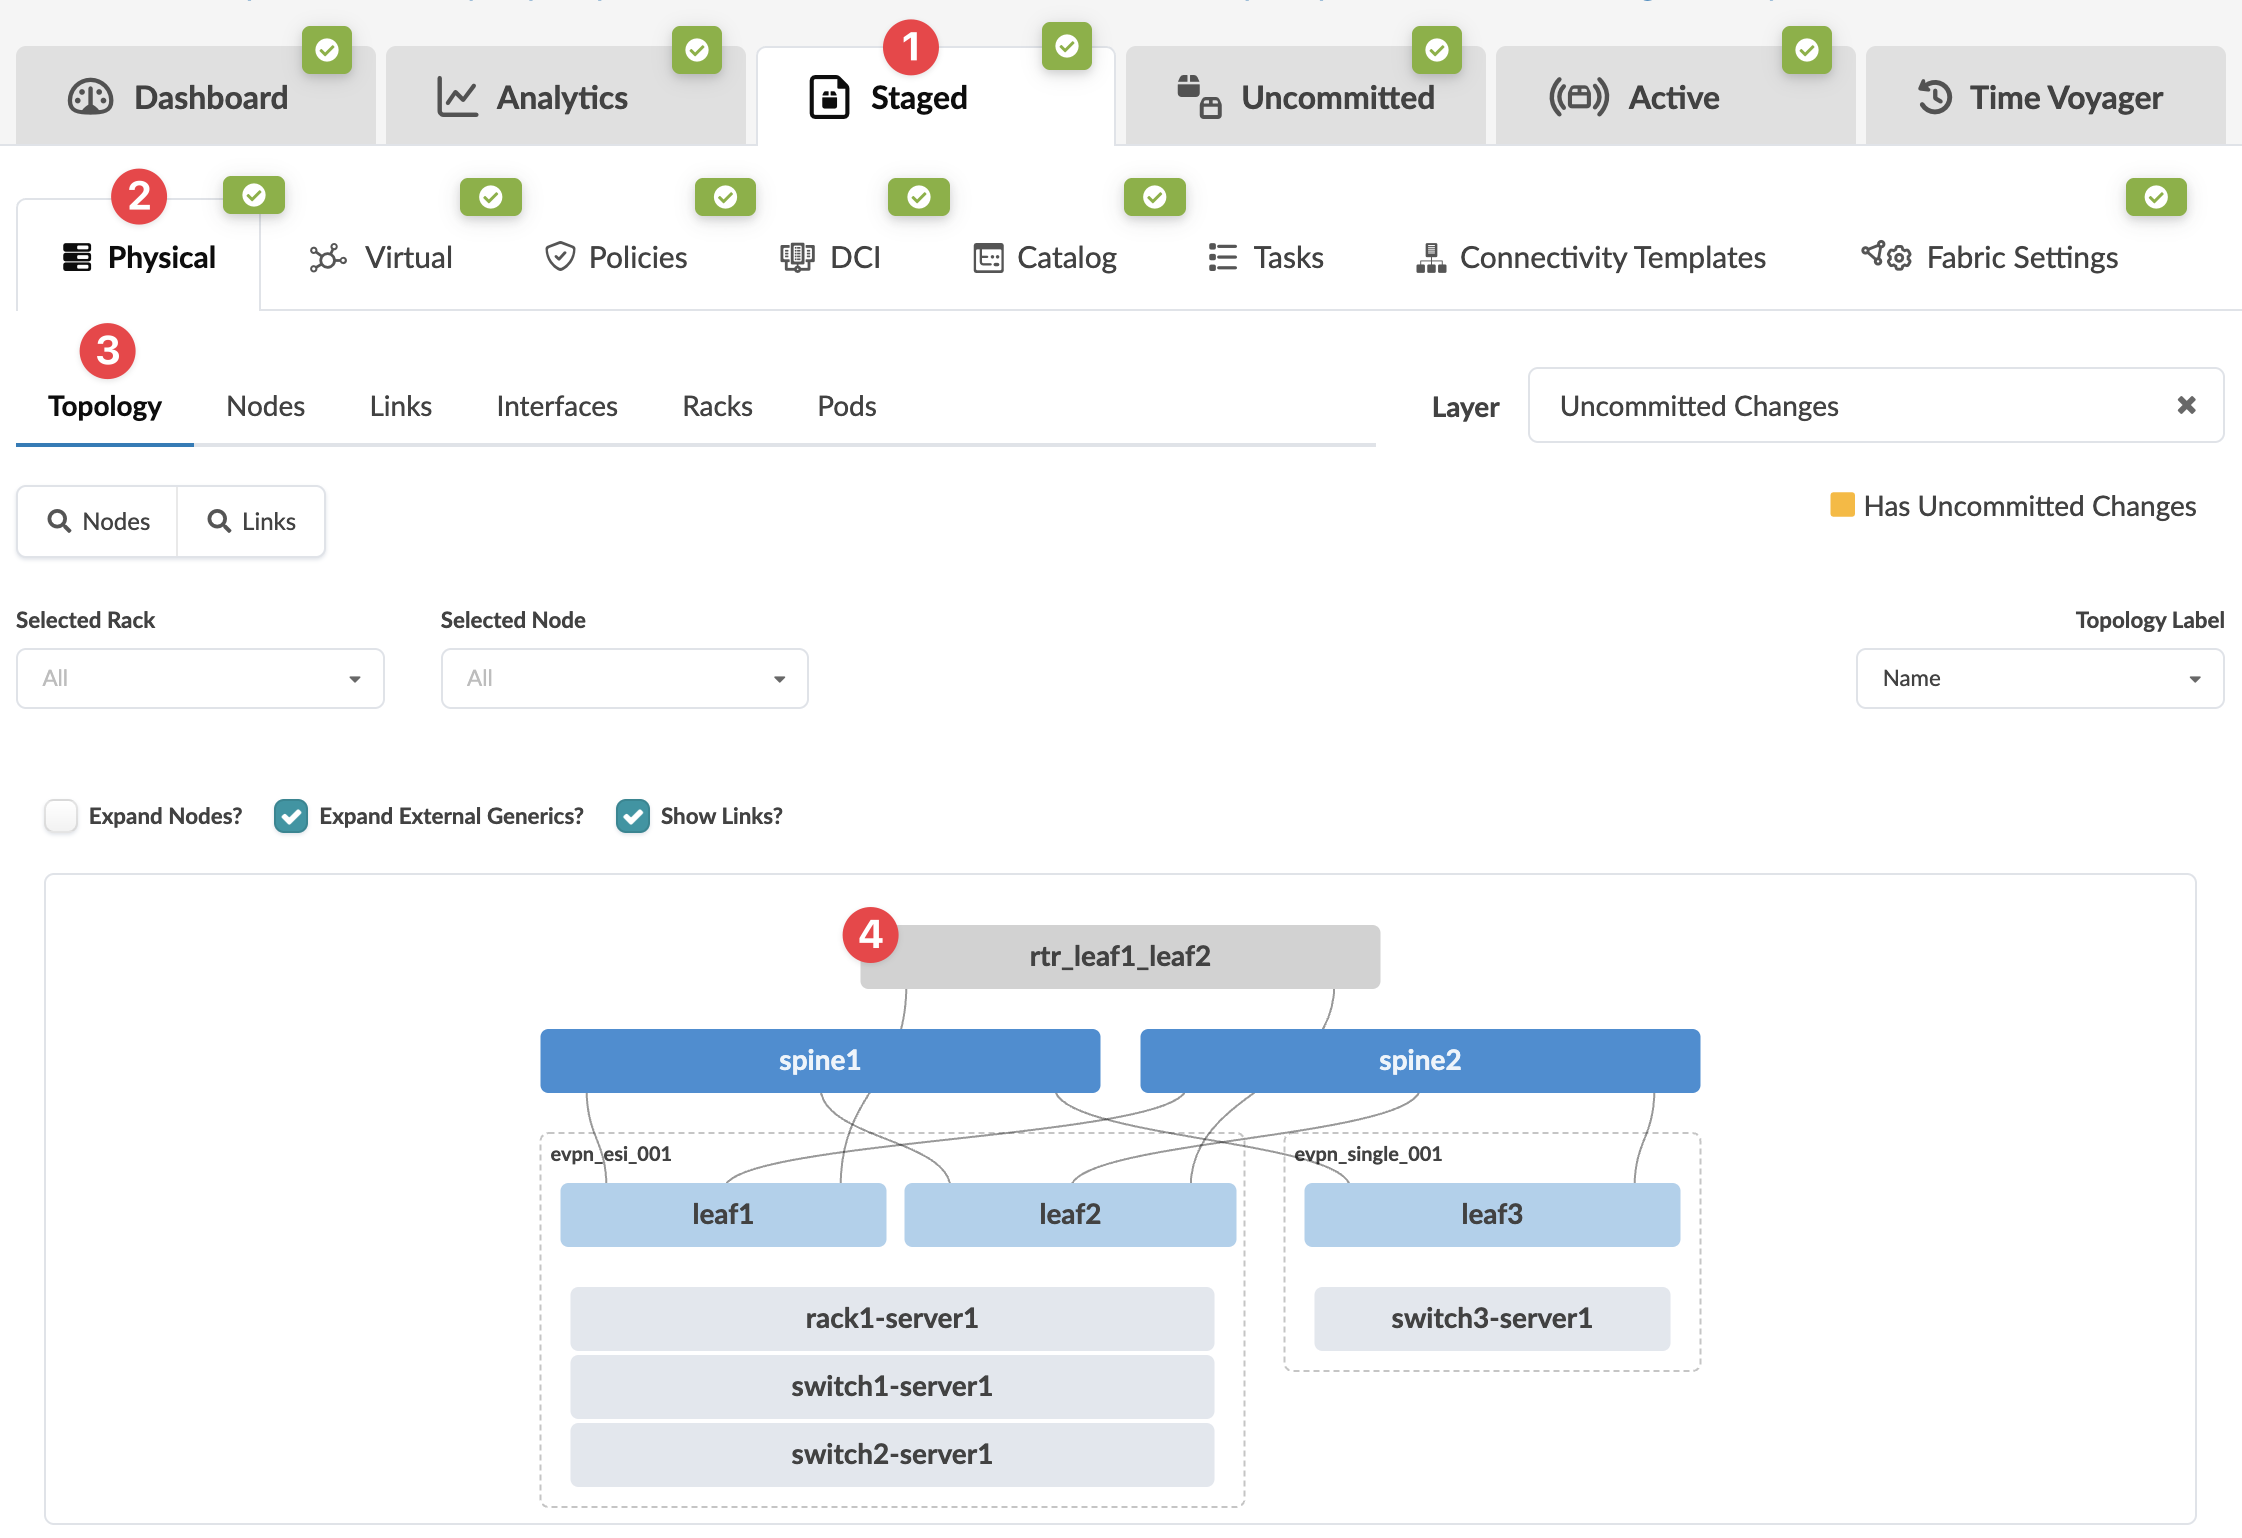 The Topology selection appears.
 -
Select the check box for the system to see operations available for that
system (and that you have permissions for).
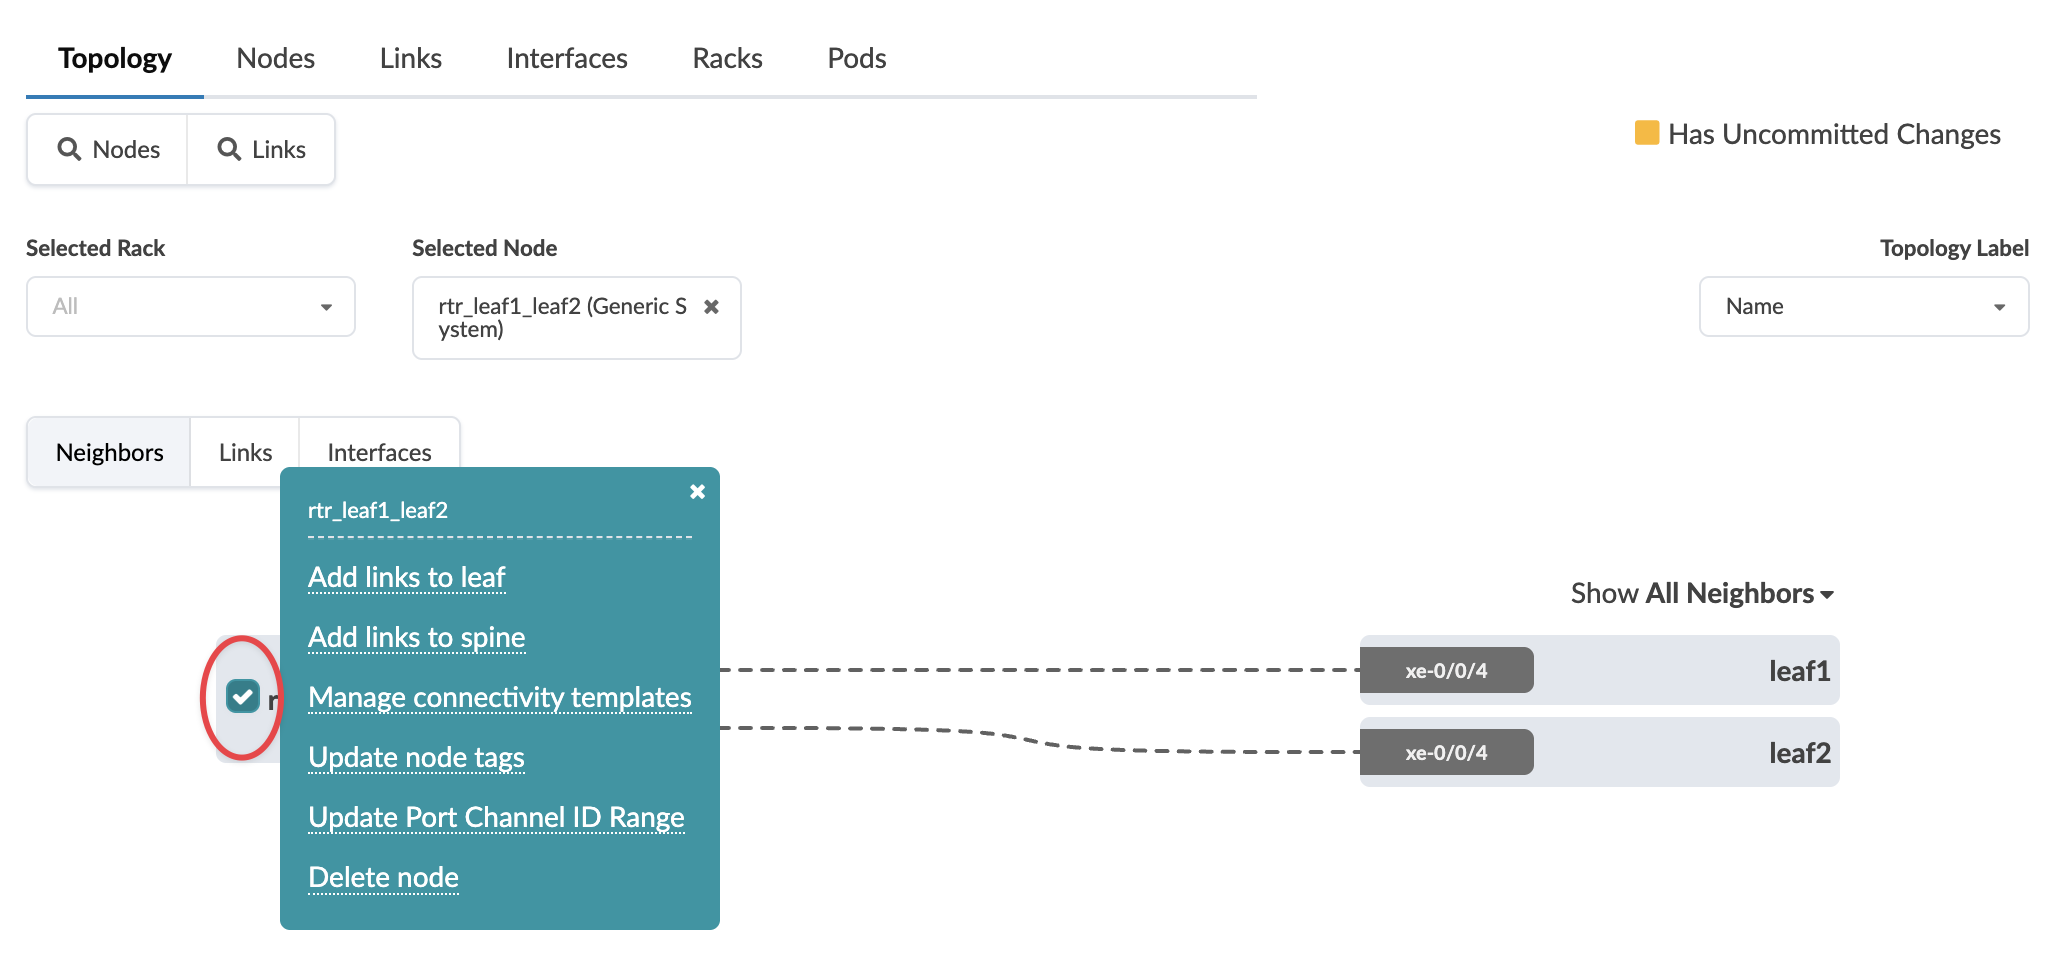
The changes are staged and you're returned to the Topology view.
When you're ready to activate your changes, go to the Uncommitted tab to review and commit (or discard) your changes.
Update Port Channel ID Range (from Nodes view)
To update the port channel ID range using the GUI:
-
From the blueprint, navigate to Staged > Physical >
Nodes and click the Edit Port Channel ID
Range button.
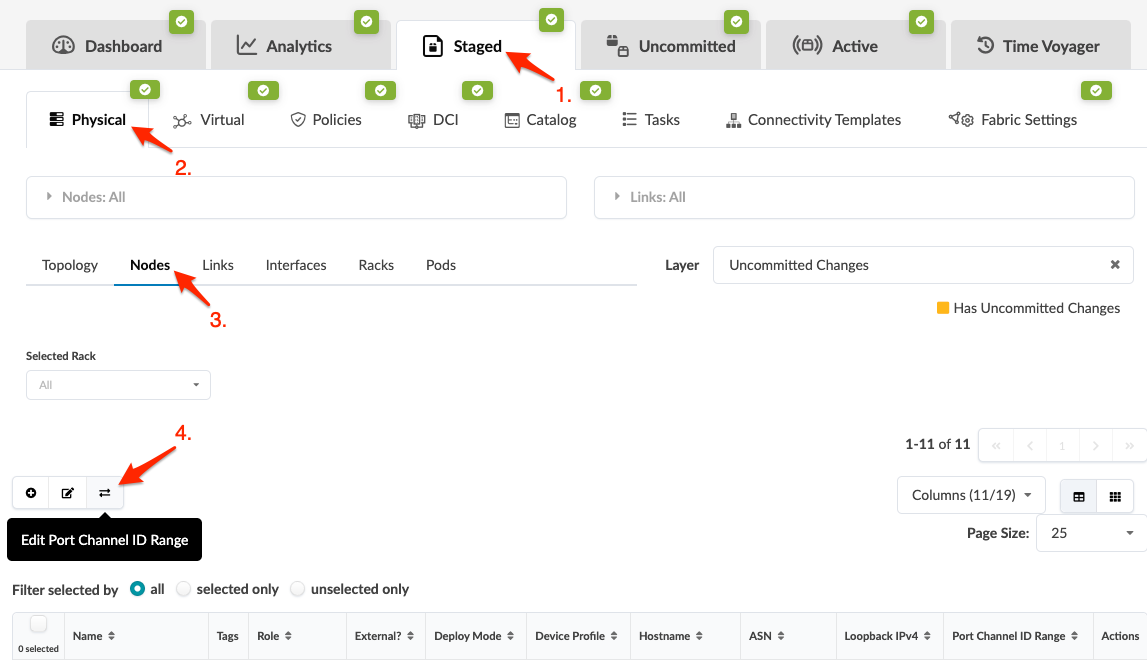 The Edit Port Channel ID Range dialog opens.
The changes are staged and you're returned to the
Nodes view.
When you're ready to activate your changes, go to the Uncommitted tab to review and commit (or discard) your changes.