Change Rack Name
You may want to use your own rack naming schema, to be based on their physical locations, for example. In these cases you can change the default rack names. You can change the name of a single rack or of multiple racks simultaneously.
Change the Rack Name of a Single Rack
-
From the blueprint, navigate to Staged > Physical >
Racks and click the name of the applicable rack (not
the check box).
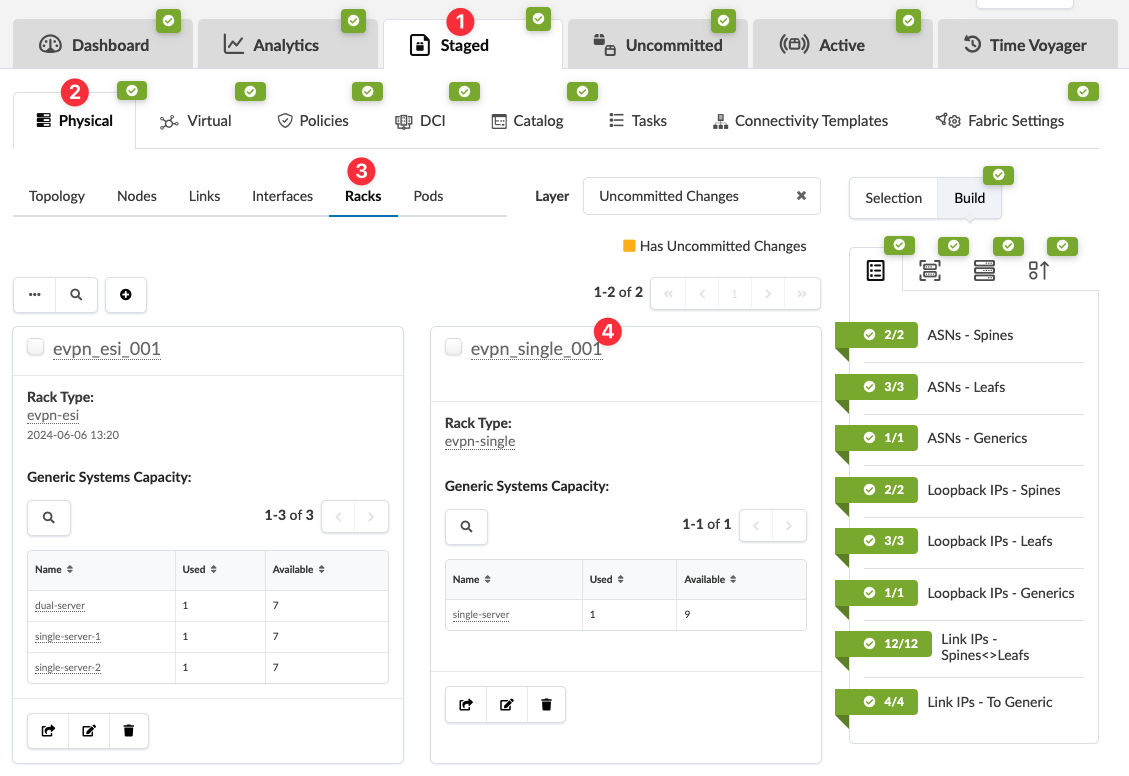 The Selection panel opens (on the right).Note:
You can also get to the Selection panel from the Topology view (Staged > Physical > Topology) by selecting the rack from the Selected Rack drop-down list.
-
From the Rack Properties tab in the
Selection panel, click the
Edit button for Name,
change the name accordingly, then click the Save
button.

When you're ready to activate your changes, go to the
Uncommitted tab to review and commit (or discard) your changes.
Change Rack Names of Multiple Racks
New feature in Apstra version 5.0.0.
-
From the blueprint, navigate to Staged > Physical >
Nodes and click the Edit Node Names
button, above the table.
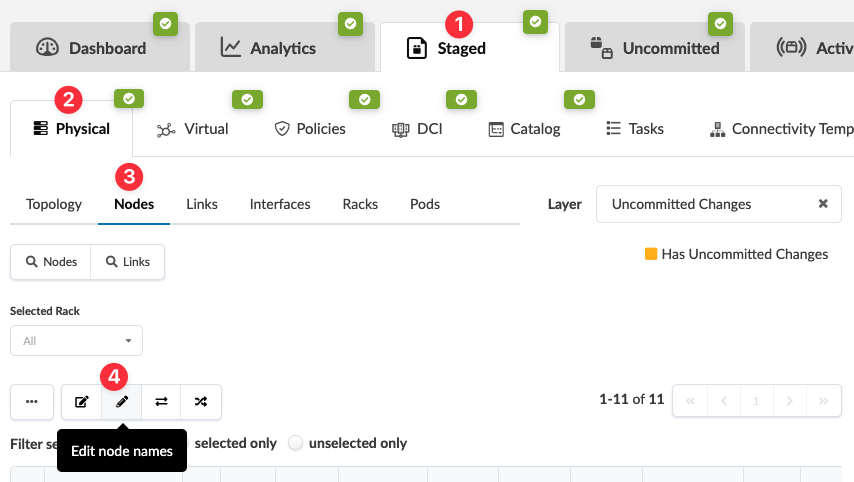 The Batch rename nodes dialog opens.
 -
Change rack names, as applicable. (Notice that you can change other various
hostnames and names from this dialog as well.)
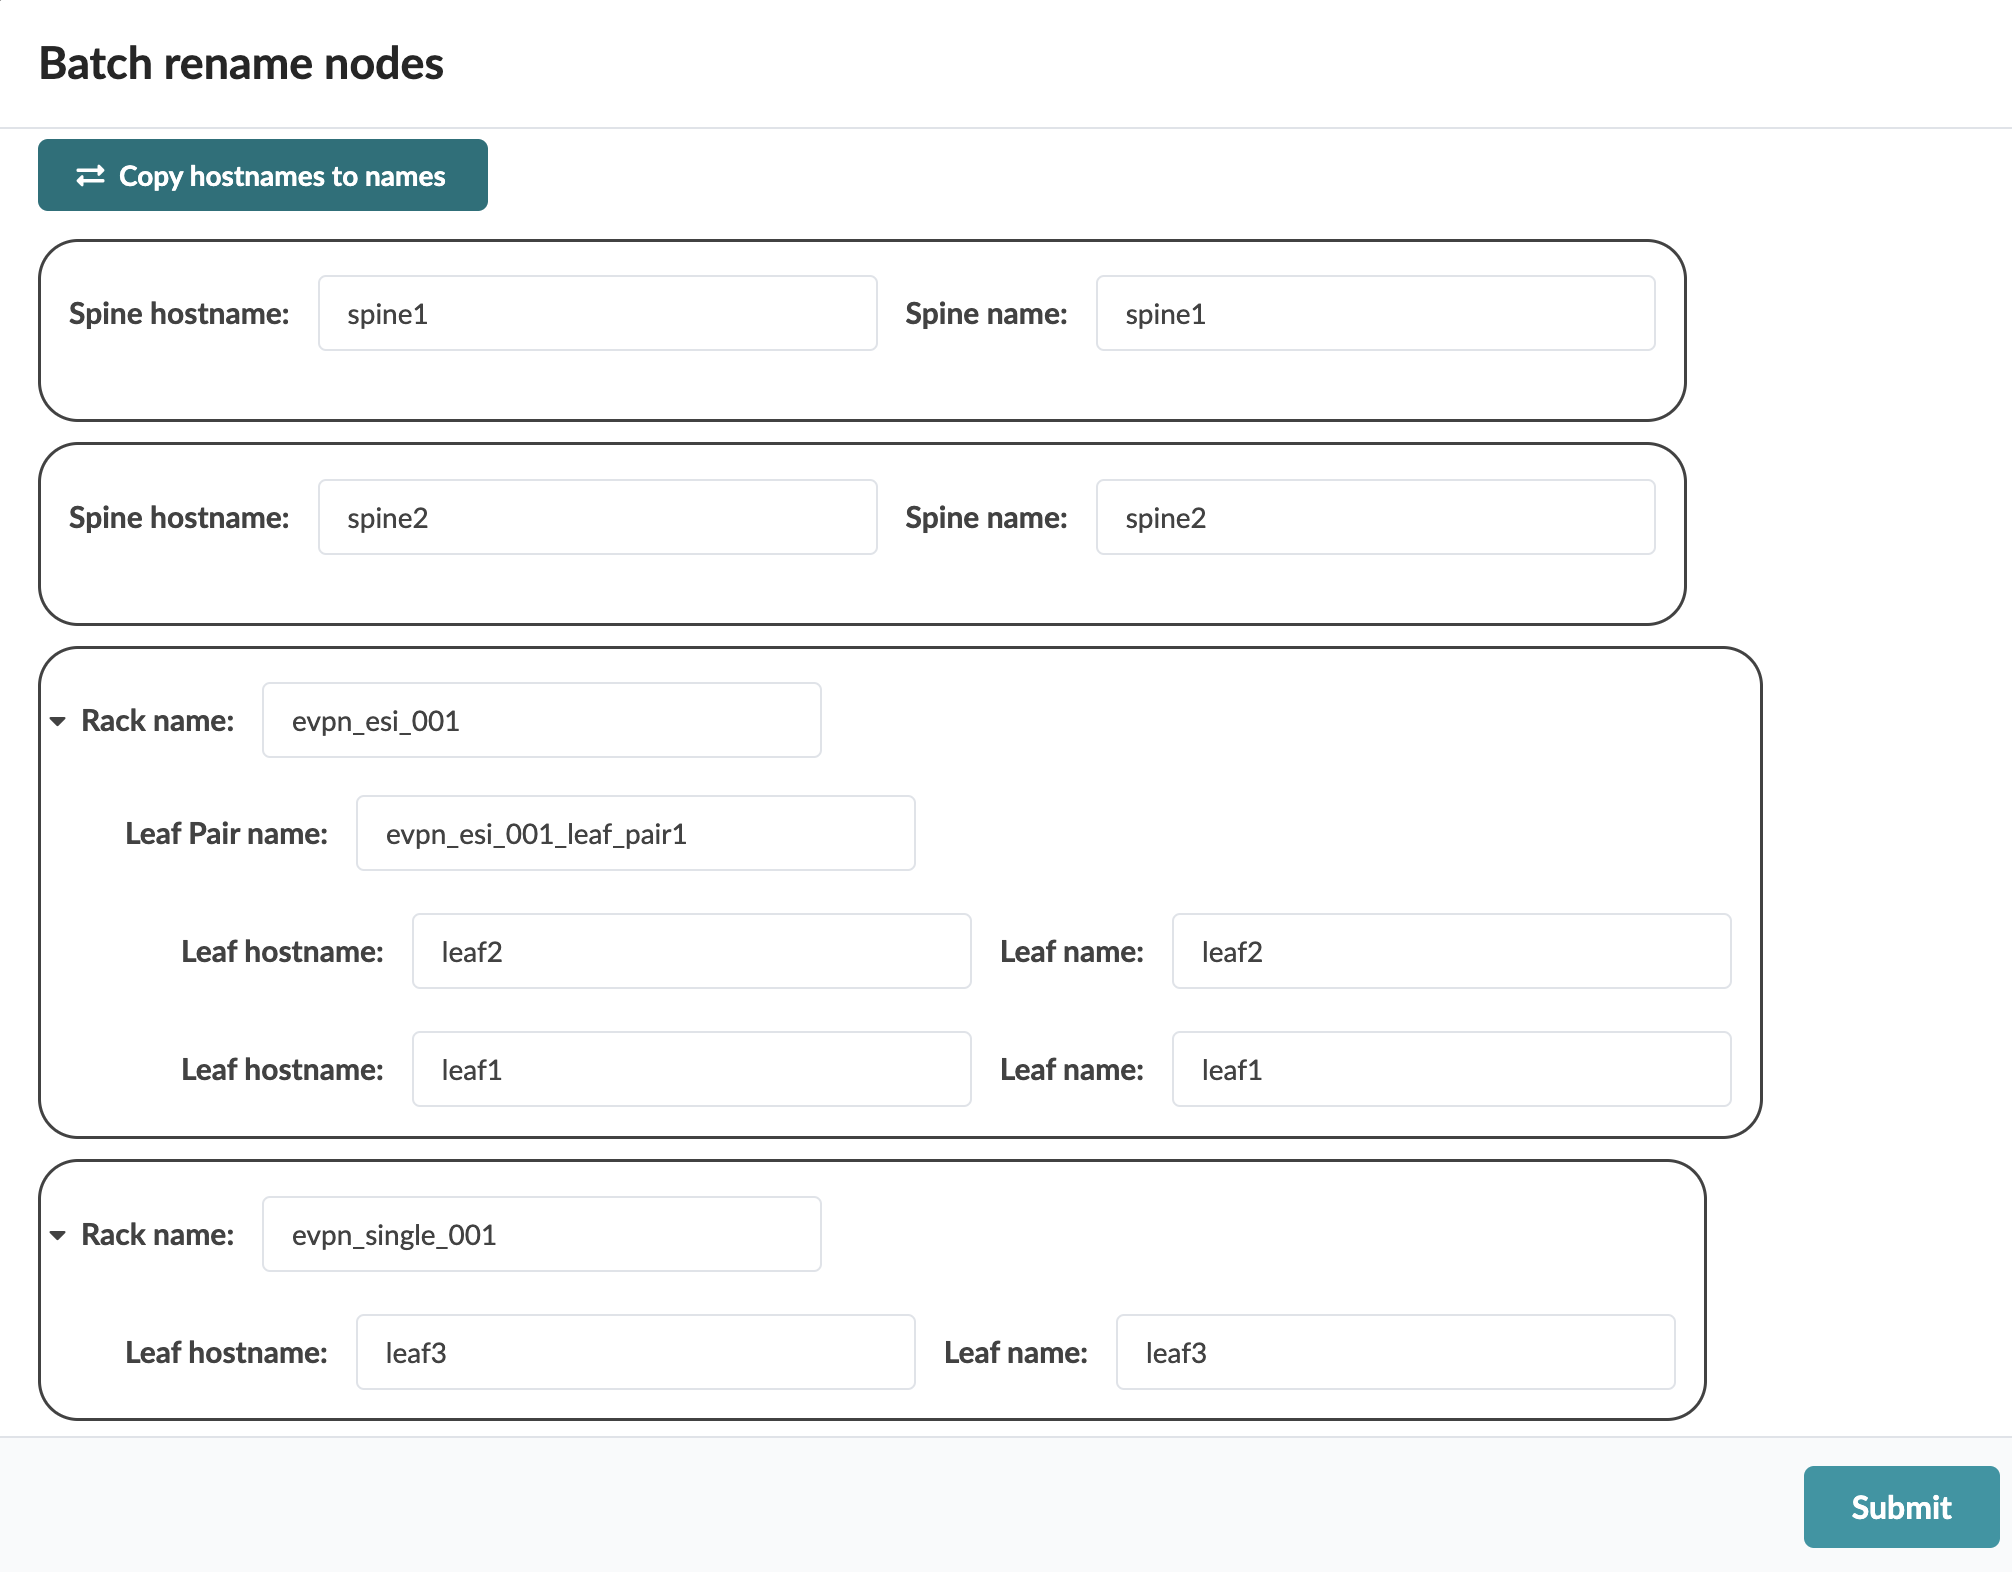
When you're ready to activate your changes, go to the
Uncommitted tab to review and commit (or discard) your changes.