Bring Interface Down
You can disable an interface (admin down) from the Topology view of the HPE Networking Apstra Data Center Director GUI or (as of version 5.1.0) from the interface detail view.
To disable an interface, your user profile must be assigned at least one of the following Granular Permissions type roles: Manage racks and links or Manage generic systems (as of version 5.1.0). For more information, see User/Role Management.
Bring Interface Down from Topology View
To bring an interface down from the GUI topology
view:
-
From the blueprint, navigate to Staged > Physical >
Topology and select the leaf that's connected to the
applicable generic system or external generic system.
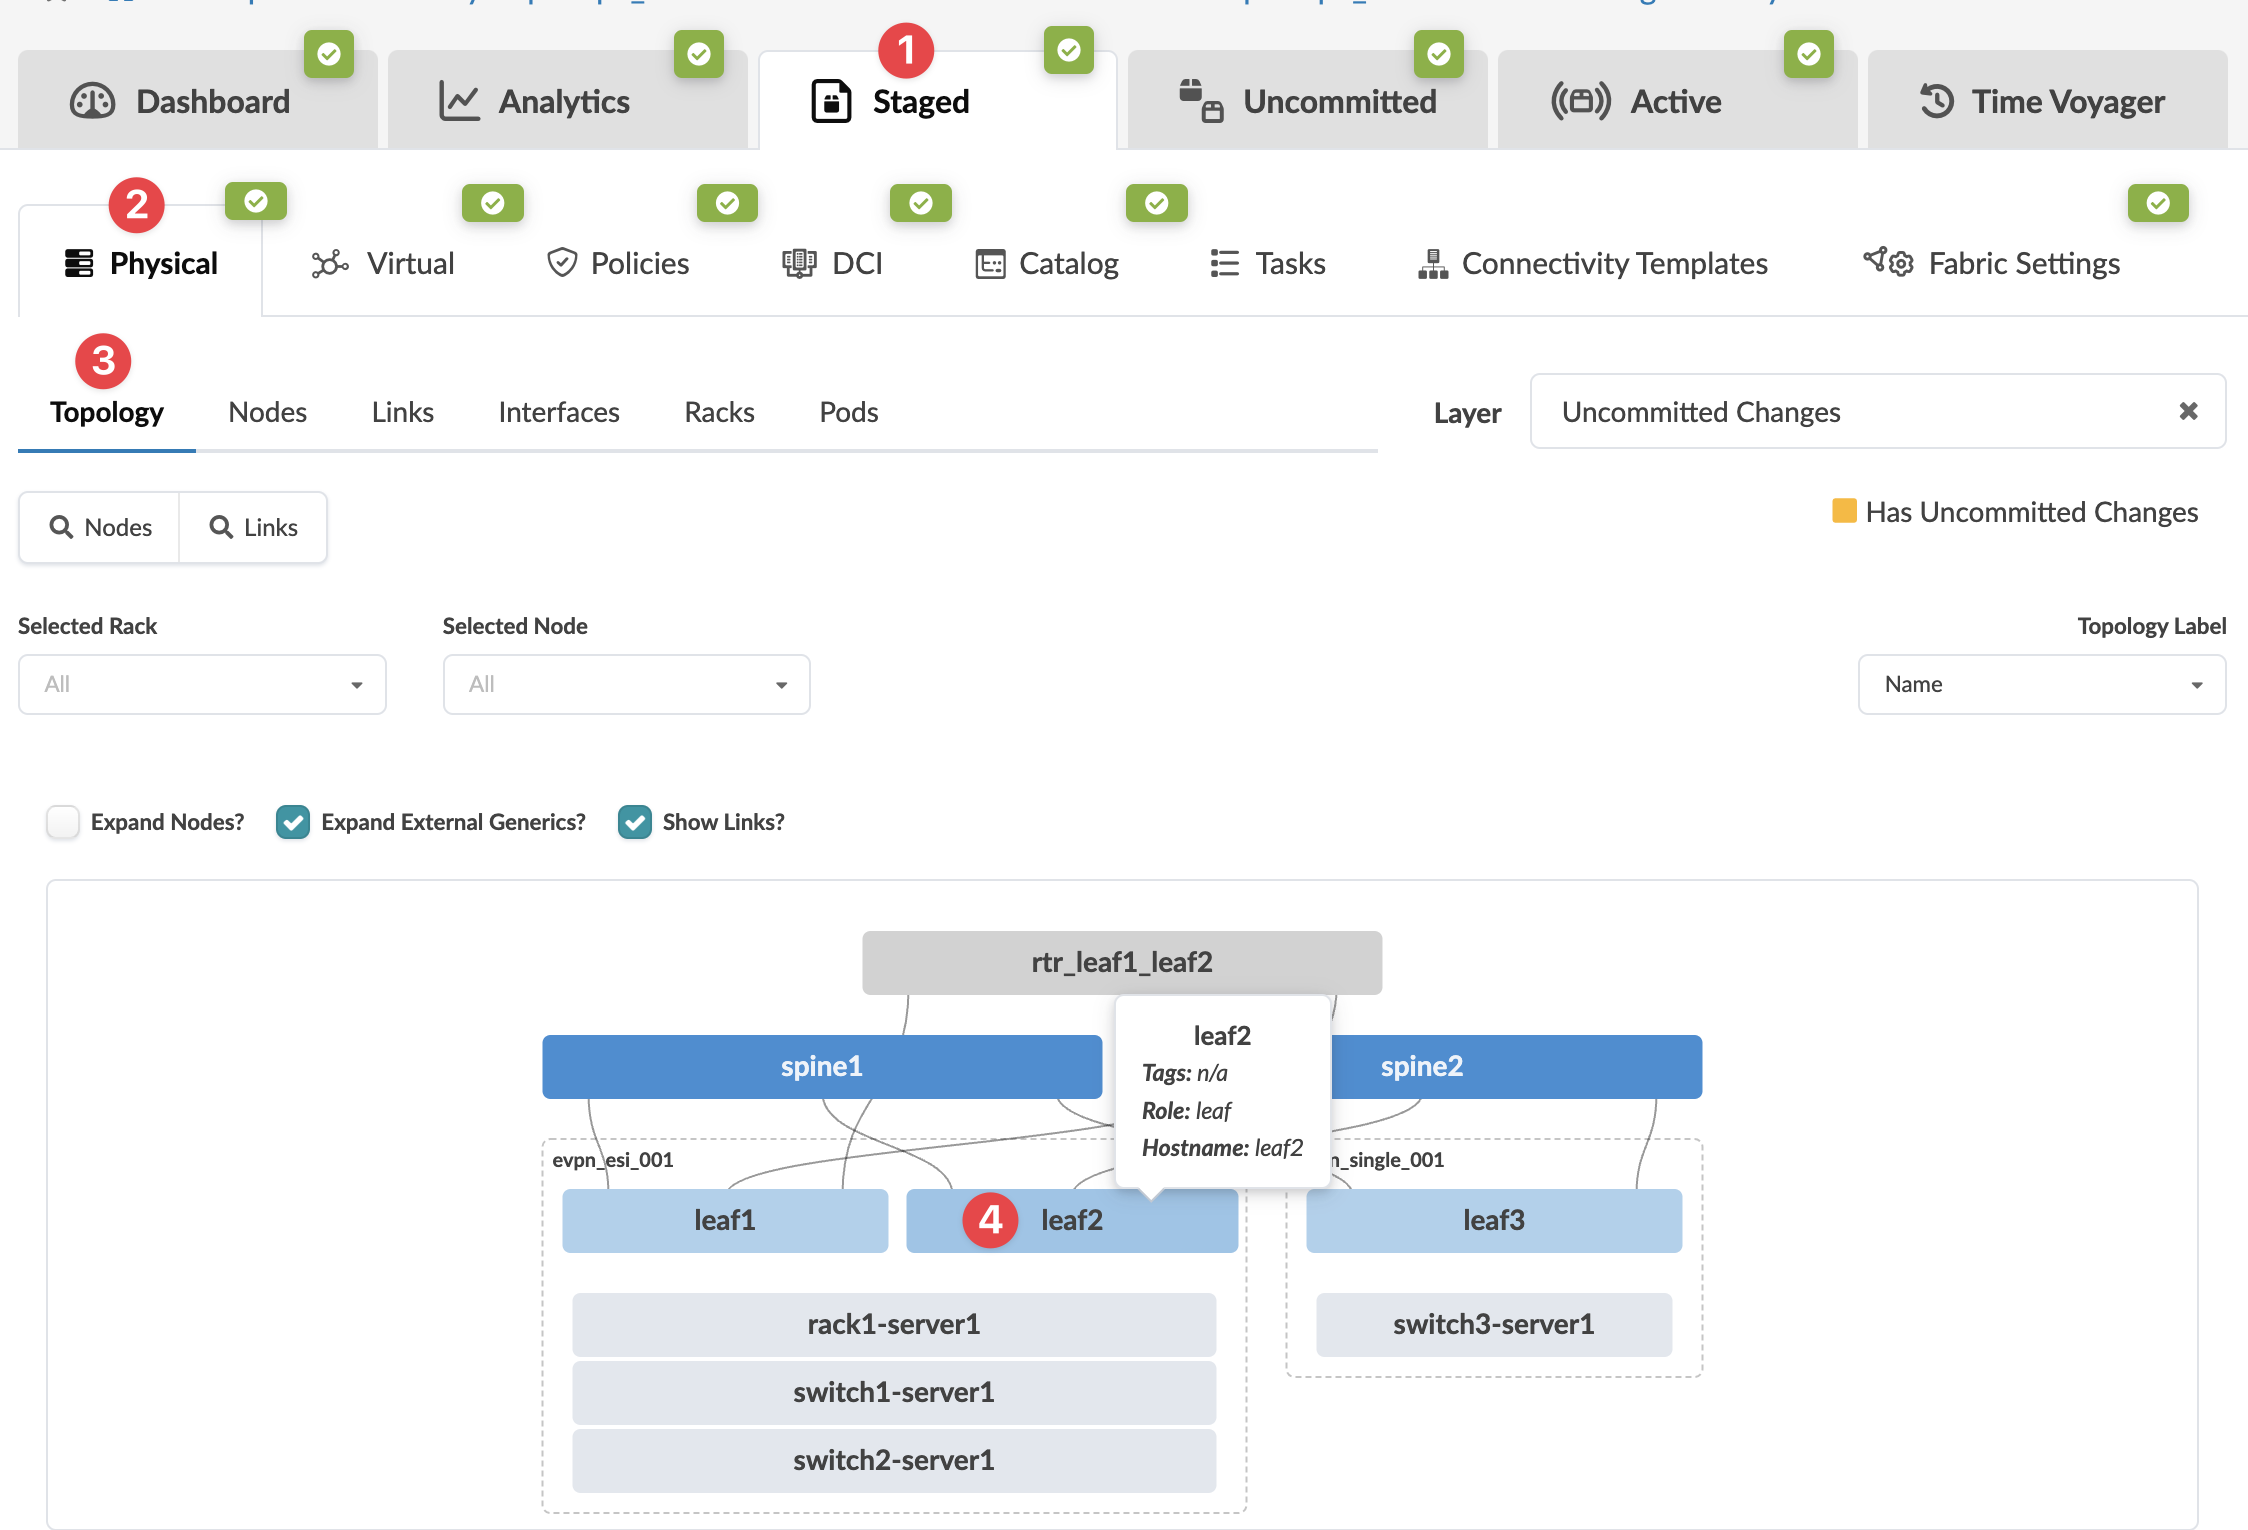 The Topology Node view appears.
 -
Select the check box for the applicable interface, then click
Disable interface to stage the change.
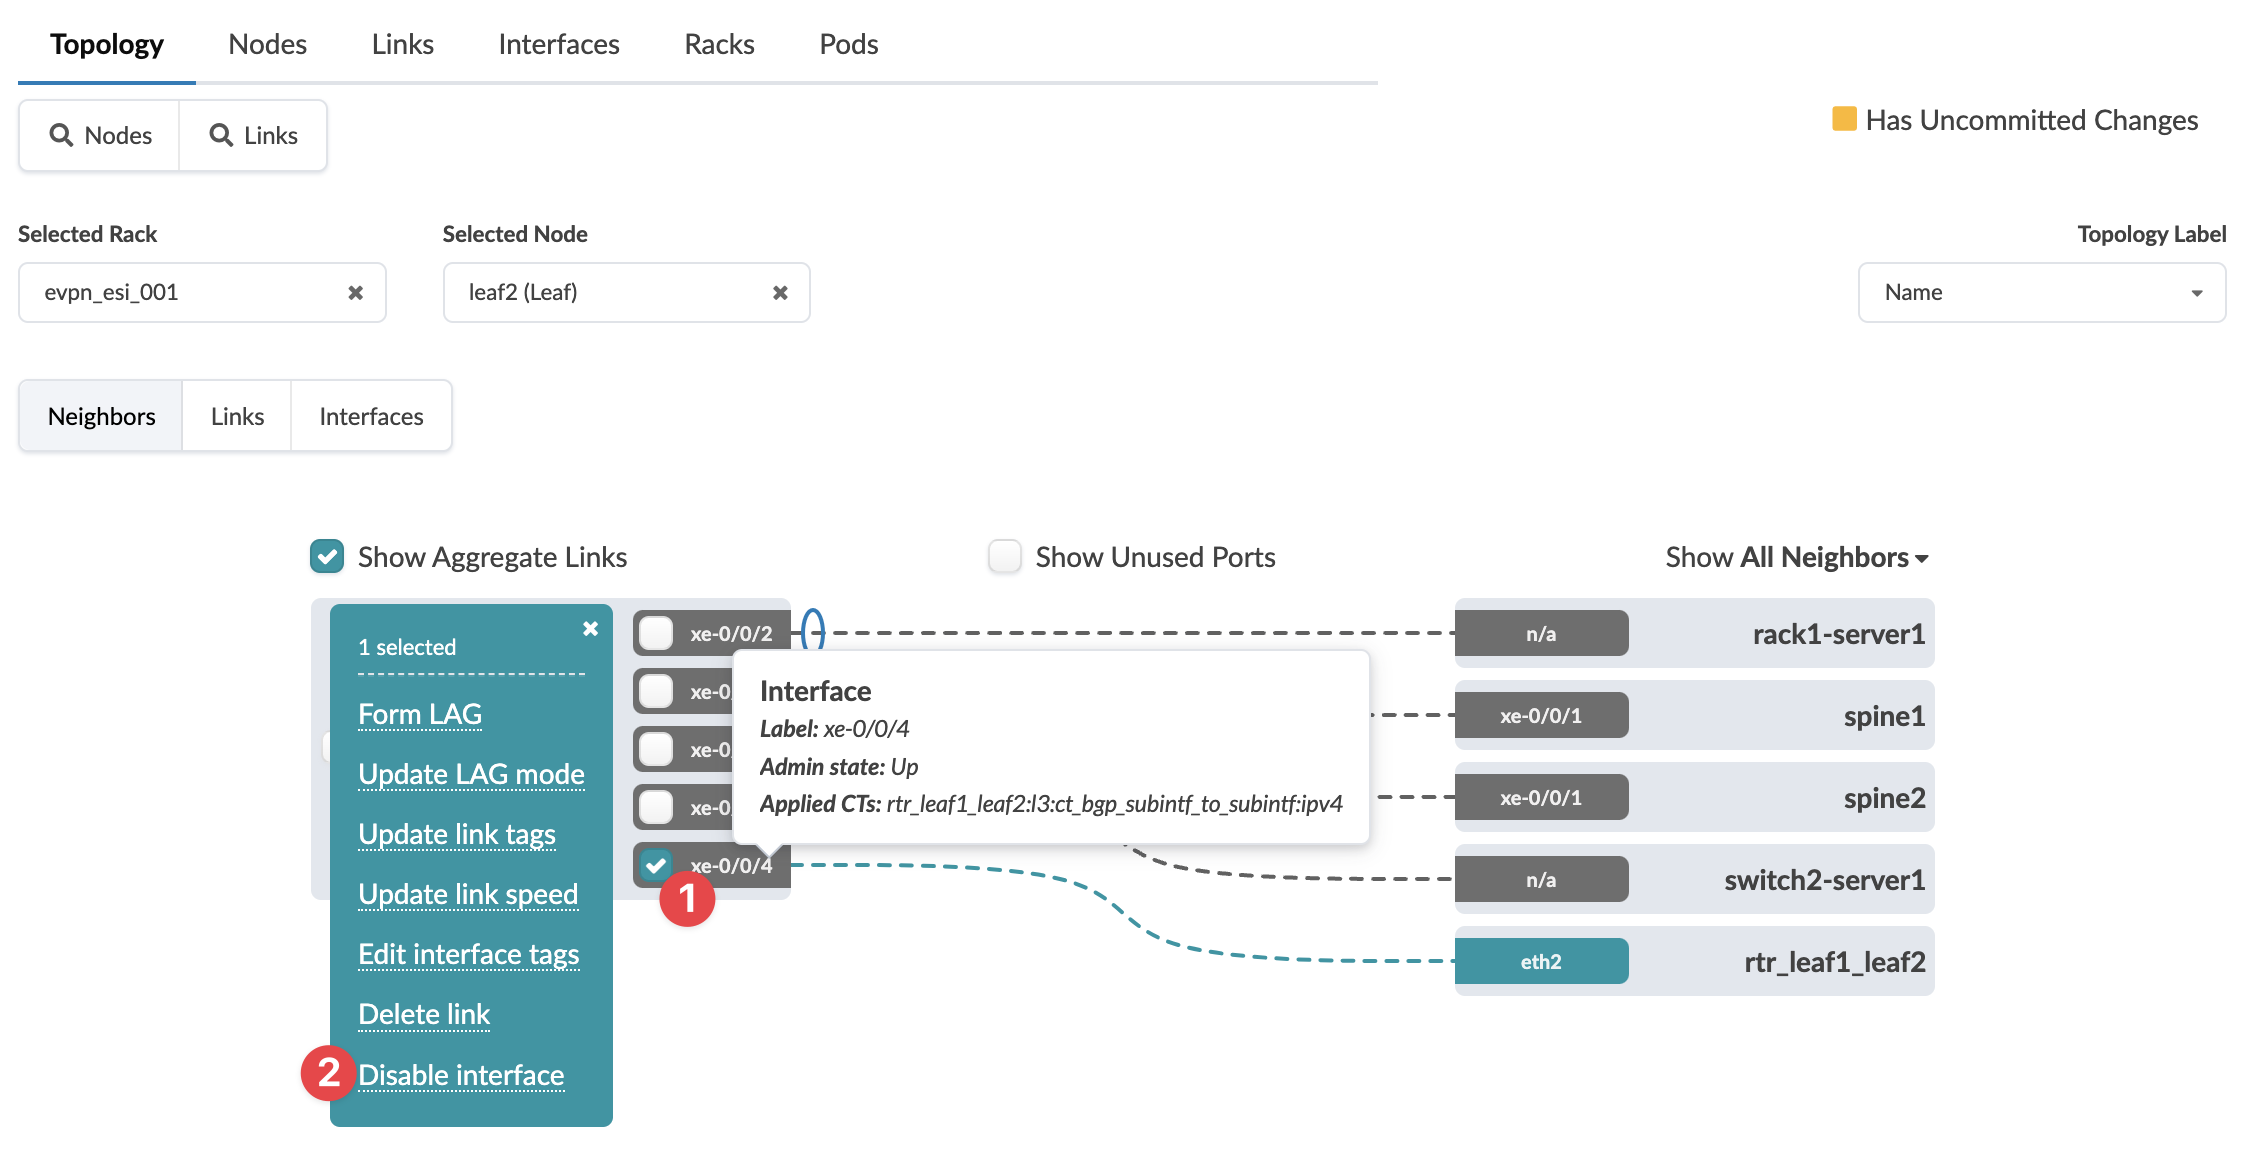 The change has been staged and is ready to commit.
To deploy the change to the active blueprint, commit
from the Uncommitted tab.
Bring Interface Down from Interface Detail Page
To bring an interface down from the GUI Interface
detail page:
-
From the blueprint, navigate to Staged > Physical >
Interfaces and select the leaf that's connected to the
applicable generic system or external generic system.
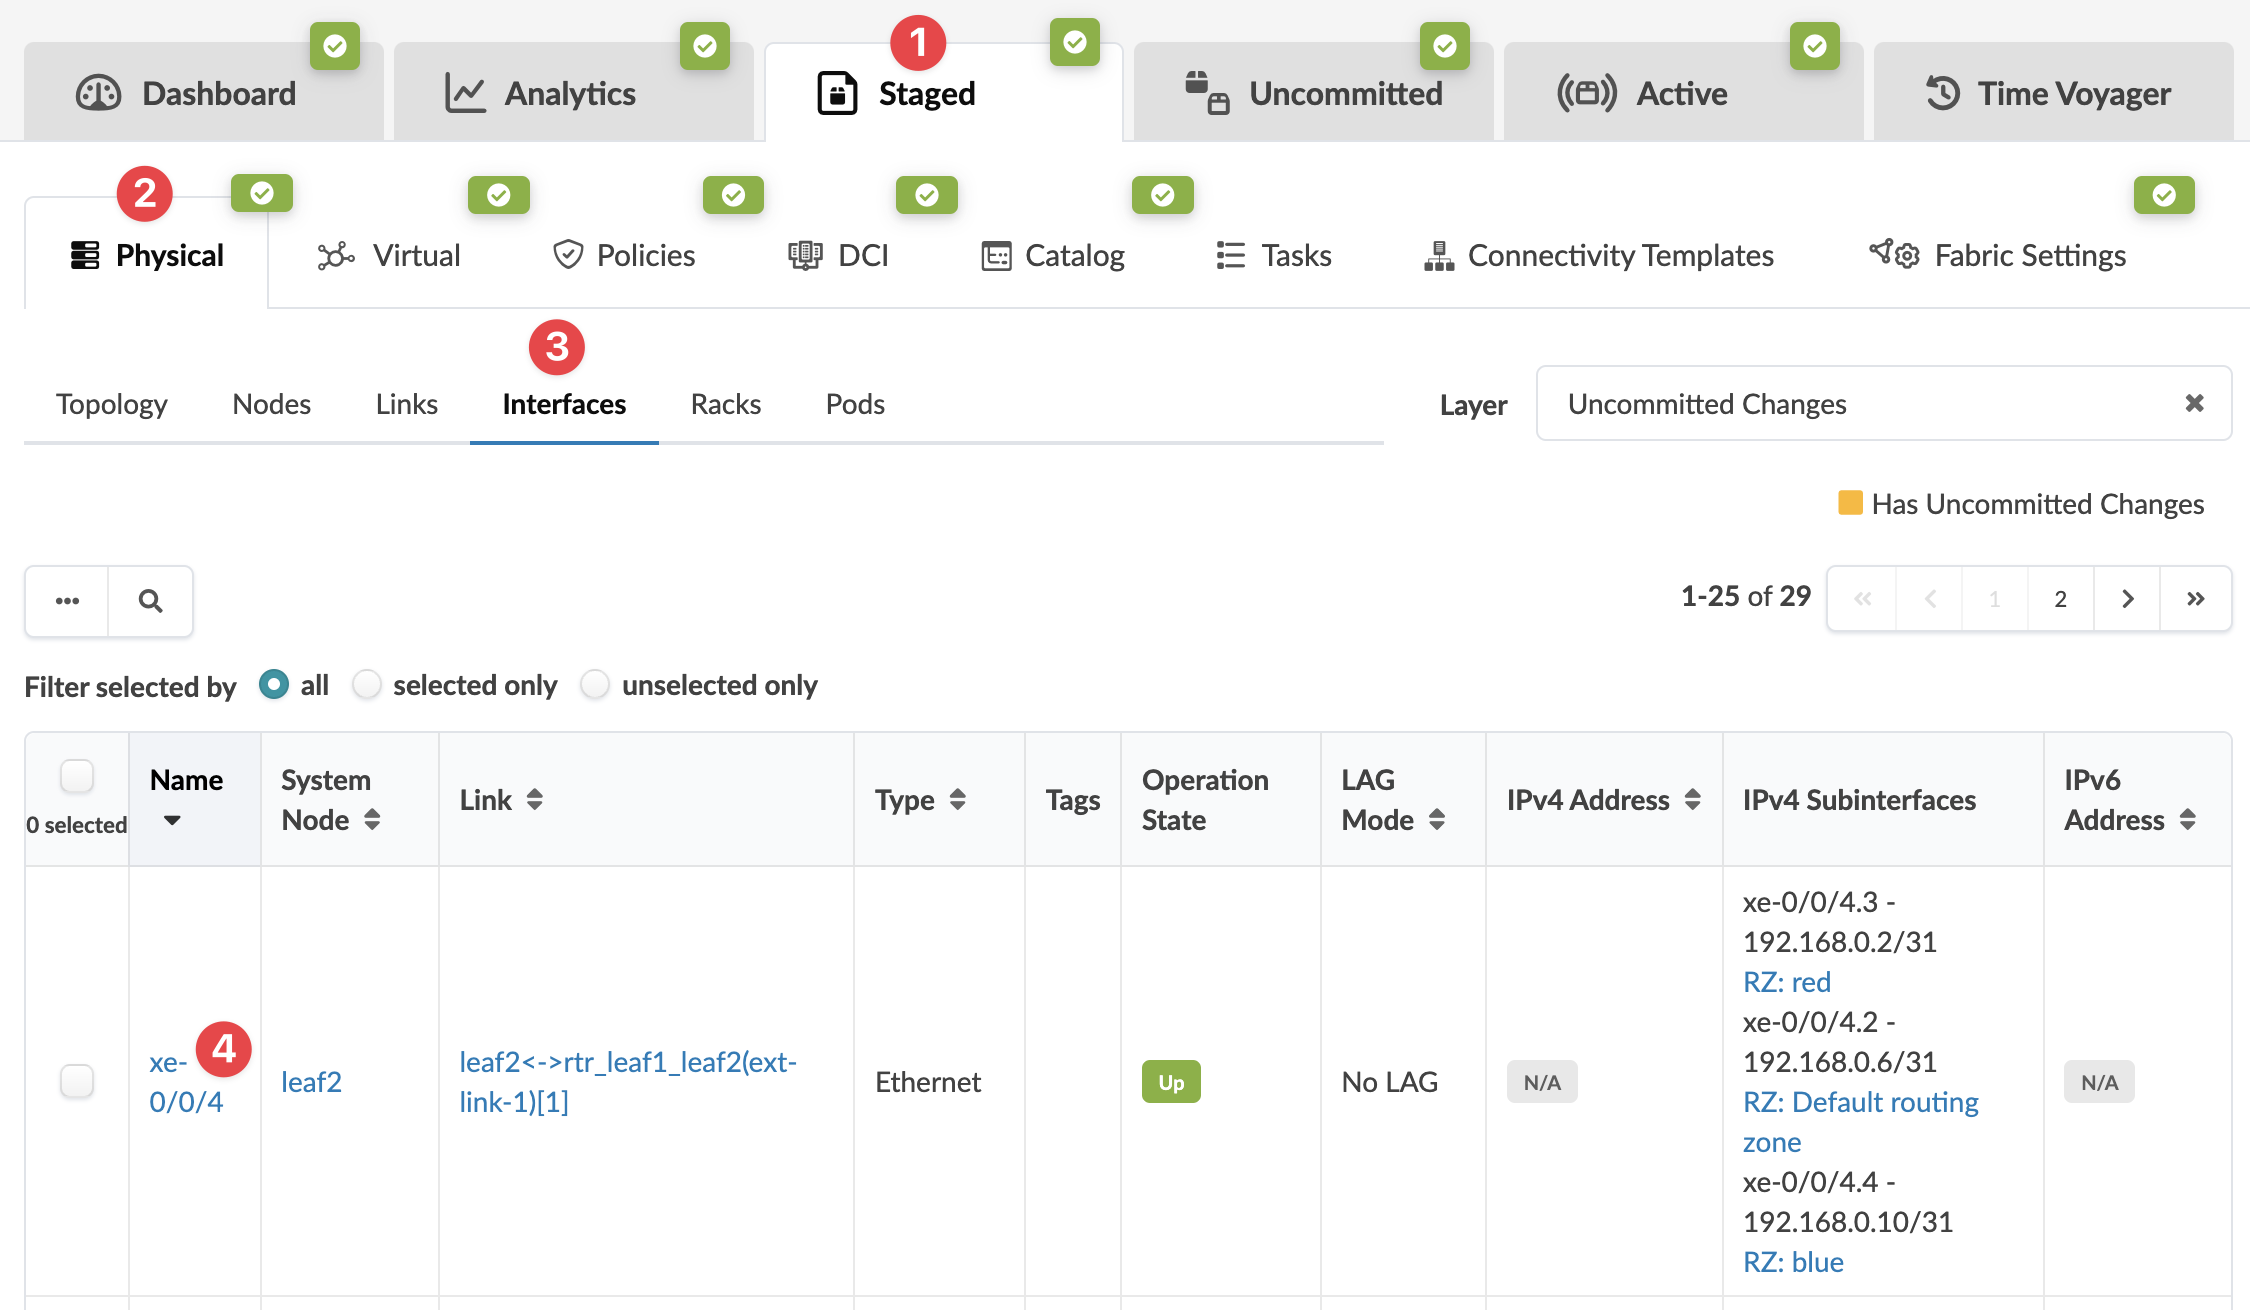 The Interface Detail page appears.
 -
Click the Bring interface down button.
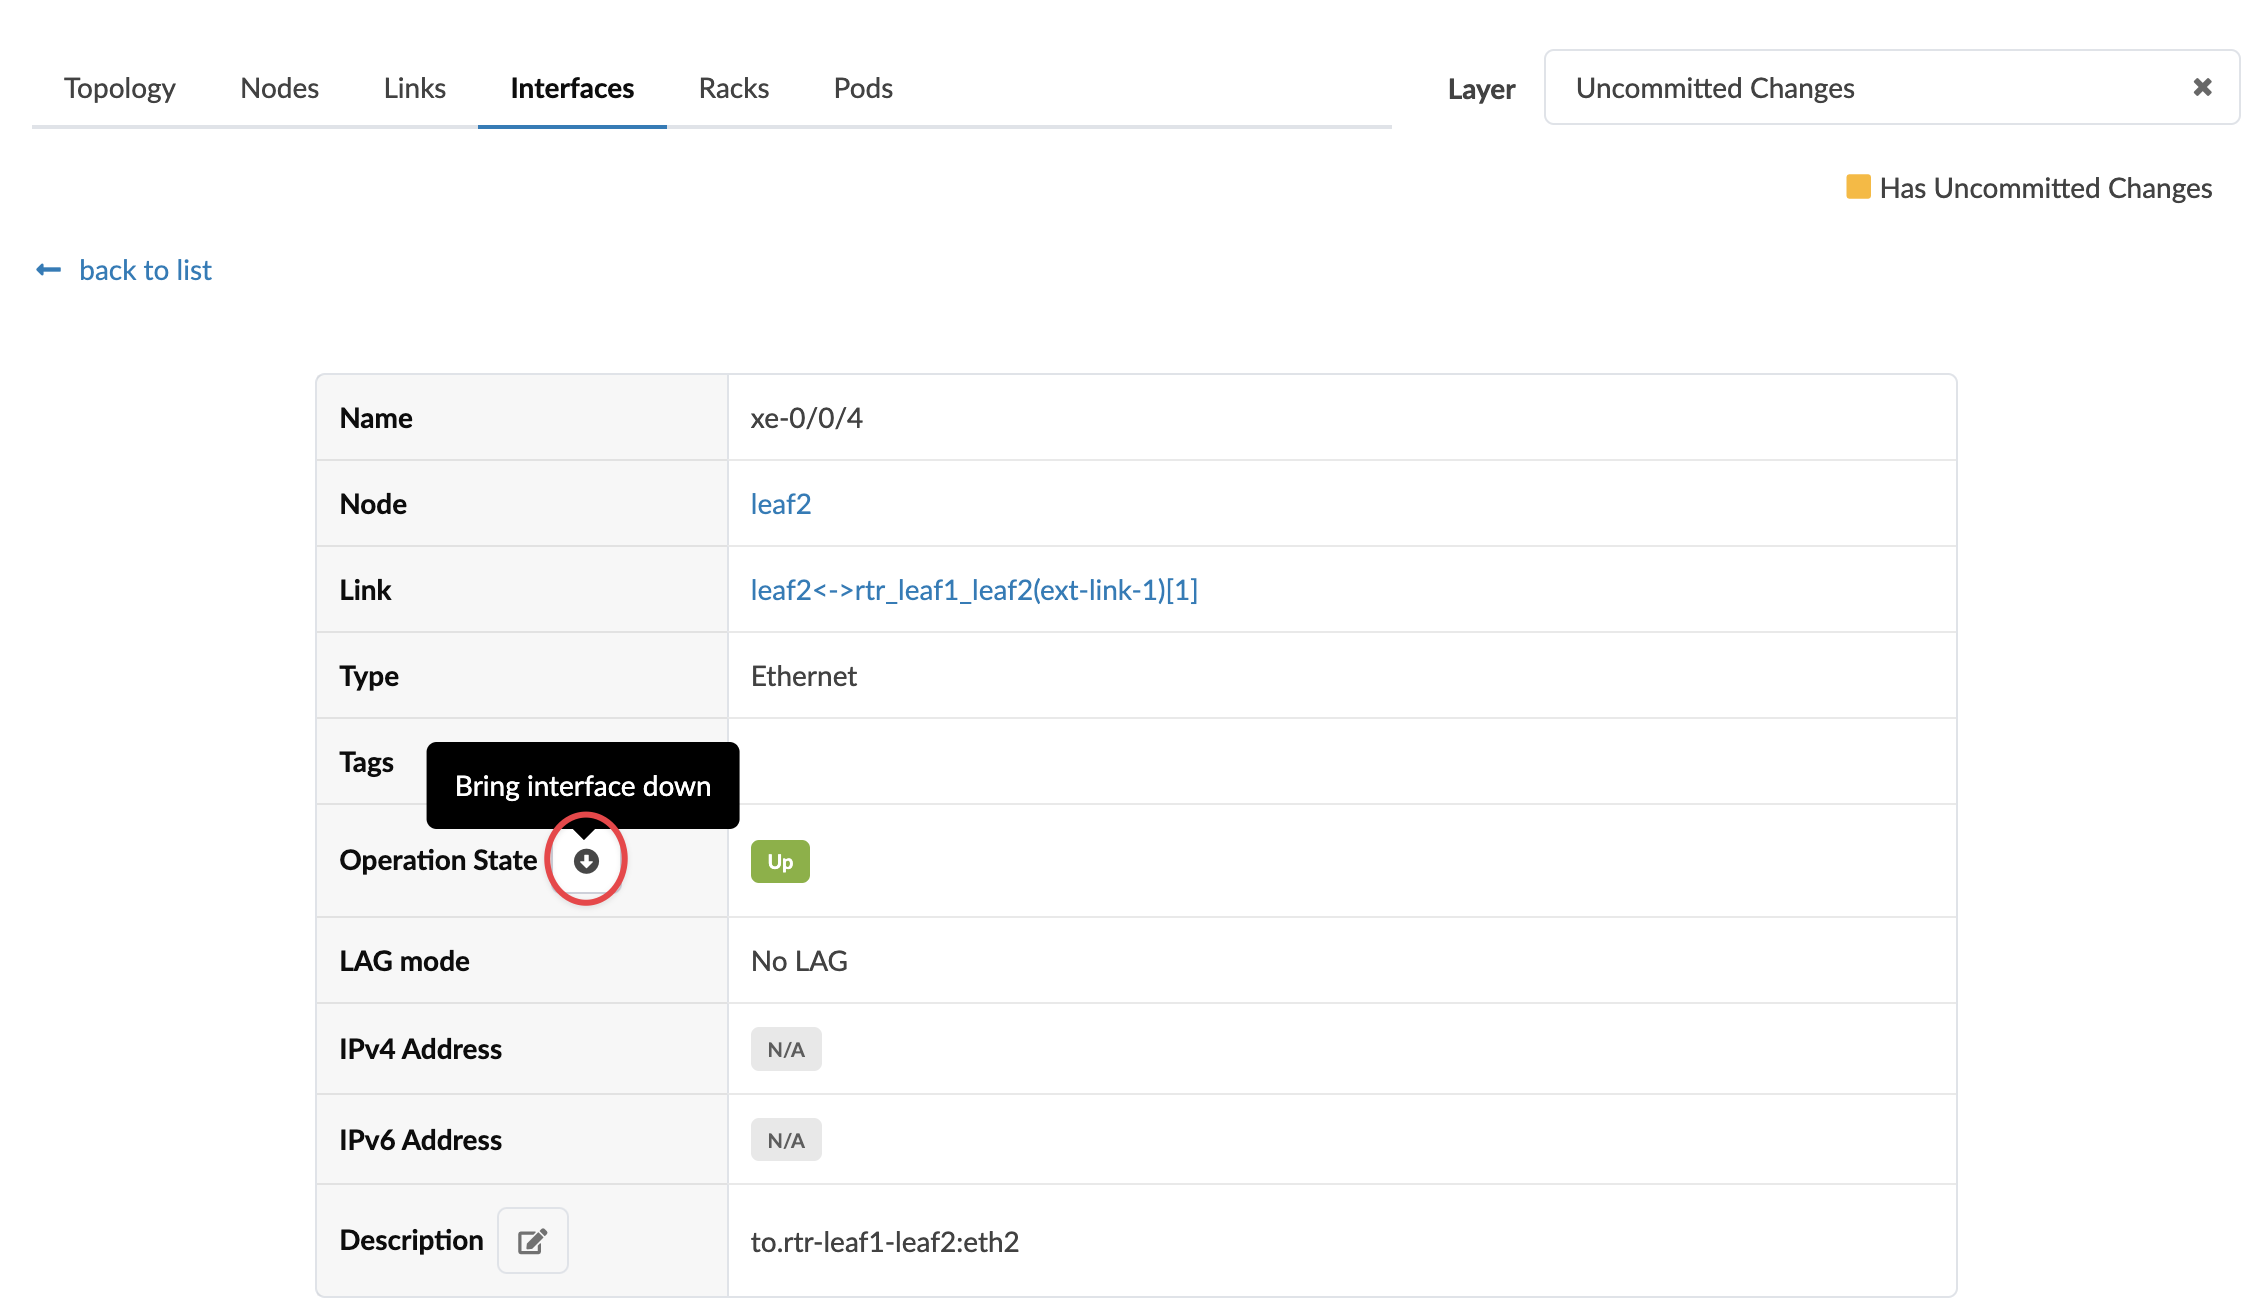 The change has been staged and is ready to commit.
To deploy the change to the active blueprint, commit
from the Uncommitted tab.