Unassign Device (Datacenter)
Unassign Device (from Device Selection Panel)
To unassign a device using the GUI:
-
From the blueprint, navigate to Staged > Physical >
Topology, and click the device to be removed.
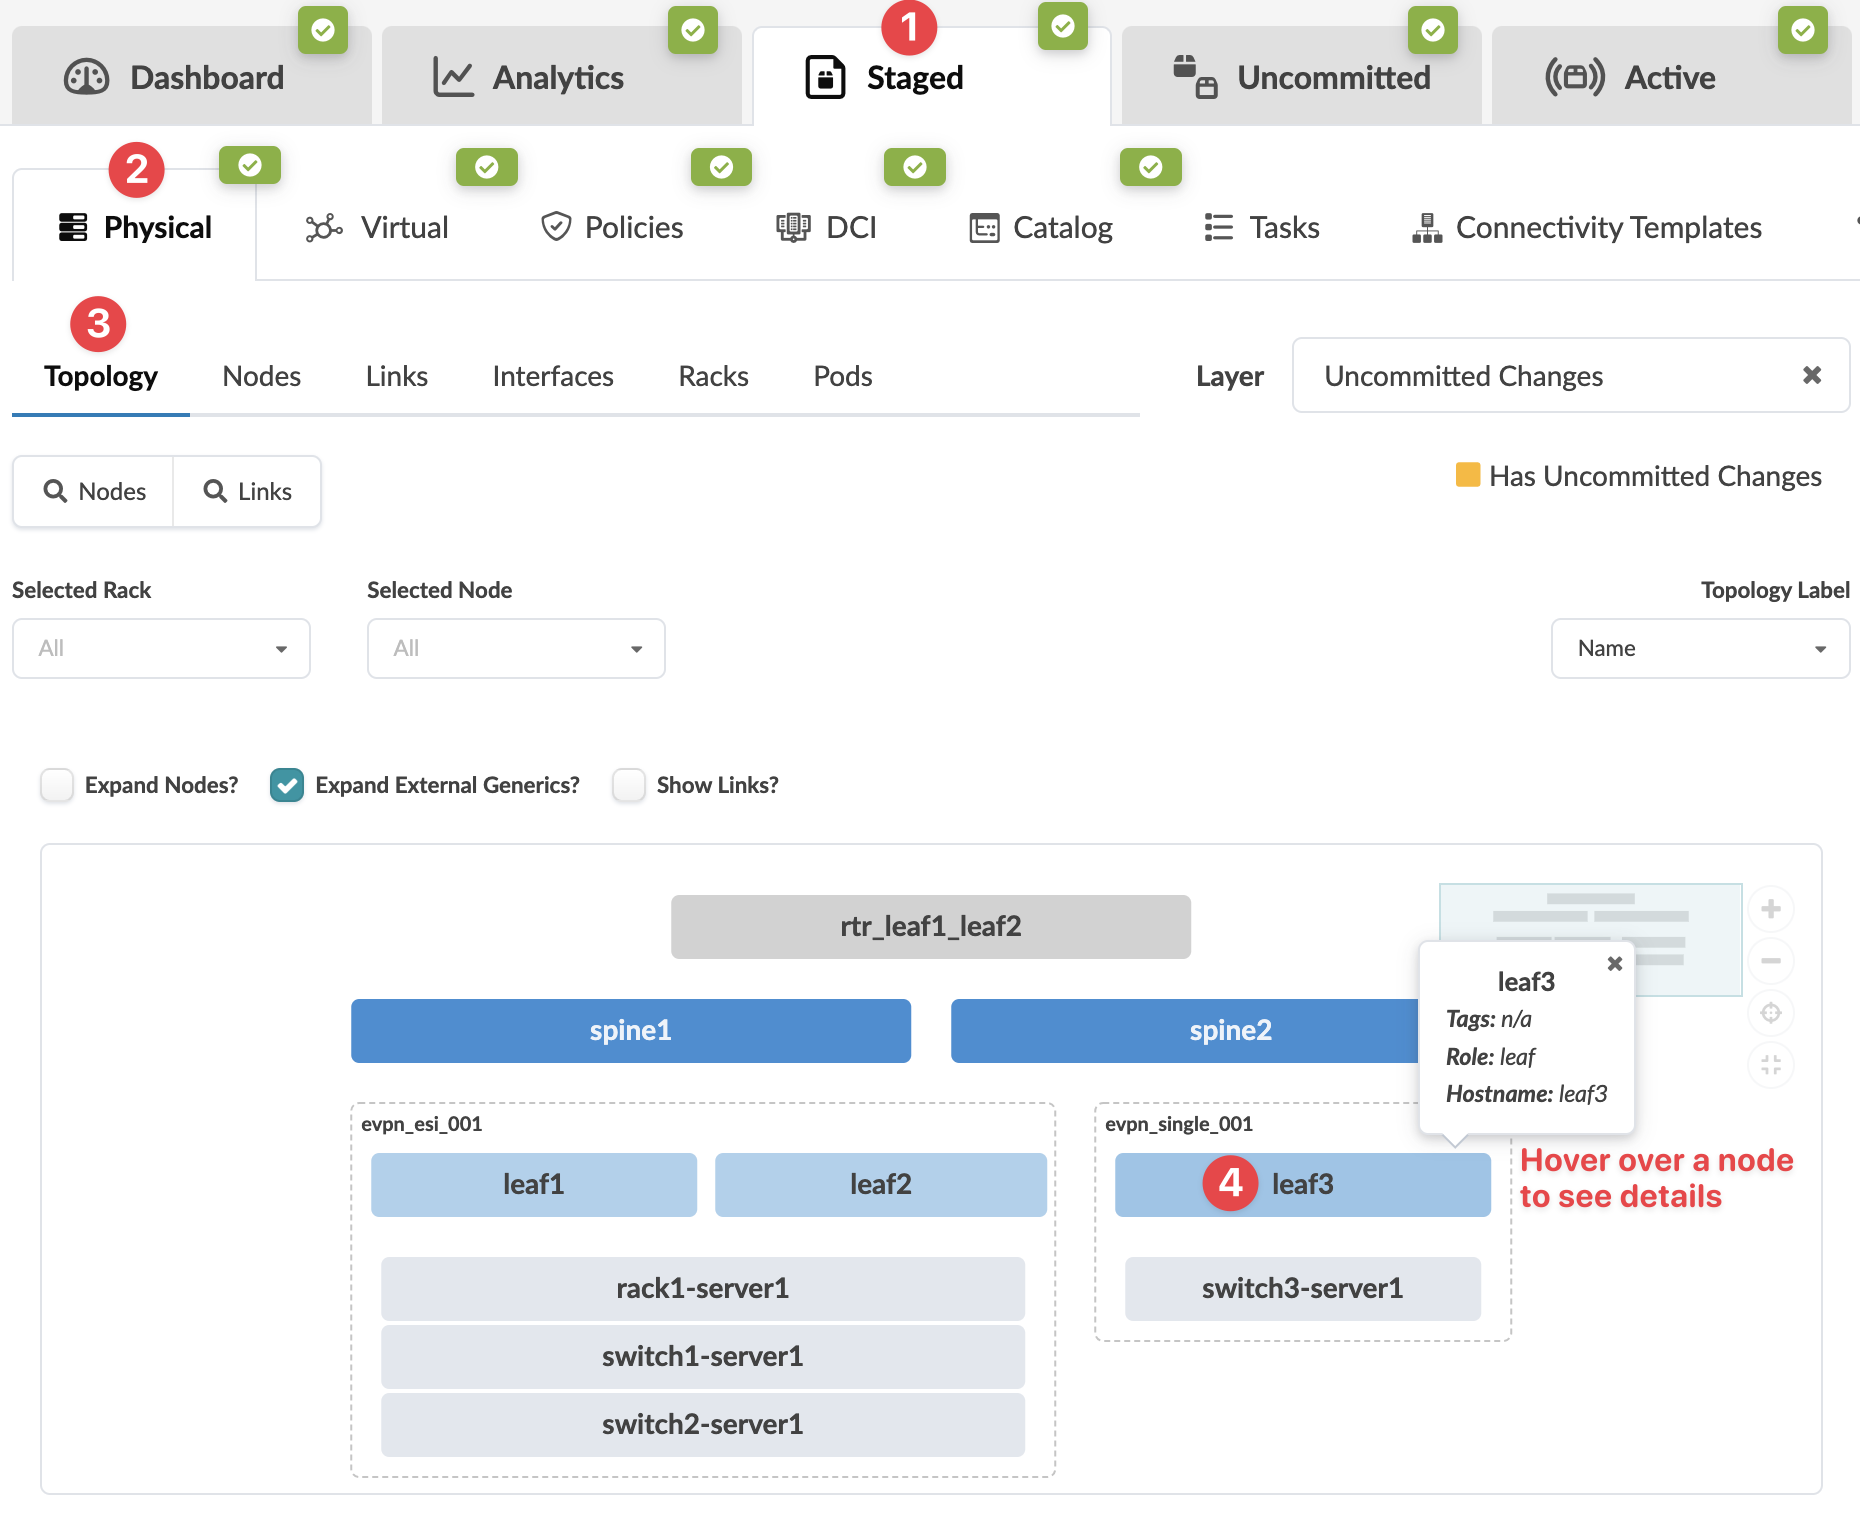 The Topology selection appears.
 -
In the right panel, in the Device tab, click the
Edit button for S/N.
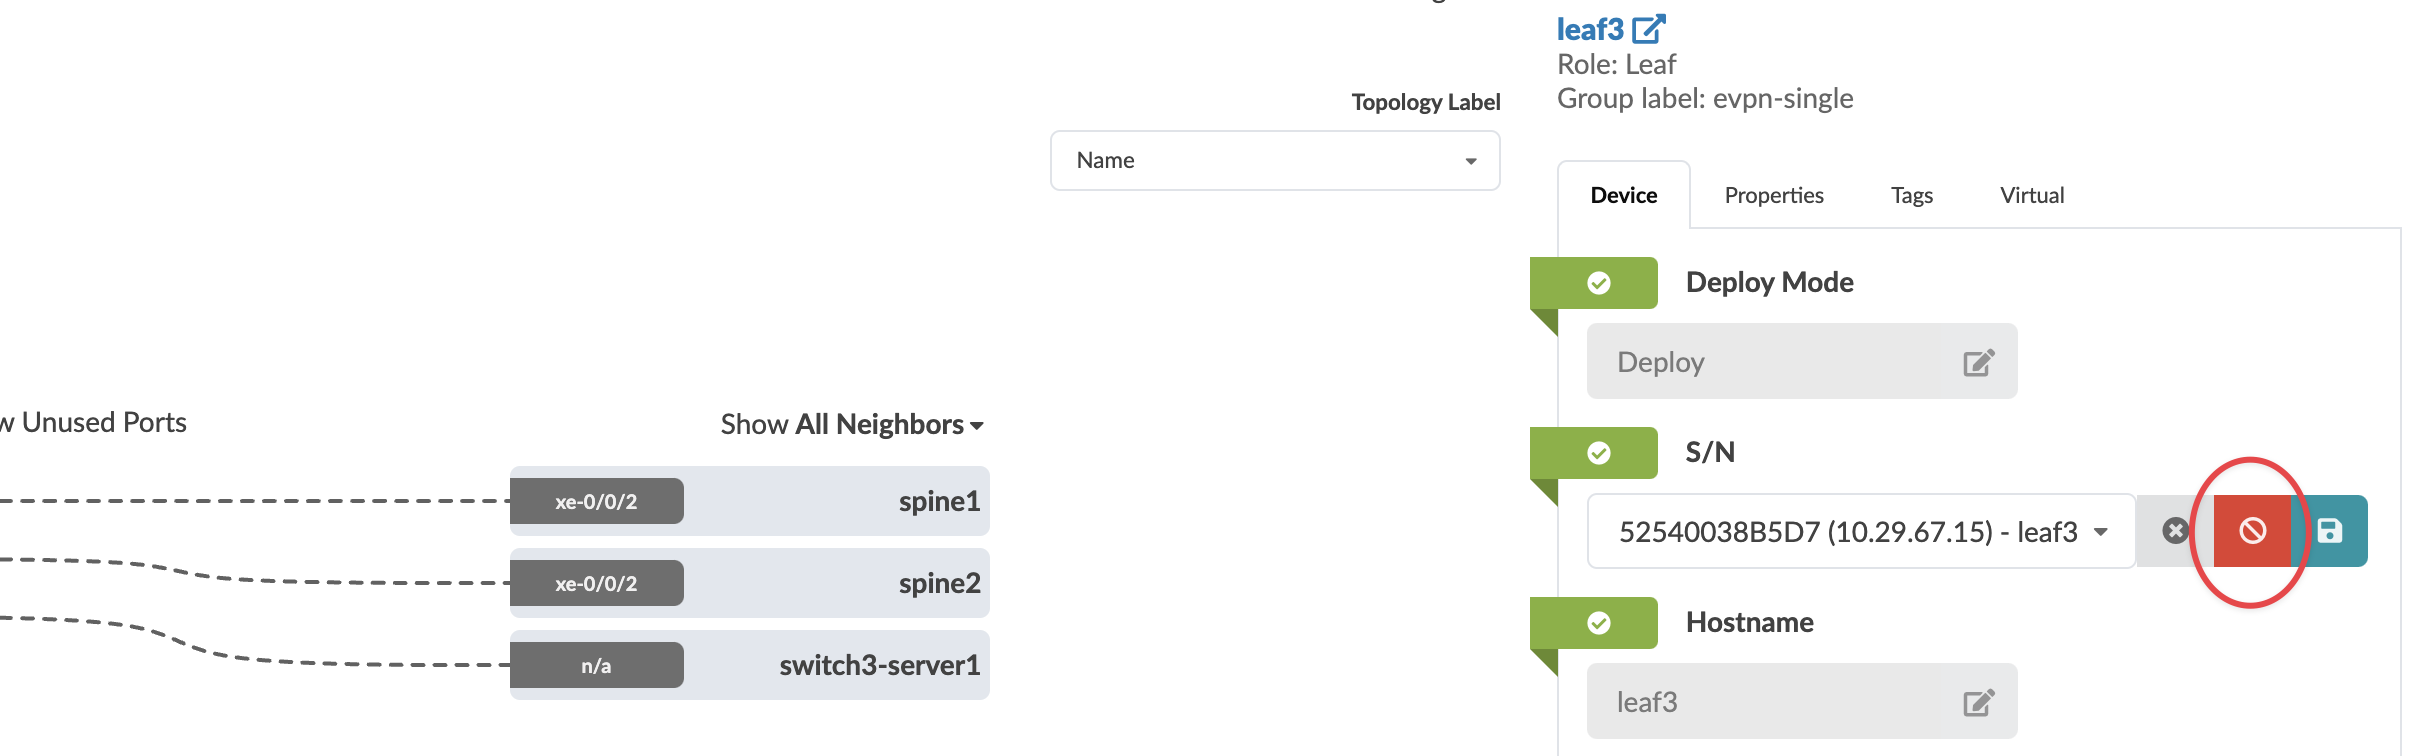
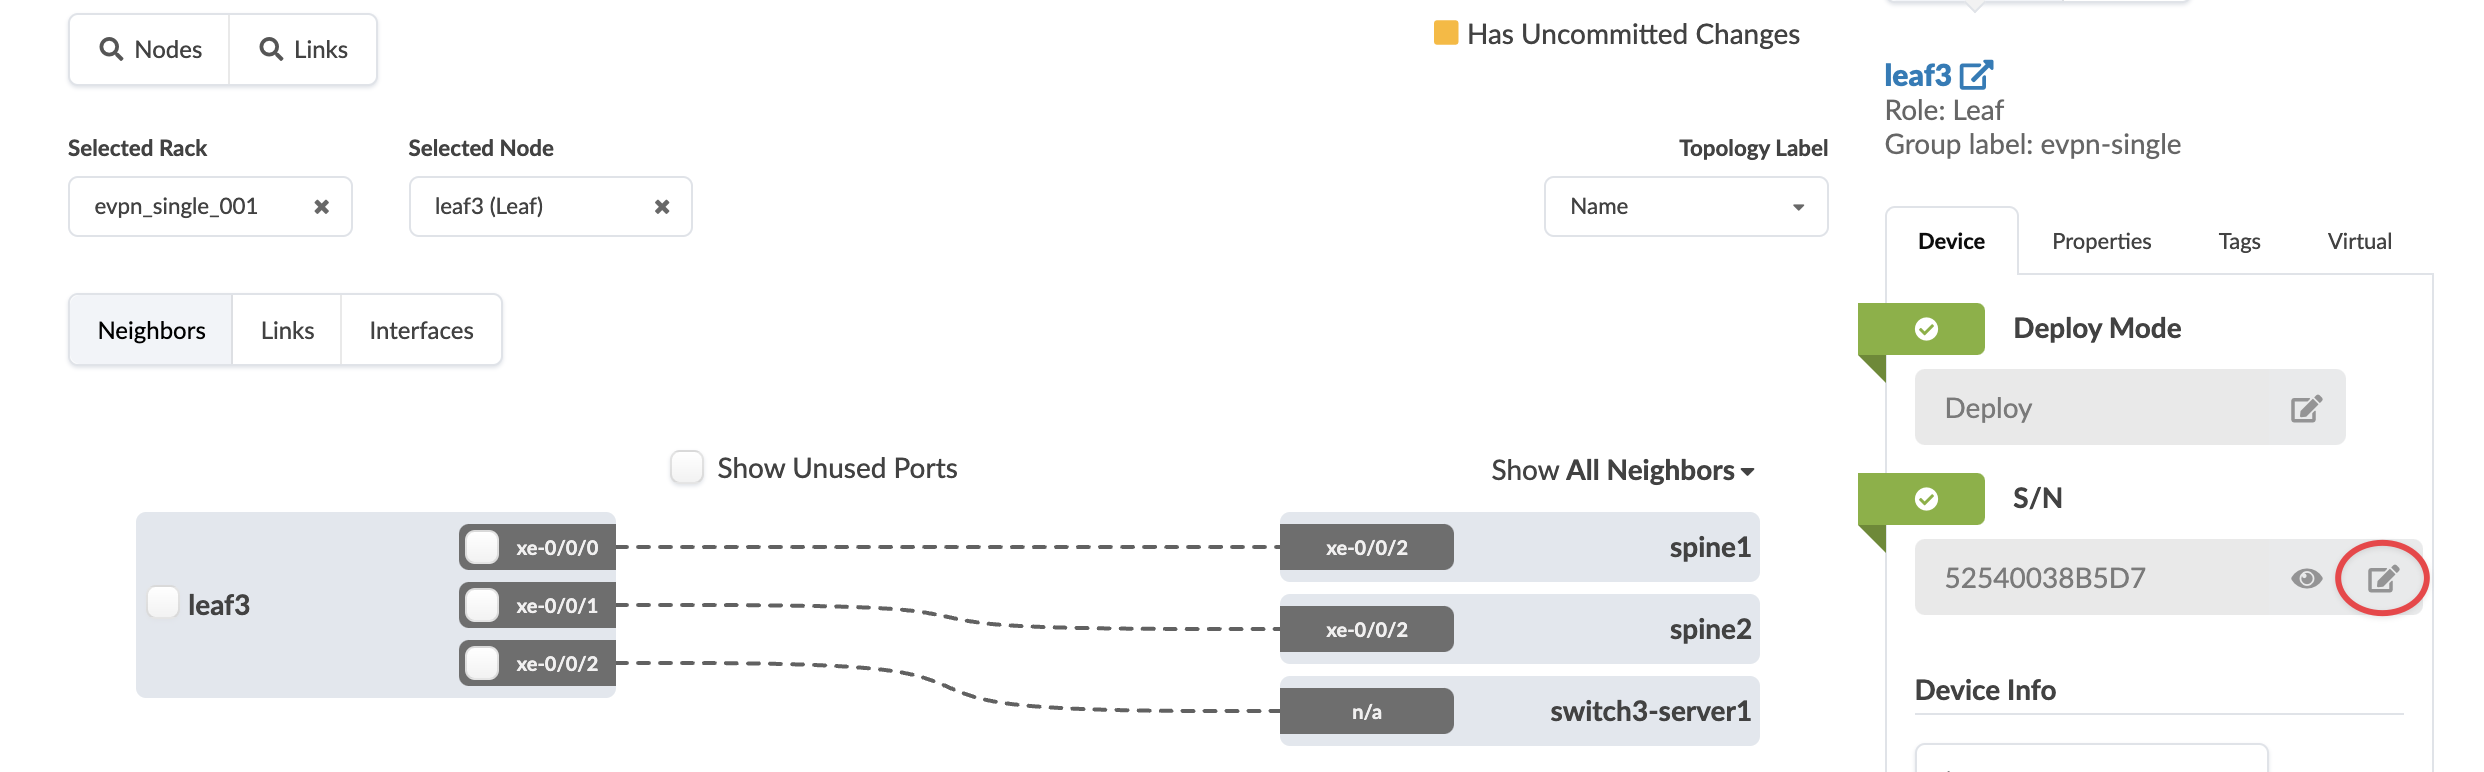 The S/N (system ID) field becomes editable
 -
Click the red square in the S/N section to unassign
the system ID.
The S/N is unassigned, and the deploy mode automatically changes to Not Set.
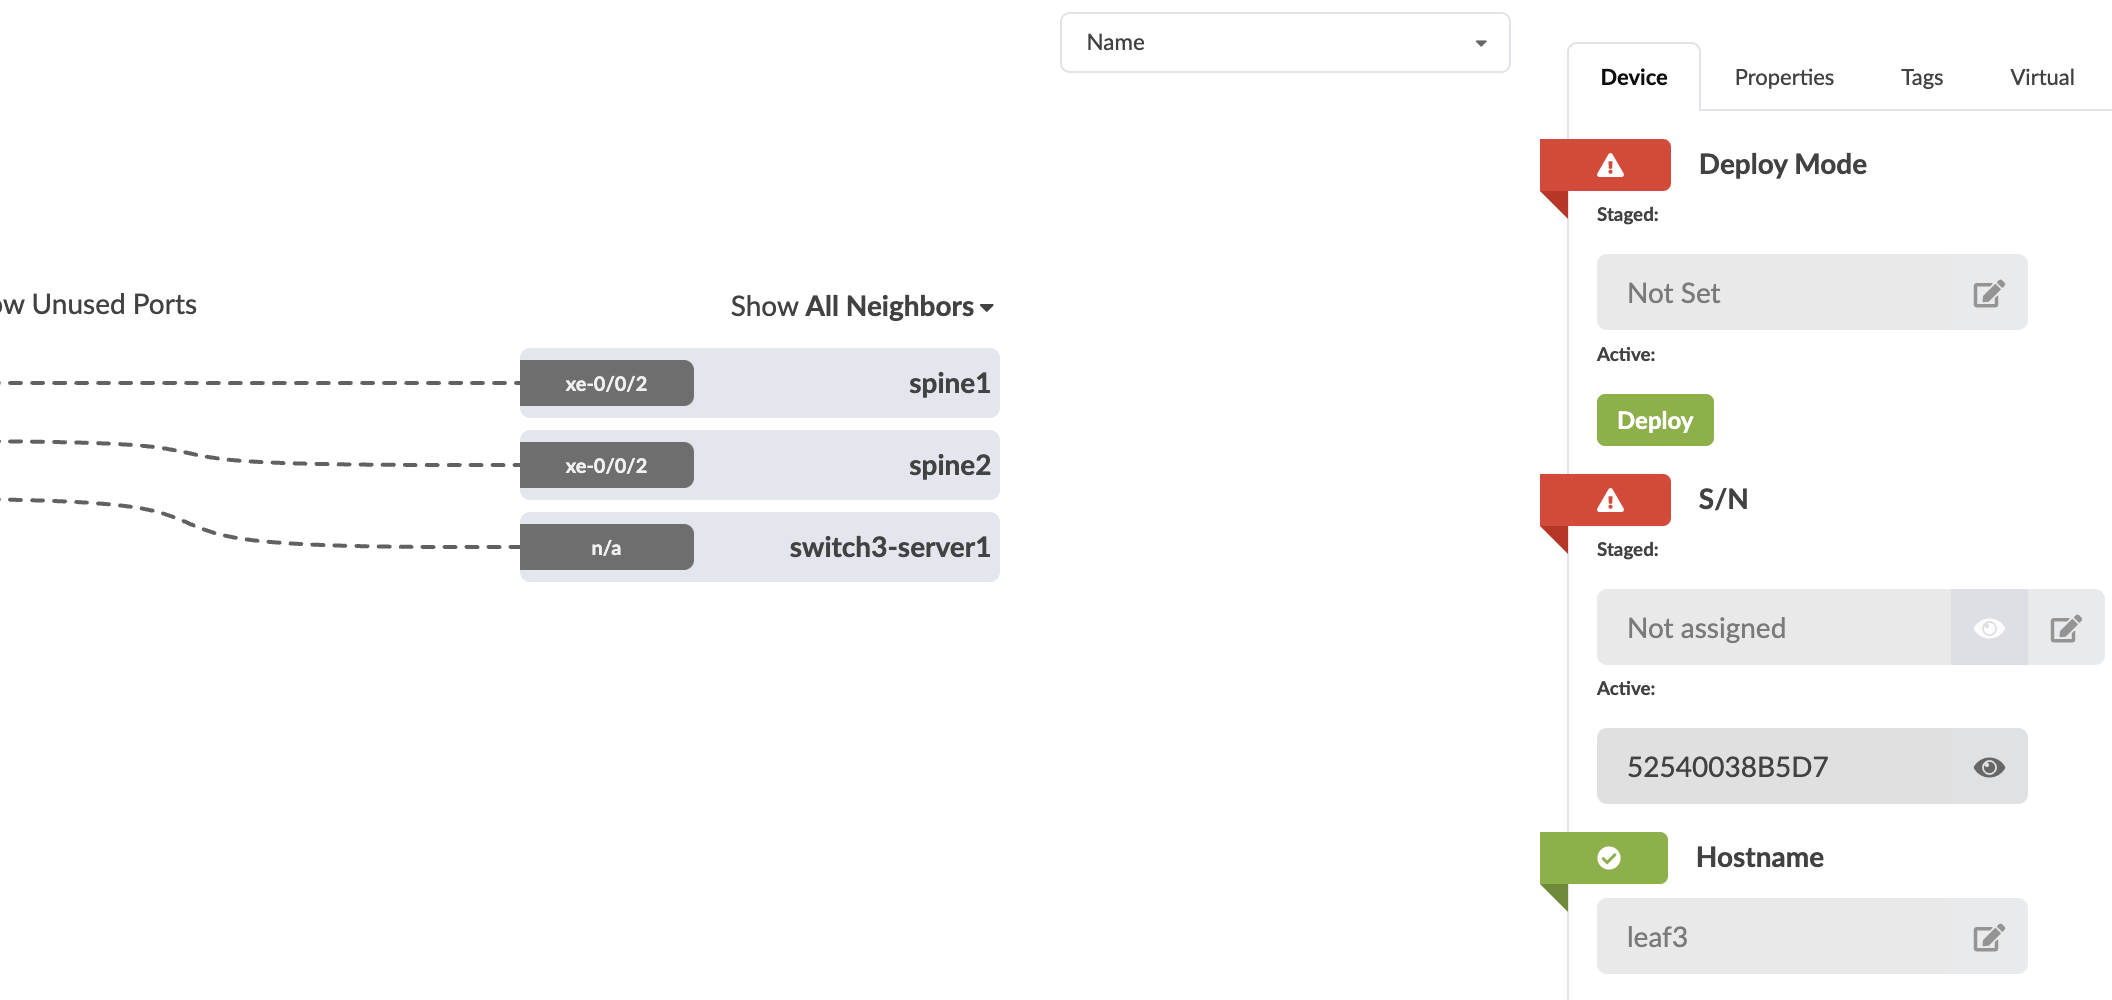
When you're ready to activate your changes, go to the Uncommitted tab to review and commit (or discard) your changes. The device will still be under Apstra management. It's ready and available to be assigned to any blueprint.
To remove the device completely from Apstra management, remove the device from Managed Devices.
Unassign Device(s) (from Devices Build Panel)
To unassign a device using the GUI:
-
From the blueprint, navigate to Staged > Physical >
Topology and click the Devices tab in
the Build panel (on the right), then click the status
indicator for Assigned System IDs.
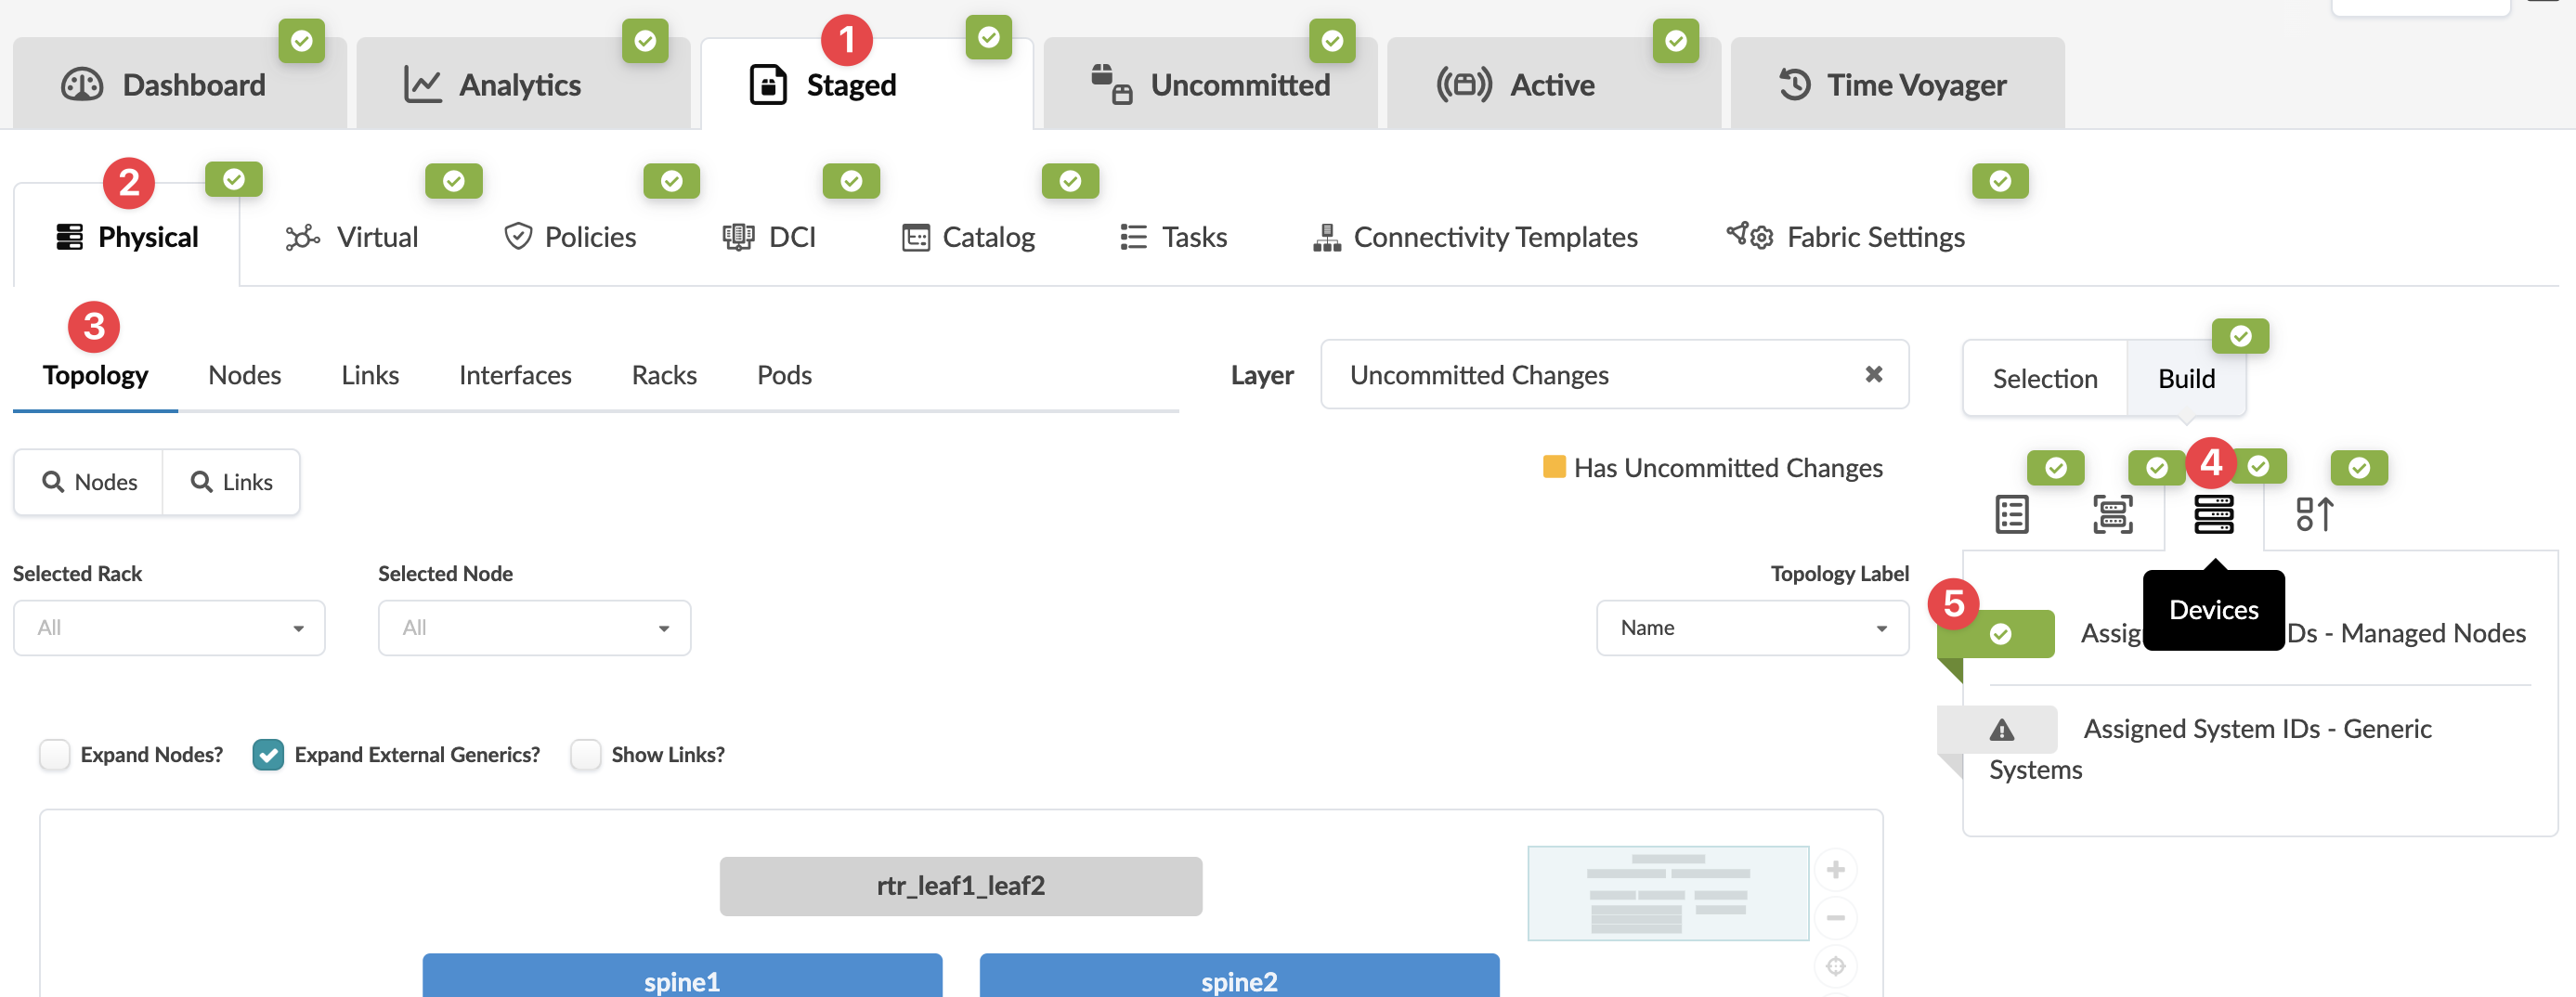 The Assigned System IDs list appears in the right panel.
 -
Click the Remove assignment button (trash can icon)
for the device to unassign. The deploy mode is automatically set to
Not Set.
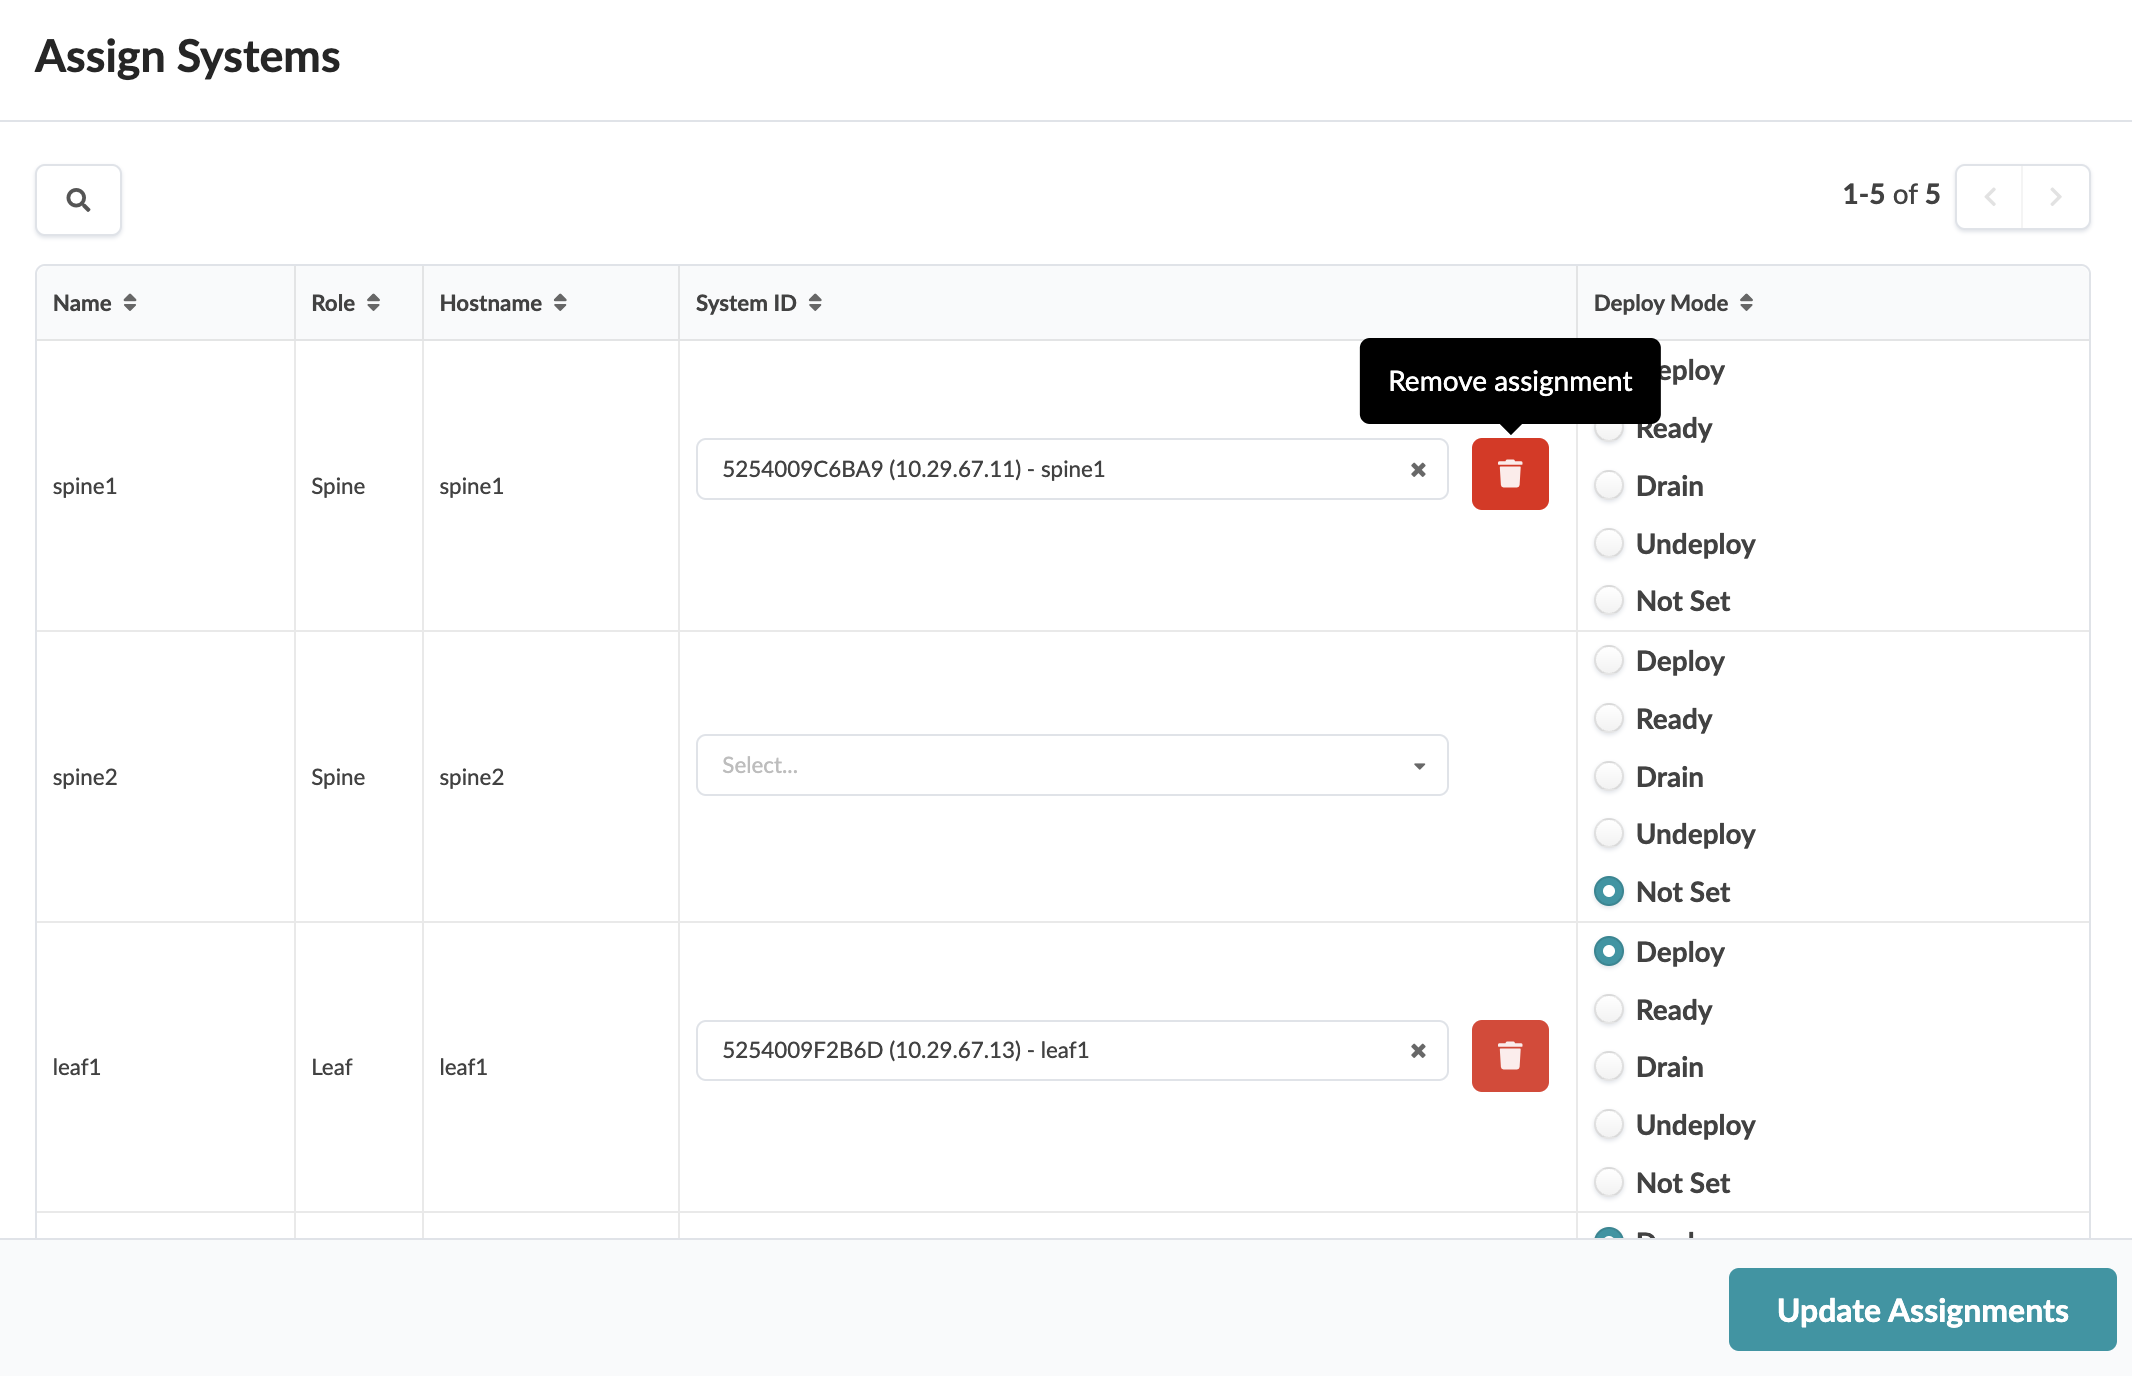
The change is staged and you're returned to the Topology view.
When you're ready to activate your changes, go to the Uncommitted tab to review and commit (or discard) your changes. The device will still be under Apstra management. It's ready and available to be assigned to any blueprint.
To remove the device completely from Apstra management, remove the device from Managed Devices.