Configure SAML 2.0 SSO

This document walks you through the process of setting up SAML 2.0 Single-Sign On (SSO). This process uses Okta as the Identity Provider (IdP), but other IdPs are supported, such as Active Directory and Google Ping.

Prerequisites

  • Download the Okta Verify app for Android or iOS and add an account for your organization. During authentication, you are prompted to enter a code or receive a push notification to sign in.

Create an SSO Provider Role Mapping

To create an SSO provider role mapping from the GUI:
  1. From the left navigation menu, navigate to External Systems > Providers > Provider Role Mapping, then click the Edit button.
    The Edit Role Mappings dialog opens.
  2. Click Add mapping.
  3. To create an admin role mapping, click the dropdown menu and select administrator.
  4. Enter a group name that you want to have admin privileges. In this example, we entered "admin_group".
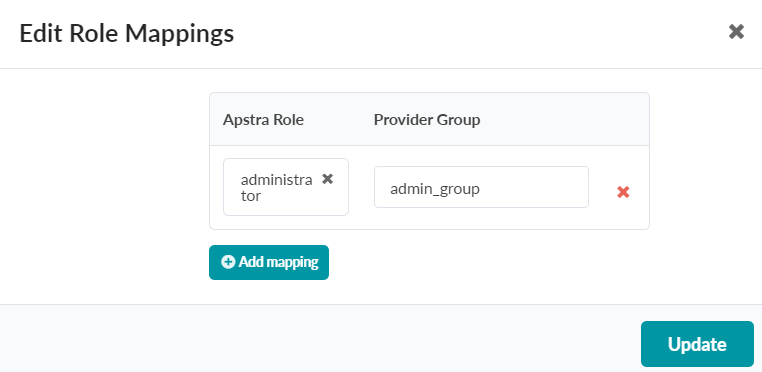
    Edit Role Mappings interface with table showing Apstra Role administrator and Provider Group admin_group, plus buttons to add mapping, update, and close.
    This admin role maps to the corresponding group we created within Okta.
  5. Click Update.
    The new Role to Provider Group role mapping is added and you're returned to the Provider Role Mapping page.

Create a New App Integration in Okta

Follow these steps to set up HPE Networking Apstra Data Center Director as an app integration to work with Okta. Configure SAML 2.0 and SSO parameters for the desired SSO behavior.

To create an app integration in Okta from the GUI:

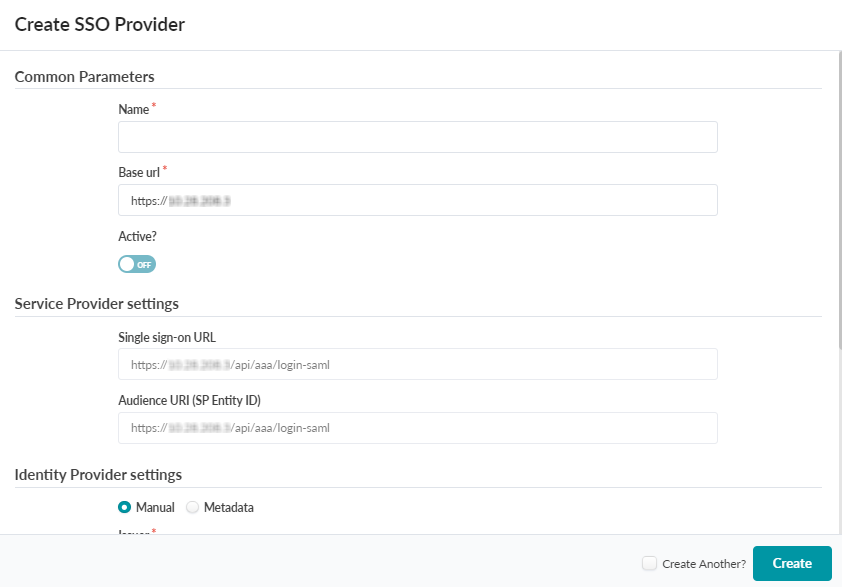
  1. From the left navigation menu, navigate to External Systems > Providers > SSO Providers, then click Create SSO Provider.
    The Create SSO Provider dialog opens.
  2. Enter a Provider name.

    User interface for creating an SSO provider with fields for Name, Base URL, Single sign-on URL, Audience URI, and Issuer. Options to set Active status, configure manually or via metadata, and buttons for Create and Create Another.
  3. From your Okta dashboard, select the Applications dropdown > Applications > Create App Integration.
    The Create a new app window displays.
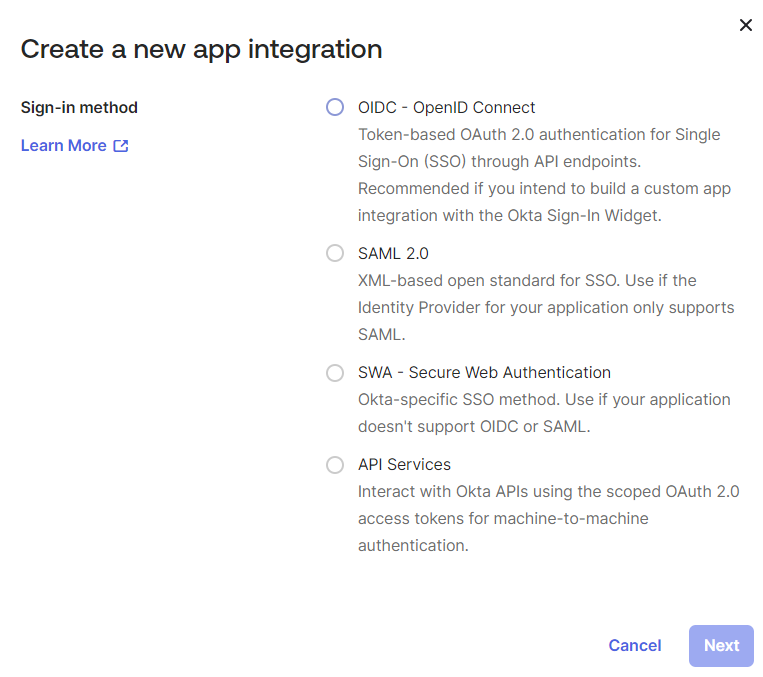
    Dialog box for selecting app integration sign-in method in Okta: OIDC OpenID Connect, SAML 2.0, SWA Secure Web Authentication, API Services. OIDC OpenID Connect is selected. Includes Learn More link, Cancel, and Next buttons.
  4. Select SAML 2.0 and click Next.
  5. Enter an App Name and click Next.
    The SAML Settings window displays.
  6. Copy and paste the Single sign-on URL from the Create SSO Provider window in the GUI.
  7. Copy and paste the Audience URI (SP Entity ID) from the Create SSO Provider window in the GUI.
  8. Add attribute statements, or user fields Okta sends to Apstra DC Director after a successful authentication. Apstra DC Director recognizes these fields as Okta IdP credentials.

    user.firstName Returns the first name of the user.

    user.lastName Returns the last name of the user.

  9. Add group attribute statements for Apstra DC Director to recognize.
    For example, you might only want groups with an “admin_” prefix to be able to authenticate.
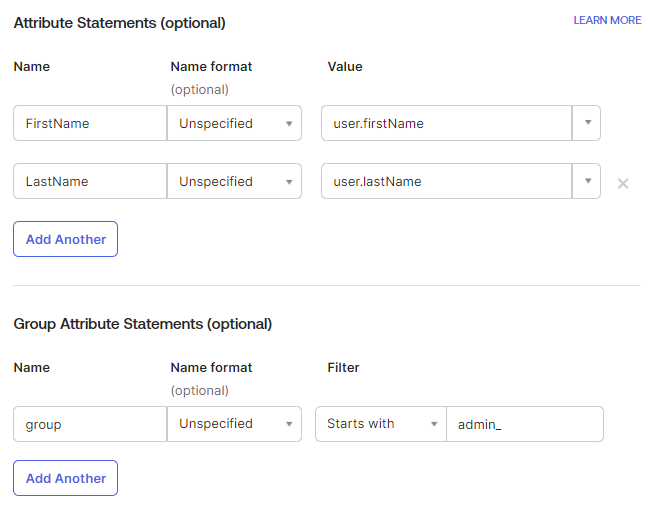
    Configuration interface for setting up Attribute Statements and Group Attribute Statements for identity management. Two attributes: FirstName mapped to user.firstName, LastName to user.lastName. One group attribute: group with filter for admin_ prefix. Includes Add Another option and Learn More link.
  10. Click Next.
  11. (Optional) Provide additional feedback.
  12. Click Finish.
    Your new app integration displays.
  13. Under Metadata details, copy and paste the following into the corresponding fields of the Create SSO Provider window in the GUI.
    • Sign on URL
    • Issuer URL
    • Signing Certificate (Certificate)
  14. Click Create.
    Your new Okta IdP displays in the SSO provider list.
  15. To verify that SSO is configured, log out of Apstra DC Director. A Sign in with SSO link should display in the login screen. User interface for creating an Interface Policy with fields for label input, 802.1x authentication toggle, link auto-negotiation toggle, port control options, host mode options, MAC auth bypass checkbox, re-auth timeout field, Create Another checkbox, and Create button for finalizing the policy.
Assign Your New Okta Integration to Users

Assign users to your Apstra DC Director app integration with Okta.
  1. Select Applications > Applications > your new app integration.
  2. Select the Assignments tab.
  3. Click the Assign dropdown > Assign to People.
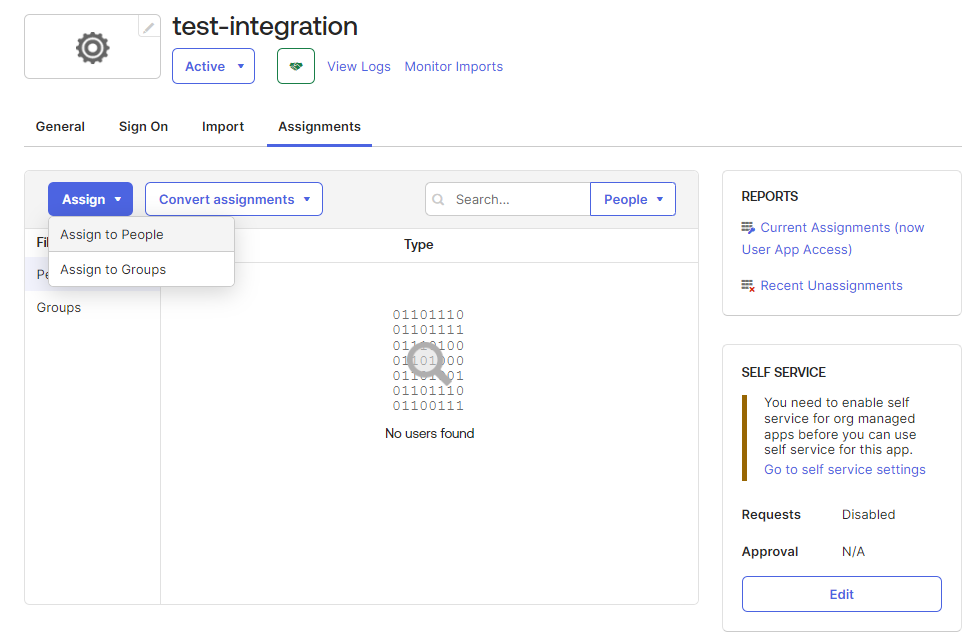
    User interface for managing assignments with options to assign tasks, search, and view reports. Tabs include General, Sign On, Import, Assignments. Status is Active.
    The Assign to People window displays.
  4. Select Assign next to a user.
  5. Ensure the username is correct and click Save and Go Back.
  6. Repeat this process for each user you want to have SSO authentication, then click Done.
    The assigned people appear the in the People list.

Assign Your New Okta Integration to User Groups

Assign groups of users to the Apstra DC Director app integration with Okta.
  1. From the Assignments tab, click the Assign dropdown > Assign to Groups.
    The Assign to Groups window displays.
  2. Select Assign next to each user group you want to have SSO authentication.
  3. Click Done.
    The assigned user groups appear in the Groups list.
  4. (Optional) To verify and edit specific People or Group assignments, select the Directory dropdown, then select the People or Group tab and click the username or user group you want to edit.
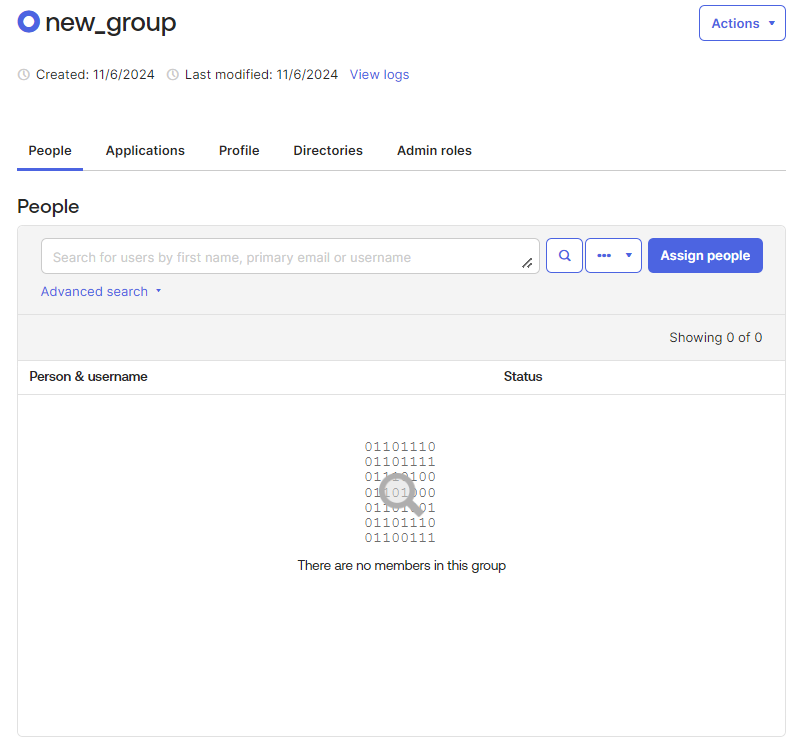
    User management interface for new_group with selected People tab showing no members and a search bar. Binary code appears in Person & username section.
  5. To review the settings and assignments of your new Okta integration, click the General tab.

Verify That SSO Configuration Was Successful

  1. Sign out of your Apstra DC Director instance. On the login screen, click Sign in With SSO.

    You are redirected to an Okta login page.

  2. Enter credentials for an assigned user and click Sign in.
    You are prompted to provide further authentication with the Okta Verify app. After successful authentication, you are redirected to the Apstra DC Director GUI.
  3. Select the profile icon at the bottom left of the page to review profile details.
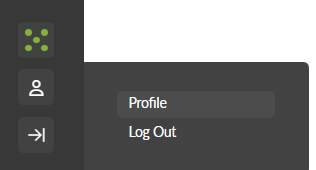
    User interface sidebar with icons for dashboard four green dots, profile person silhouette, and logout right arrow. Dropdown menu: Profile, Log Out.
    Under User profile, note the Roles field.
  4. Select External Systems > Providers > SSO Providers.
    Note that depending on configured role mapping, you may or may not have access to this page. If you are assigned to a user group with administrator role, you can access the SSO Providers page.
    Your new Okta integration is visible in the list, and should have an On Active toggle.