Assign Agent Profile

If you're using agent profiles, you can assign one to an agent when you create the agent, or you can assign it later. If you assign it later, you can assign it to one agent at a time, or to multiple agents simultaneously, as shown below.

Assign Agent Profile to One Agent

  1. From the left navigation menu, navigate to Devices >Managed Devices, click the three dots in the Actions column (right side) for the device that you want to update, then click the Edit button in the Agent menu.
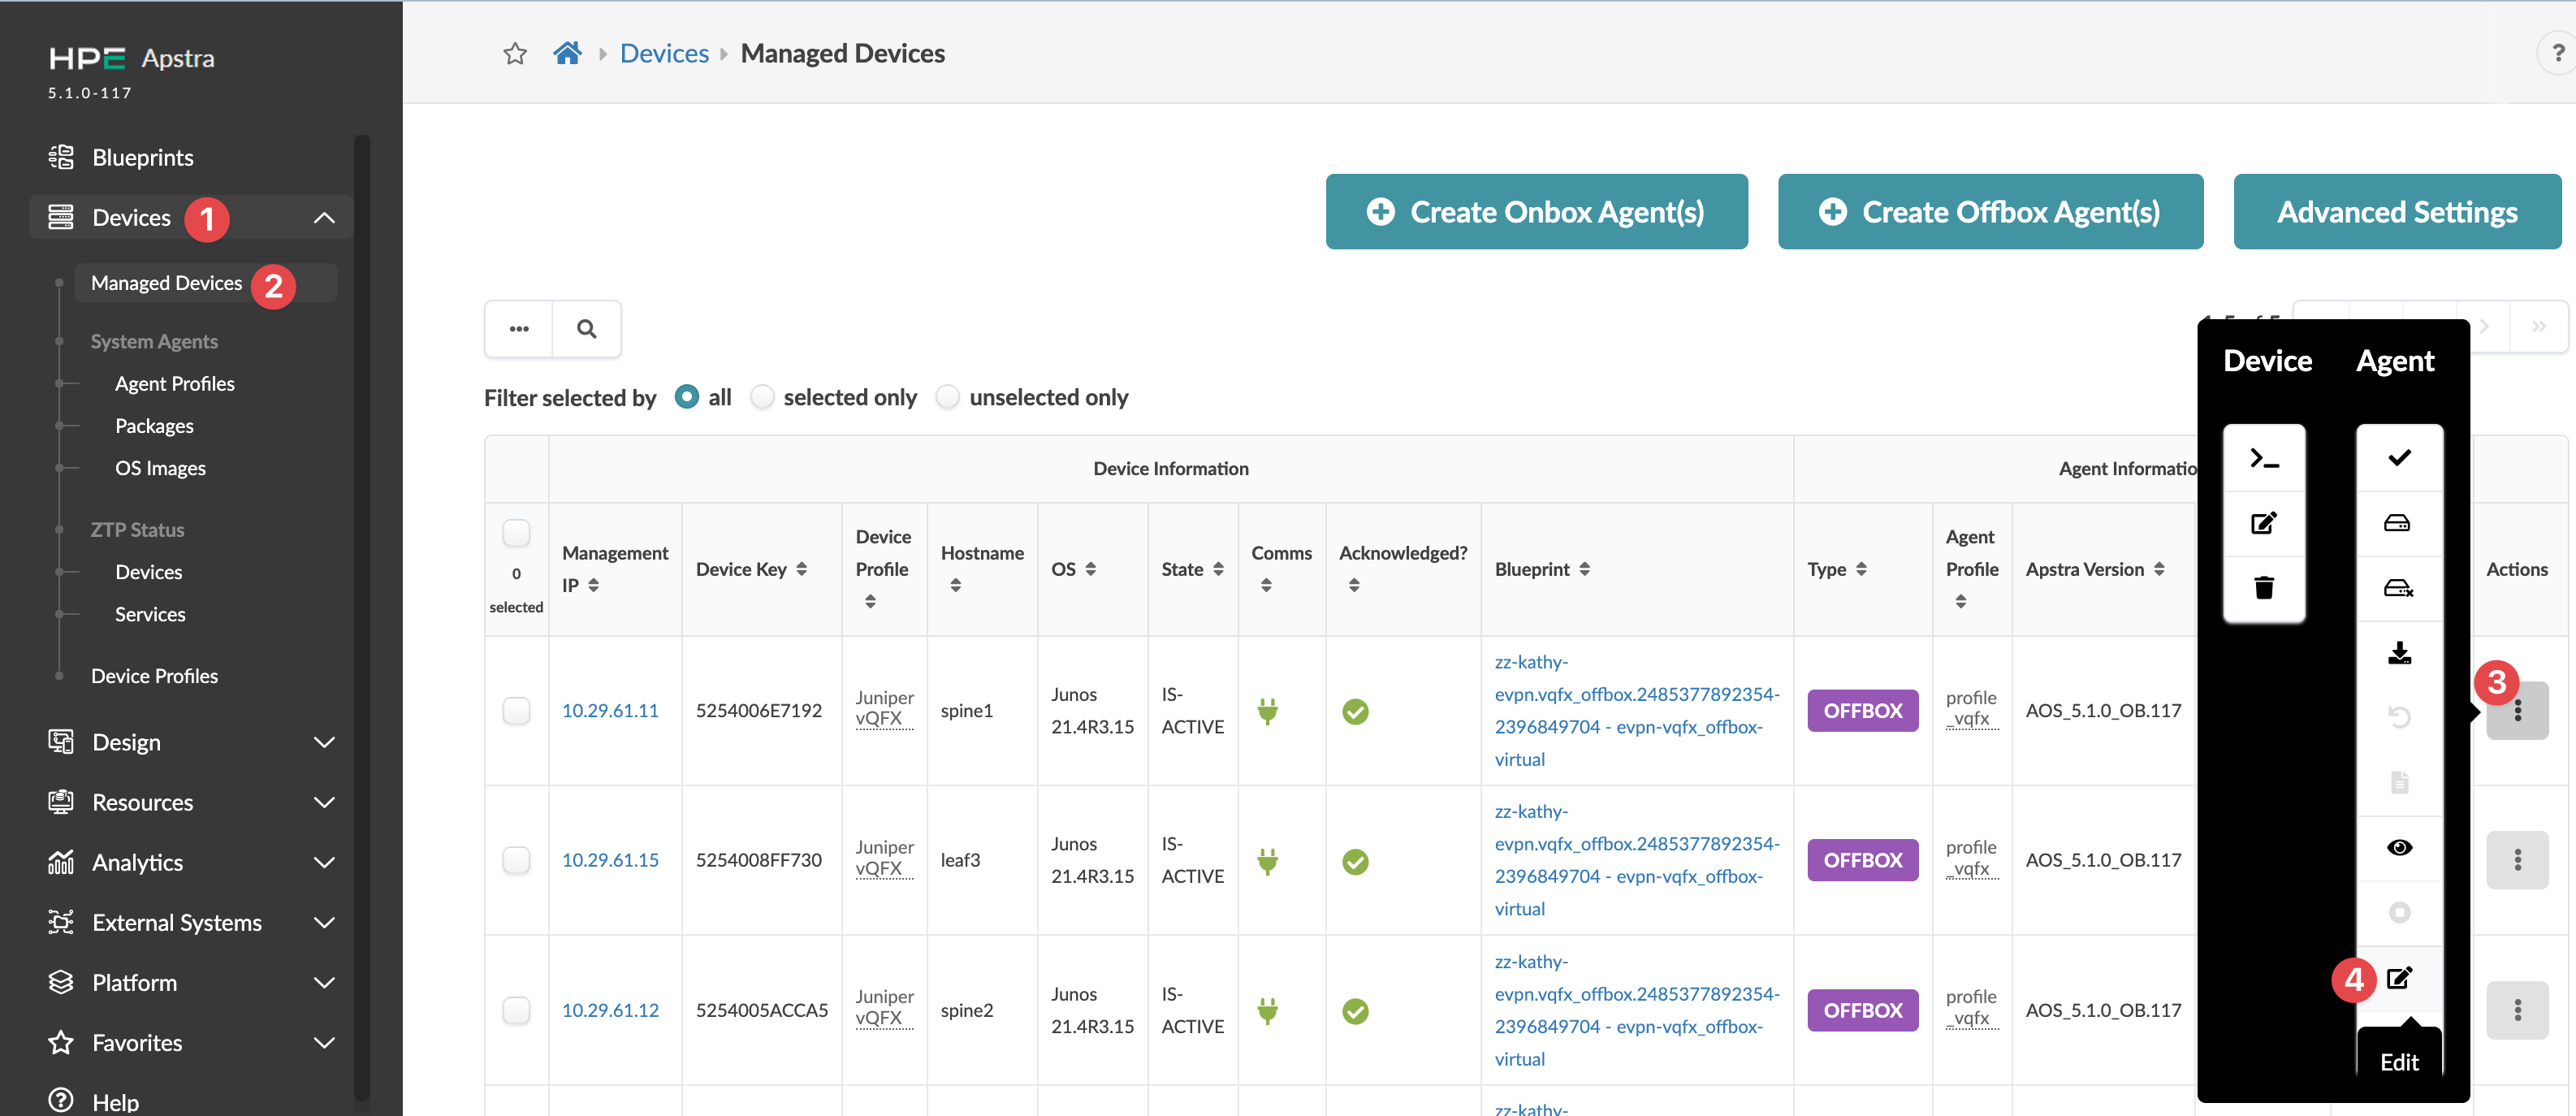
    Screenshot of Juniper Apstra interface showing Managed Devices section with devices listed in a table. Key columns include Management IP, Device Key, Device Profile, Hostname, OS, State, Comms, Acknowledged, Blueprint, Type, Agent Profile, and Apstra Version. Actions menu on each row, Edit option highlighted. Top buttons for creating new agents and accessing Advanced Settings.
    The Edit Onbox (or Offbox) System Agent(s) dialog opens.
  2. Select the agent profile from the drop-down list.
  3. Click Update to update the agent and return to the table view.

Assign Agent Profile to Multiple Agents

  1. From the left navigation menu, navigate to Devices >Managed Devices and select one or more check boxes for the device(s) to update.
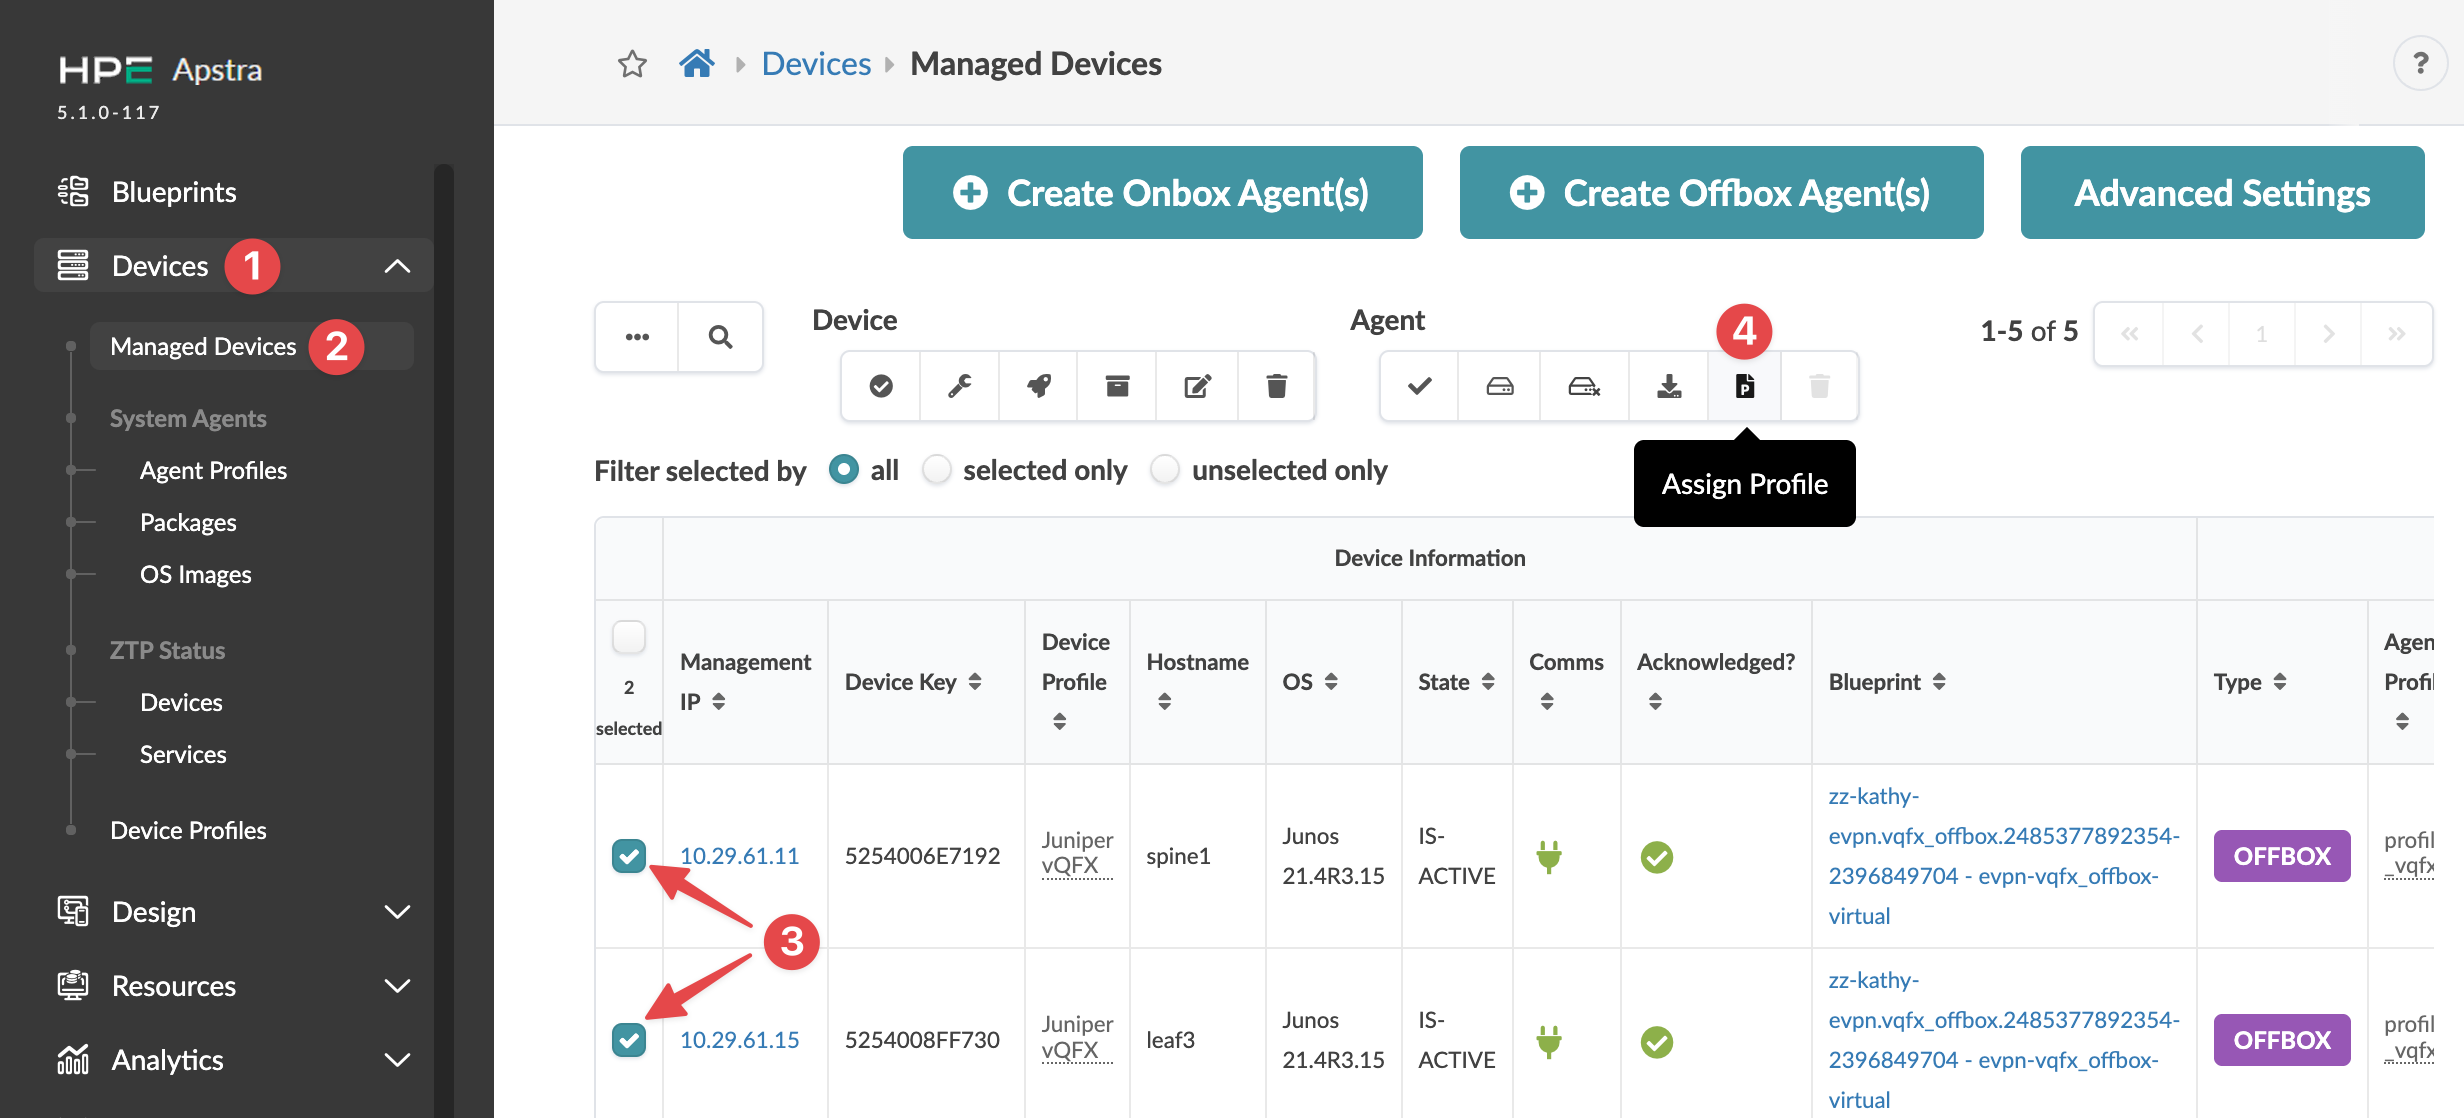
    HPE Apstra Managed Devices interface showing navigation menu, device management table with selected devices 10.29.61.11 and 10.29.61.15, and Assign Profile button highlighted.
  2. Click the Assign Profile button (in the menu that appears above the table after making a selection).
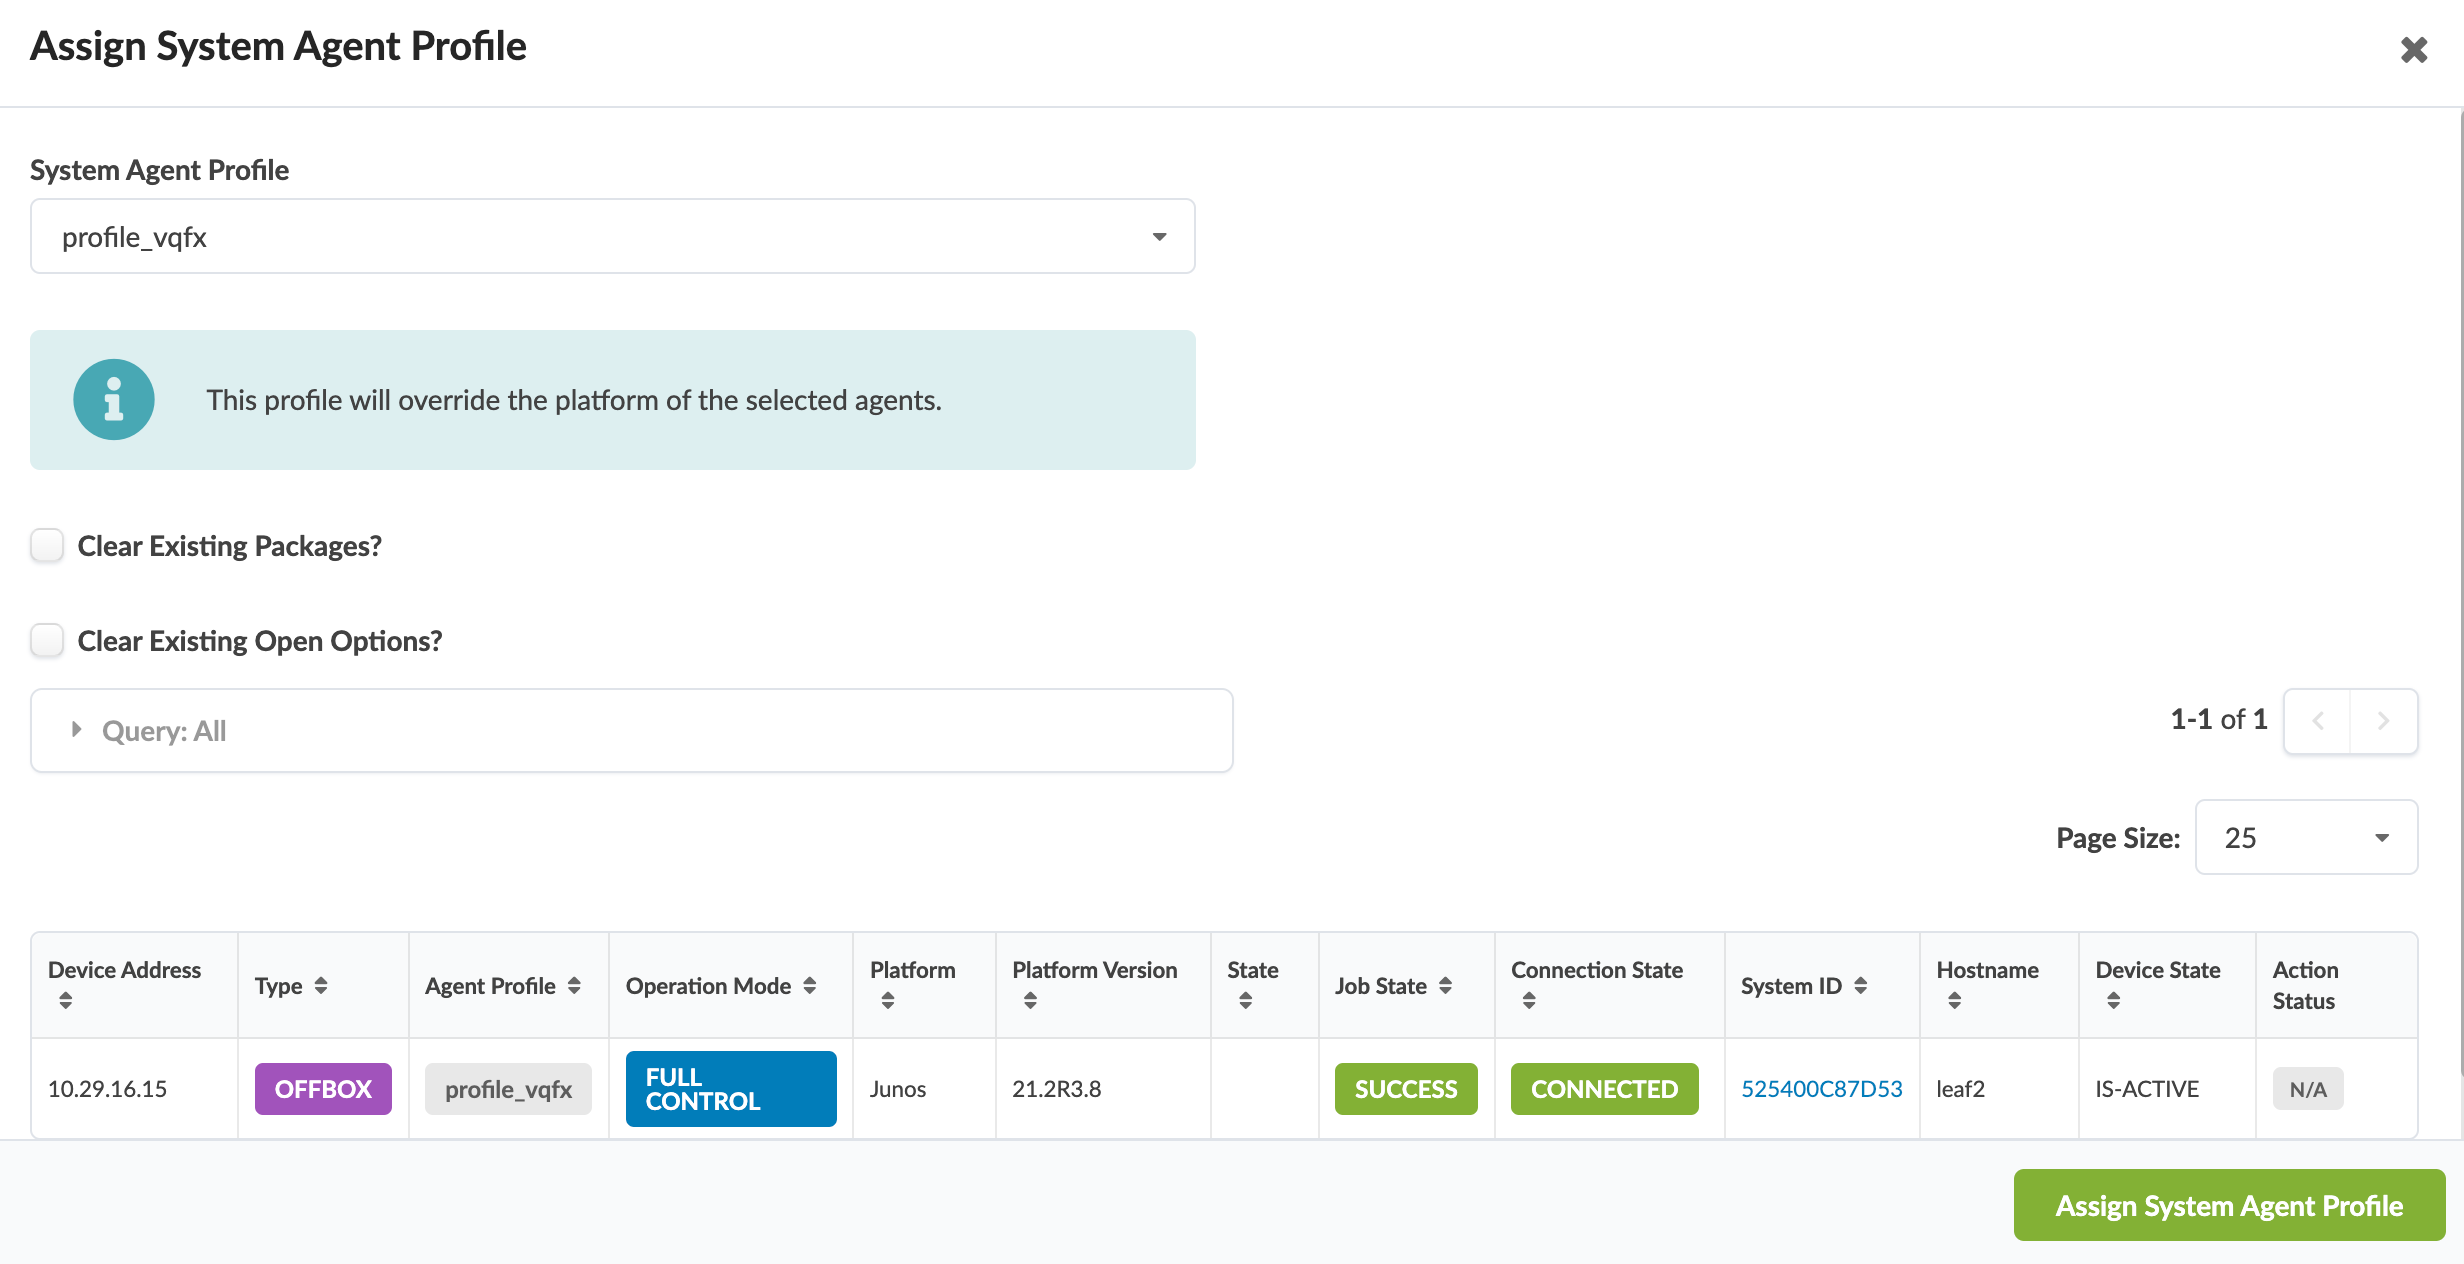
    Assign System Agent Profile interface with dropdown for selecting profile, blue info box, checkboxes to clear packages and options, and device table displaying device details.
  3. Select a system agent profile from the drop-down list.
  4. Click Assign System Agent Profile to save your changes and return to the table view.