Create Tenant

  1. From the blueprint, navigate to Staged > Policies > Tenants and click Create Tenant.
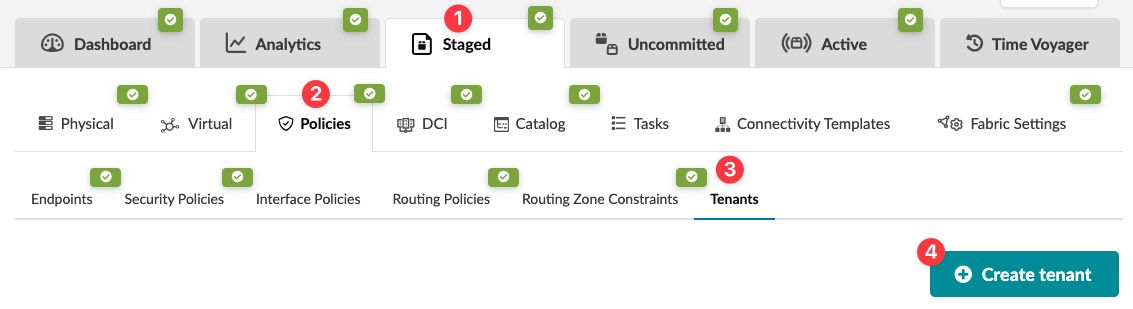
    Screenshot of a network management tool UI displaying tabs: Dashboard, Analytics, Staged, Uncommitted, Active, and Time Voyager. Policies section manages Physical and Virtual resources with options like Endpoints and Security Policies. Tenants section highlighted with a Create Tenant button, suggesting tenant management functionality.
    The Create Tenant dialog opens.
  2. Enter a label that doesn't start or end with space characters and that doesn't contain quotes. The regular expression for the allowed names is a-zA-Z0-9_-. Tenant labels serve as primary keys. After you've create a tenant, you can't change its label.
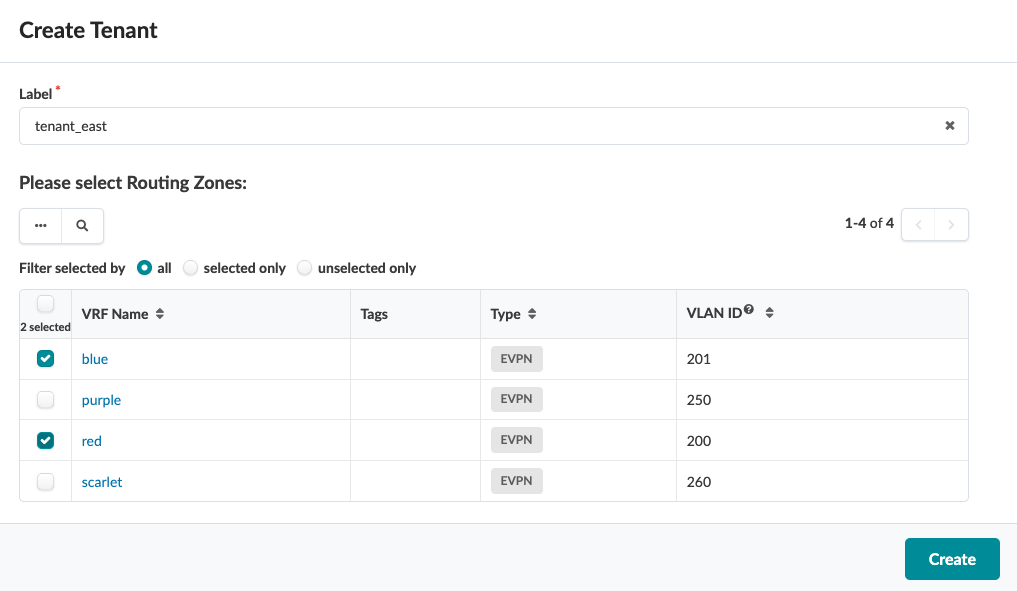
    User interface for creating a tenant in a network management system. Includes a label field with tenant_east entered, routing zones table with columns for VRF name, tags, type set to EVPN, VLAN ID, checkboxes for zone selection with blue and red selected, filter options, pagination controls, and a Create button.
  3. Select check boxes for one or more routing zones of type EVPN. (The Default Routing Zone is excluded from this feature given the number of design elements it holds which are structural to the fabric underlay.) You can search for routing zones by VRF name, tags, and/or type of routing zone (EVPN).
  4. Click Create to stage the tenant and return to the tenant table view.

When you're ready to activate your changes, go to the Uncommitted tab to review and commit (or discard) your changes.