Create Routing Policy
-
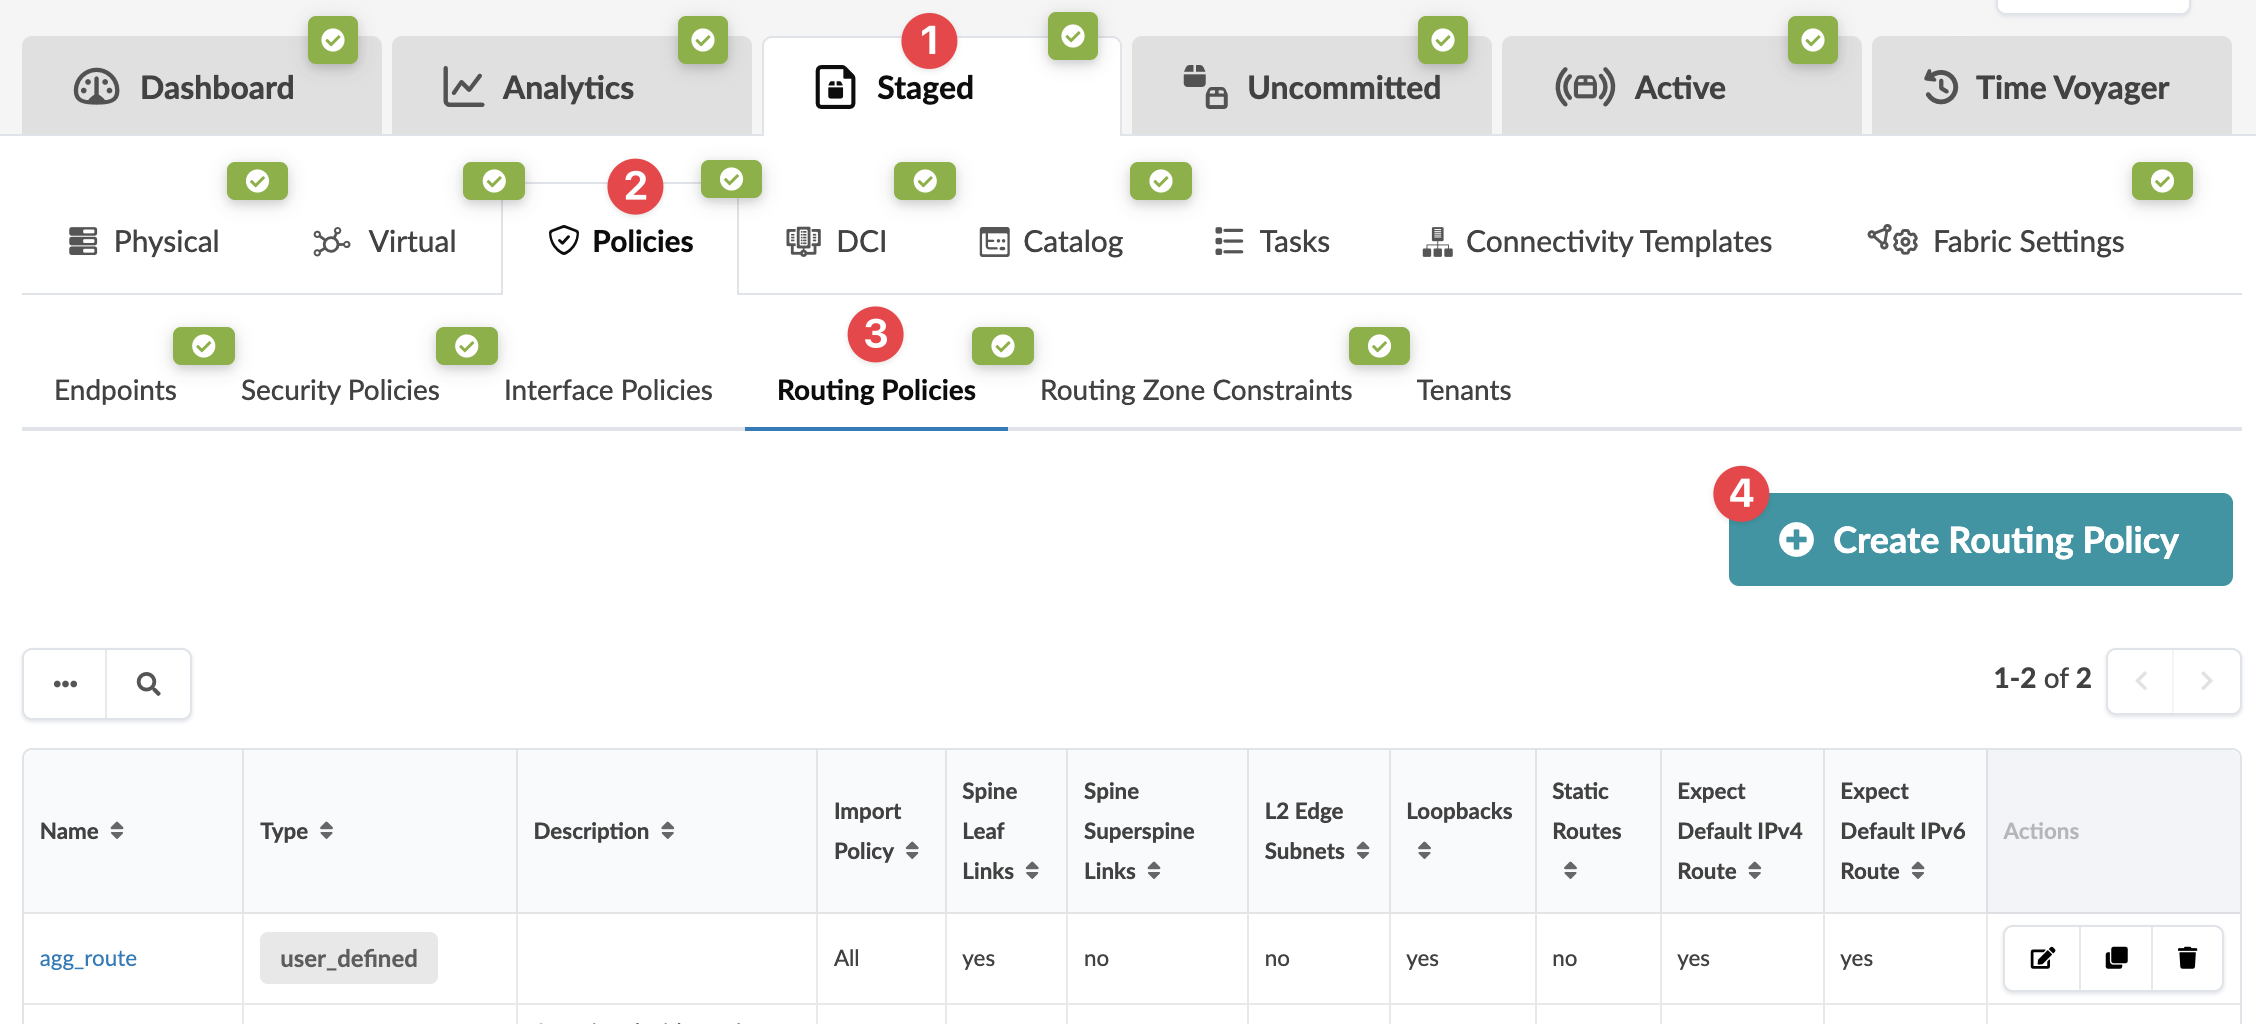
From the blueprint, navigate to Staged > Policies > Routing
Policies and click Create Routing Policy (or to copy
an existing policy and customize it, click the Clone button
(between the Edit and Delete buttons) for
the policy to copy.)
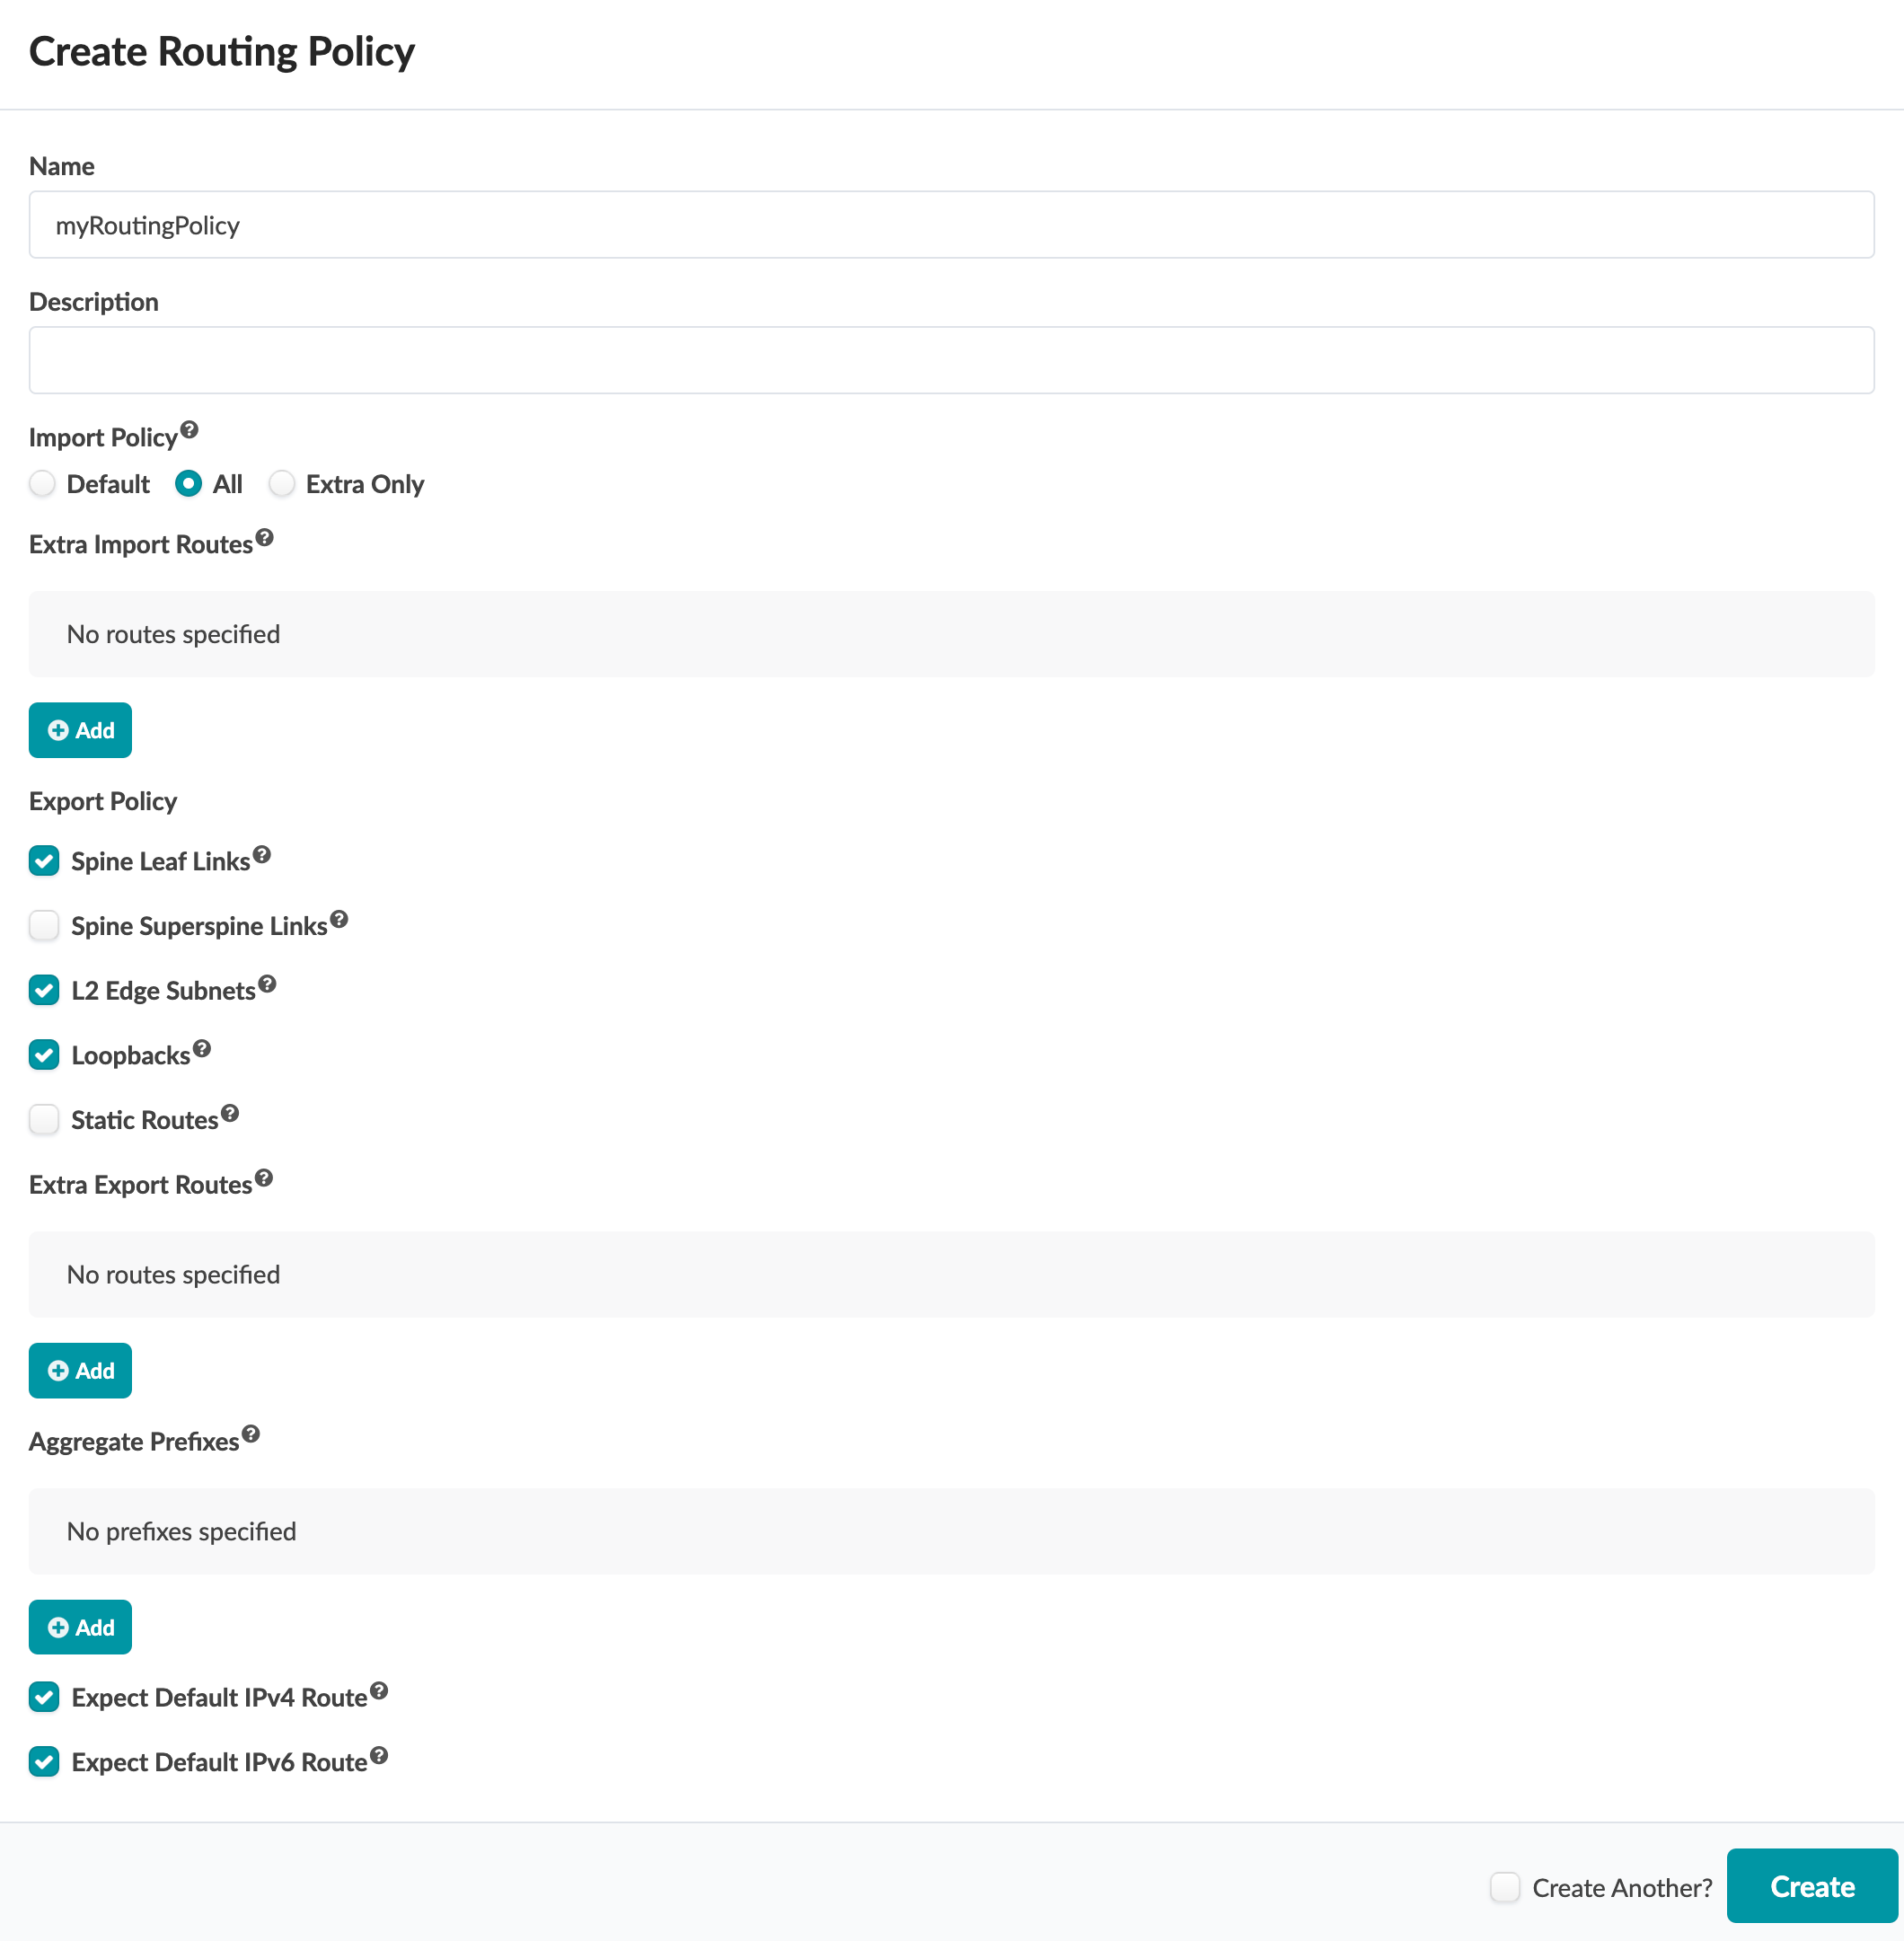
 The Create Routing Policy dialog opens (or the Clone Routing Policy dialog opens, as applicable).
 -
Configure your policy. For parameter details, see What are Routing
Policies.
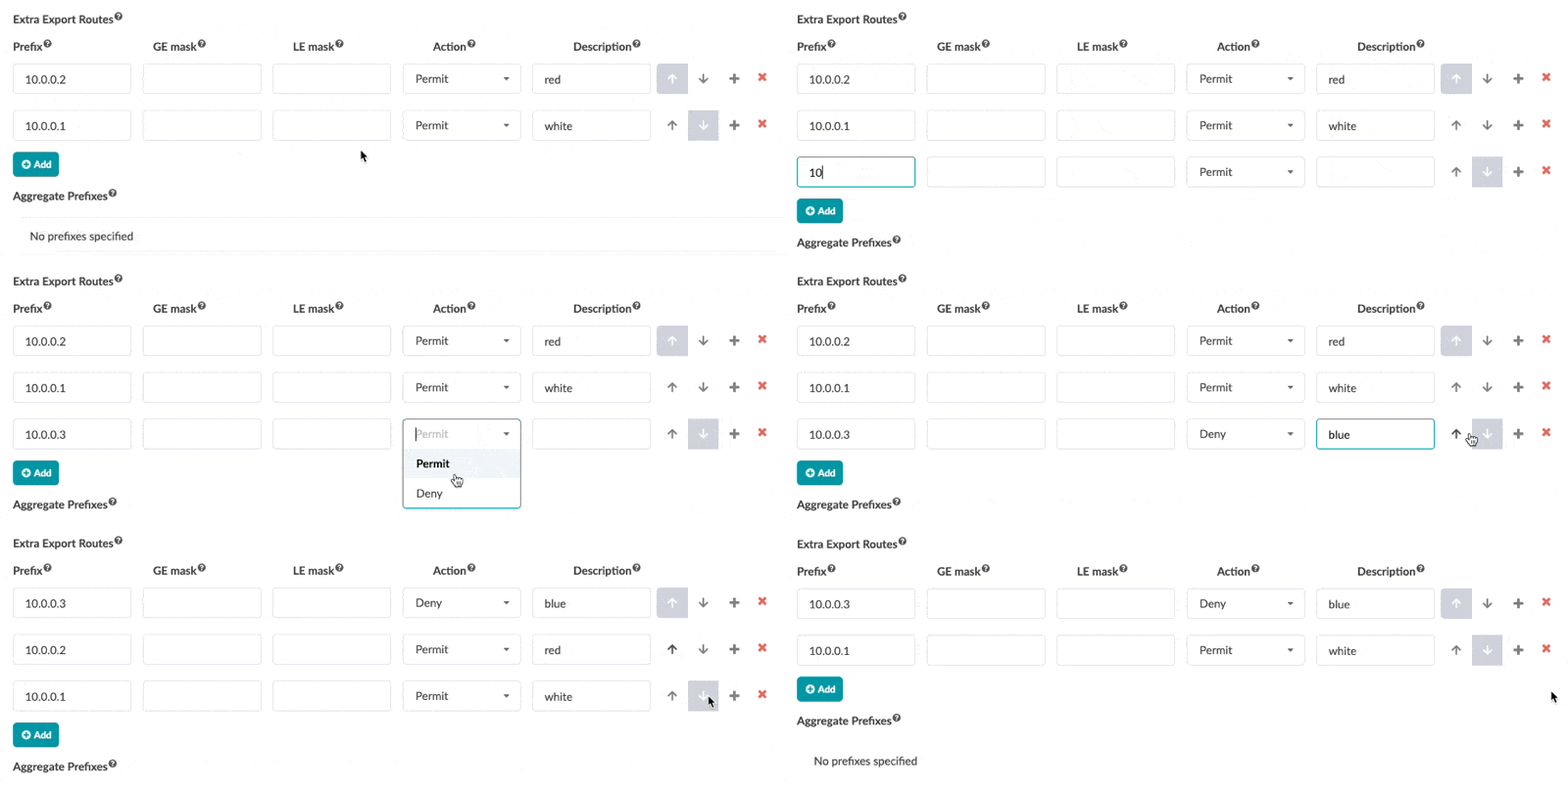
For extra routes, (both import and export) you can add route descriptions and reorder them (as of Apstra version 5.0.0).
When you're ready to activate your changes, go to the Uncommitted tab to review and commit (or discard) your changes.