Edit Device Properties (Datacenter)

You can change device properties such as name, interface map, ASN, and loopback IP, depending on the node chosen.

To edit device properties using the GUI:
  1. From the blueprint, navigate to Staged > Physical > Nodes and select a node name (not the check box).
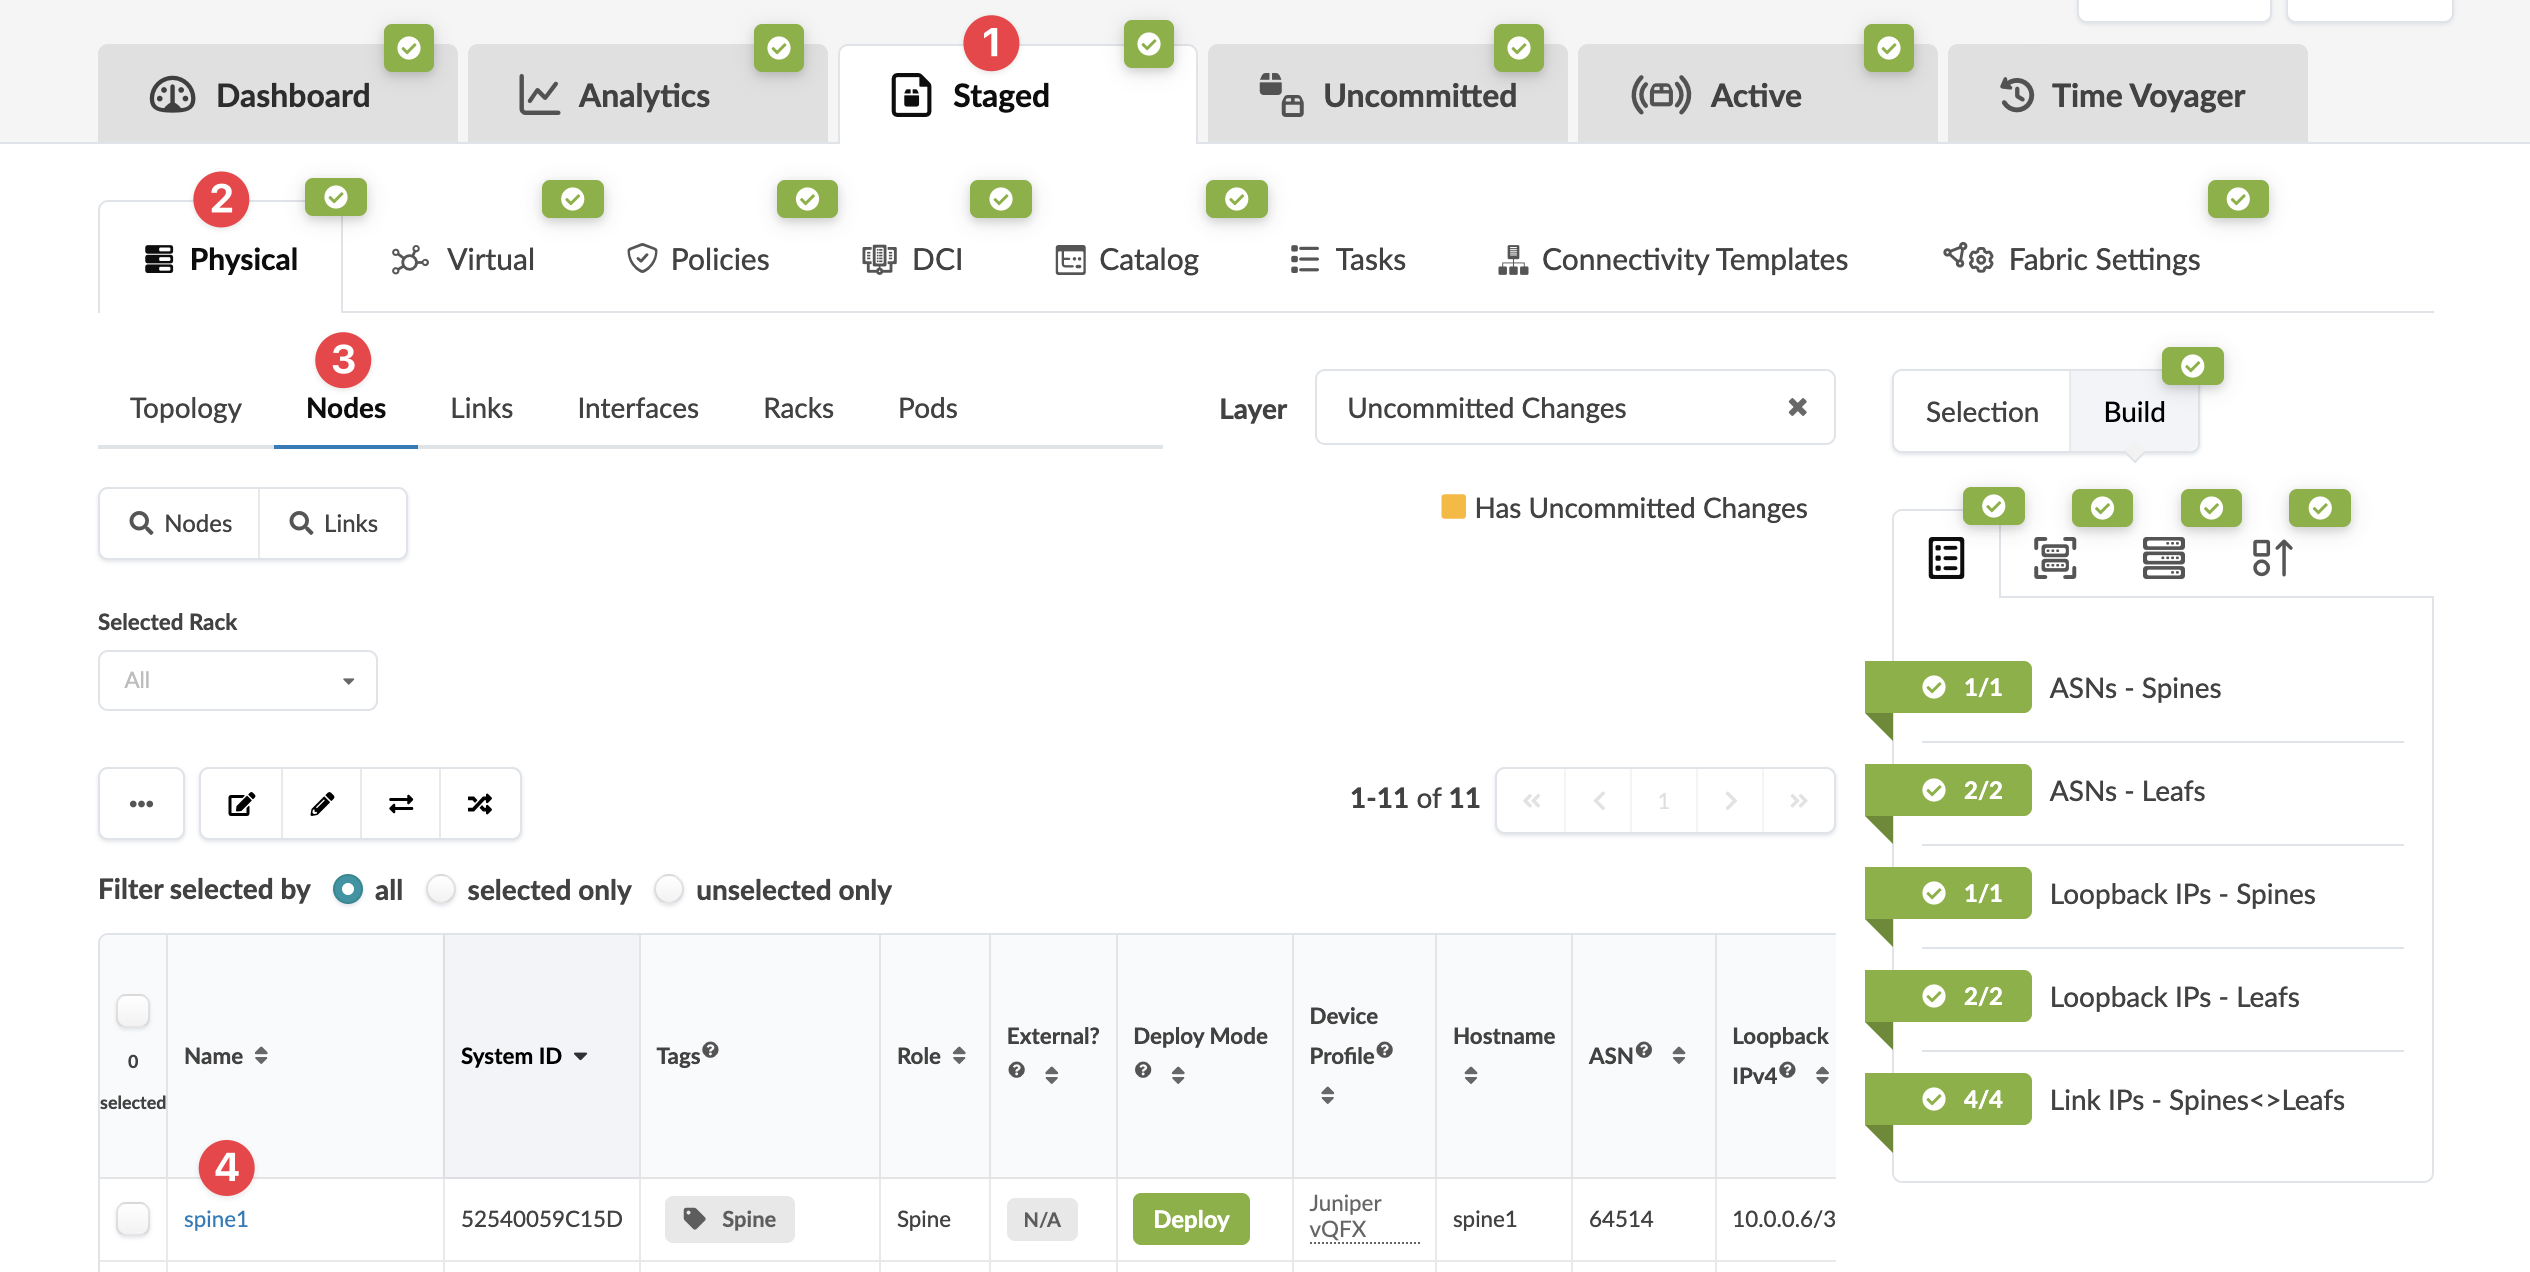
    Screenshot of a network management tool interface showing top navigation tabs like Dashboard and Analytics, main menu tabs such as Physical and Virtual, and the Nodes section with detailed information on a highlighted node named spine1 including system ID, role, deploy mode, and IP addresses.
    The Topology selection view appears.
  2. Click the Properties tab in the right Selection panel.
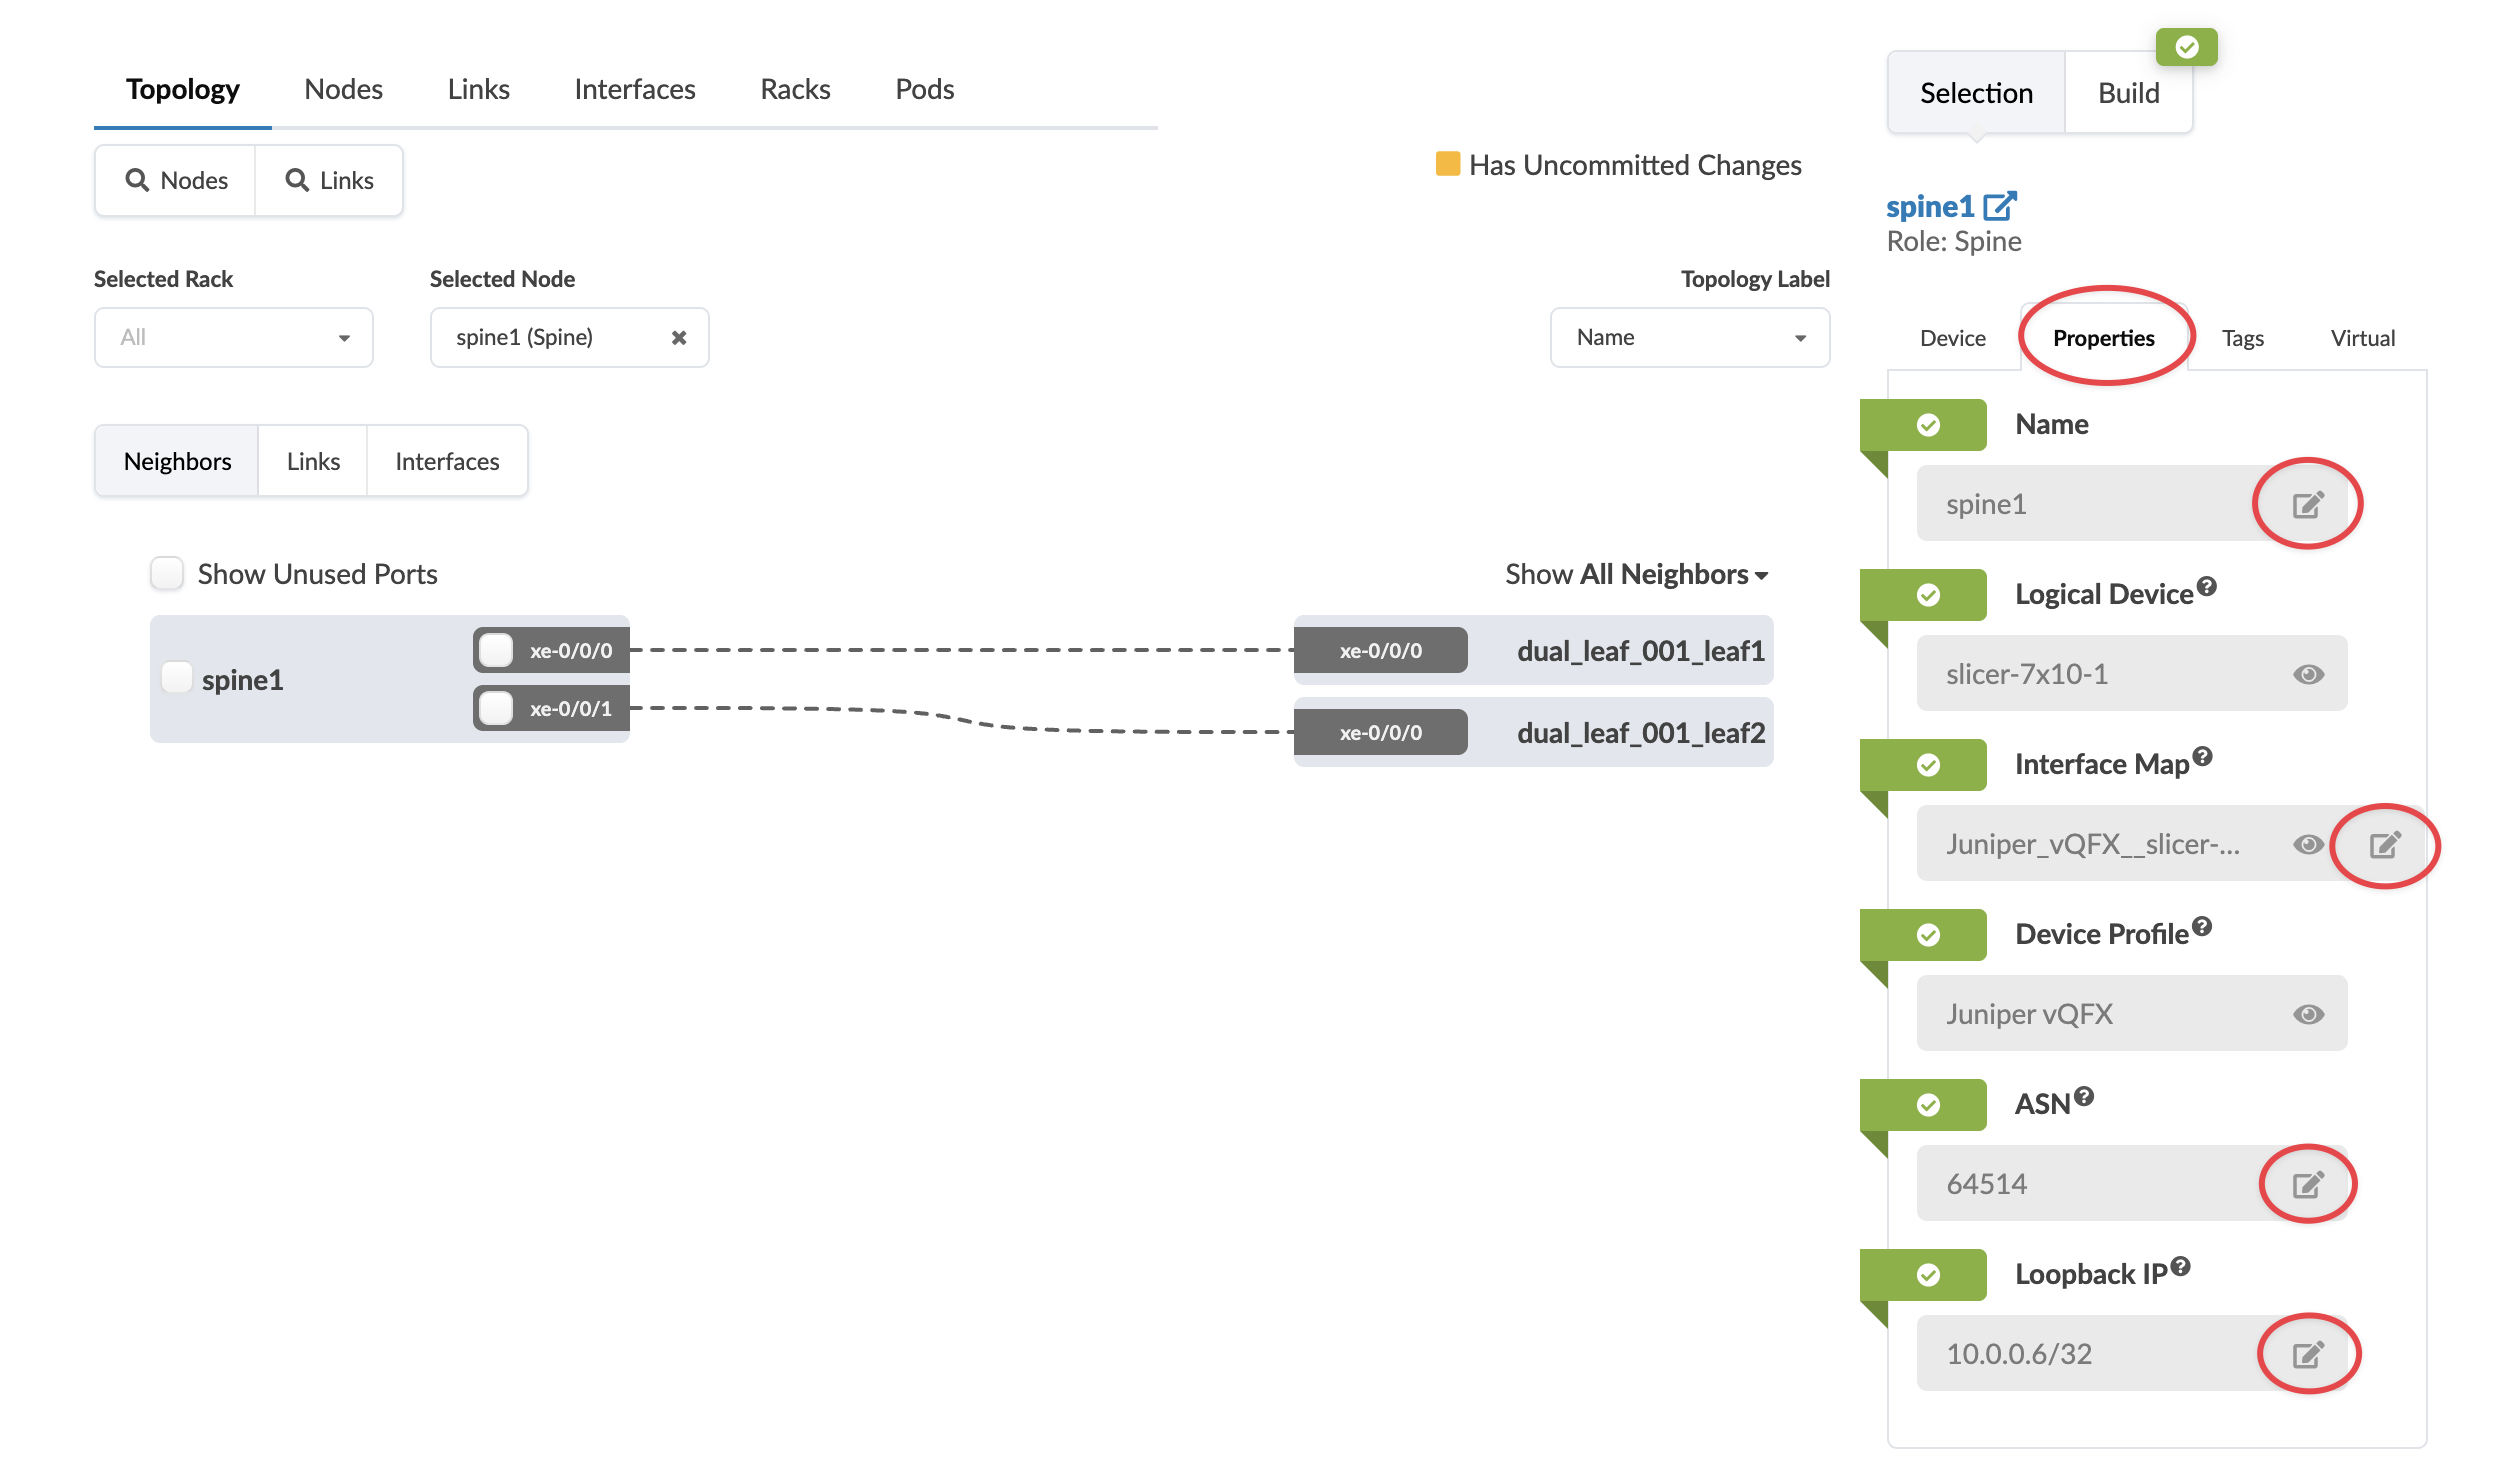
    Network topology interface showing spine1 node connected to dual_leaf_001_leaf1 and dual_leaf_001_leaf2 via xe-0/0/0 and xe-0/0/1. Properties panel displays spine1 details: name spine1, logical device slicer-7x10⁻¹, interface map Juniper_vQFX__slicer-, device profile Juniper vQFX, ASN 64514, loopback IP 10.0.0.6/32. Editable properties indicated by icons.
    The Properties tab and its contents appear.
  3. You can change device properties such as name (must be changed to a unique name), interface map, ASN, and loopback IP, depending on the node chosen. The attributes that can be edited have an Edit button associated with them. Change properties as applicable.
    Note:

    If you changed leaf names in a leaf pair, the leaf pair name does not change. You can manually change the leaf pair name to correspond with the new leaf names. This is especially useful when assigning leaf pairs when you create virtual networks.

  4. Click the Save button.
The changes are staged.

When you're ready to activate your changes, go to the Uncommitted tab to review and commit (or discard) your changes.