Delete Node
You can delete nodes using the GUI.
To delete a node using the GUI:
-
From the blueprint, navigate to Staged > Physical >
Topology and select the node to delete. In our example, we've selected a
generic system.
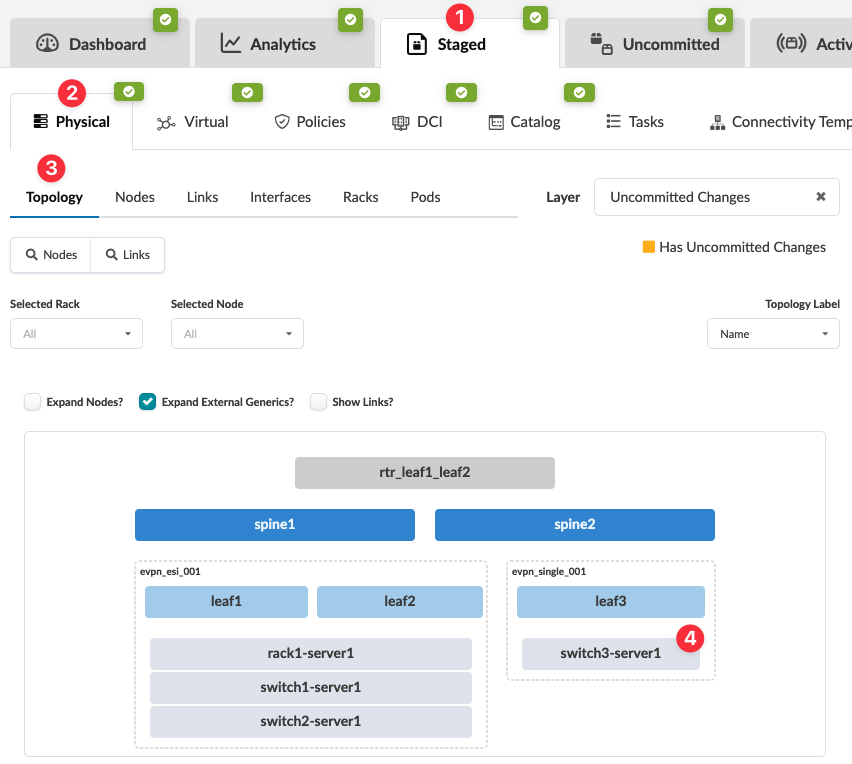 The Topology selection view appears.
 -
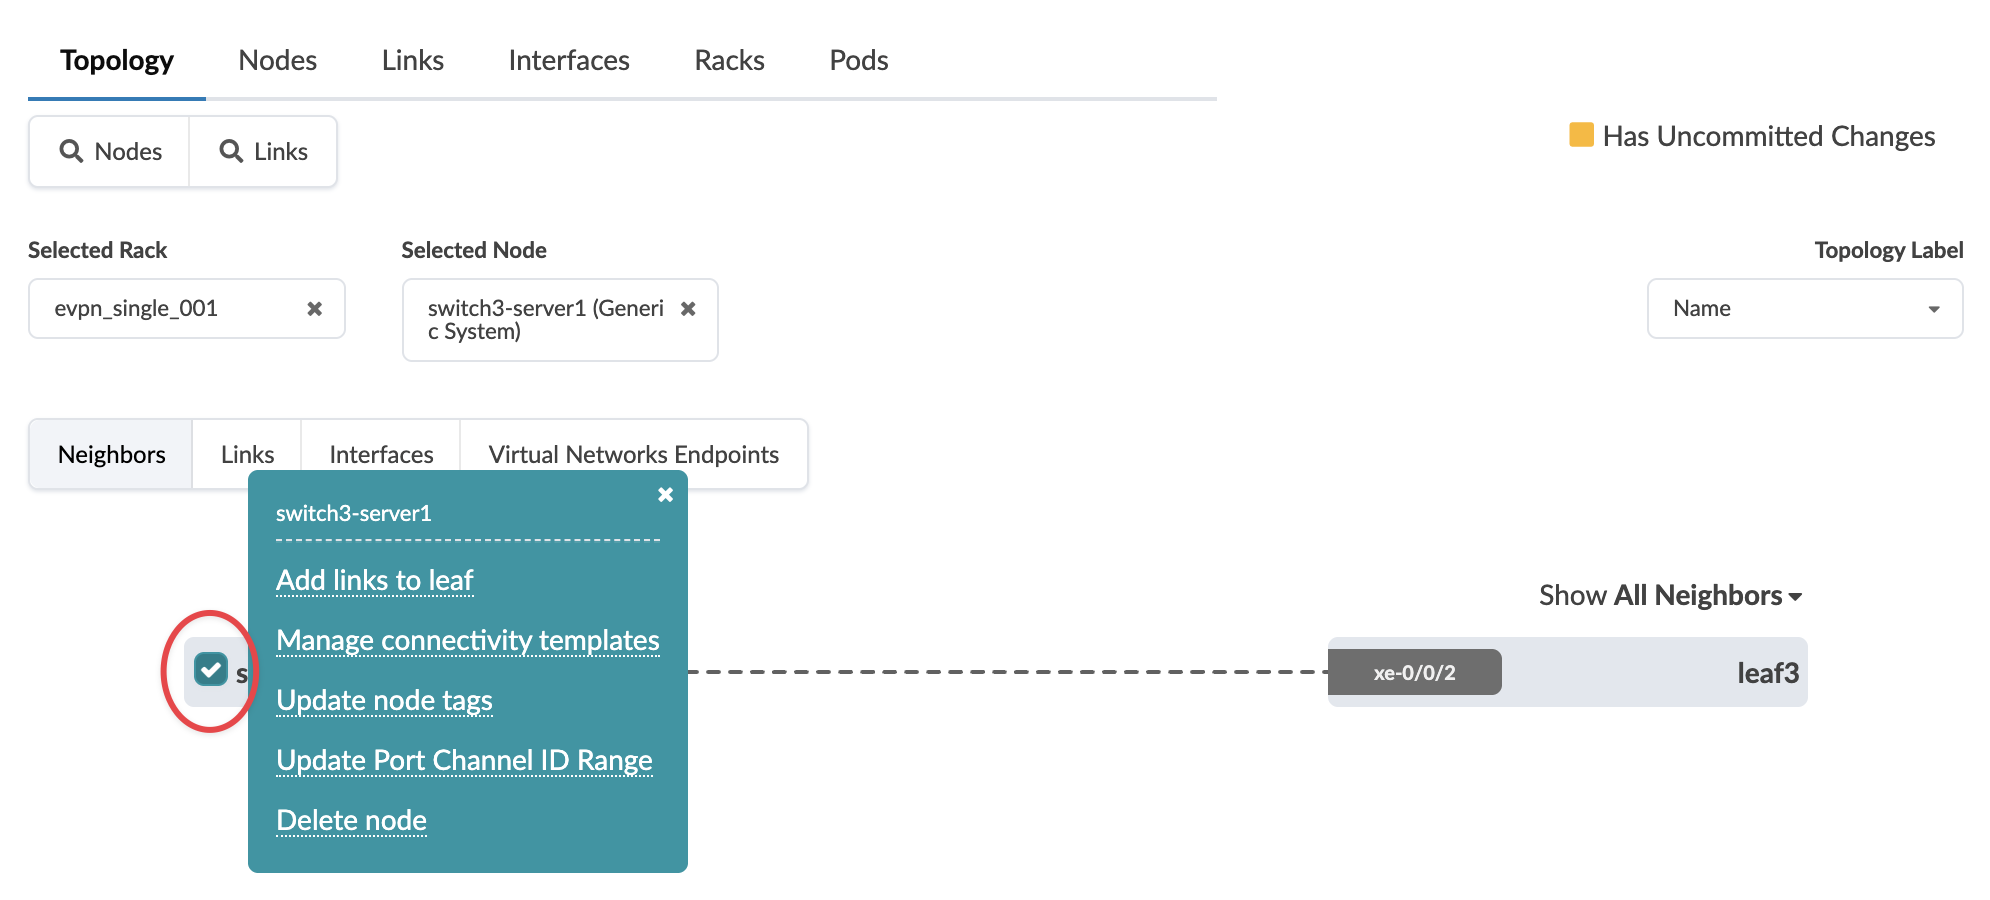
Select the node check box to see the operations available for that node (and that you
have permissions for).
 Note:
Note:You can also get to the selection page from the Nodes view. From the blueprint, navigate to Staged > Physical > Nodes, click the node name in the table, then click the node name that appears at the top of the Selection panel (on the right side of the page).
The deletion is staged and you're returned to the Topology view. All links towards the system will be deleted and connectivity templates will be unassigned for you.
When you're ready to activate your changes, go to the Uncommitted tab to review and commit (or discard) your changes.