Update Link Properties
If you have changed server names and/or hostnames for switches, any associated link names do not automatically update to match. This may cause confusion when reviewing an updated cabling map in the Uncommitted tab. You can change link names to match your other name changes. You can also change link IP for endpoints from here.
To update link properties from the GUI:
-
From the blueprint, navigate to Staged > Physical >
Links and click the name of the link to update.
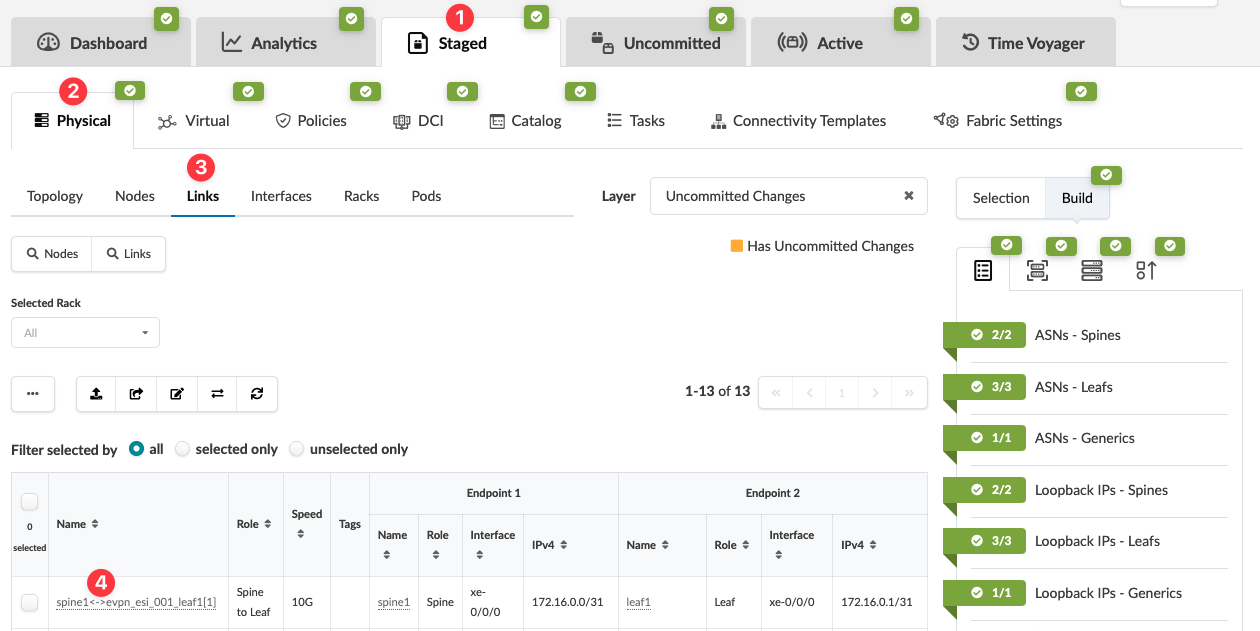
The Selection panel on the right becomes active and populates with information about the selection.
-
In the Properties tab in the Selection panel click the
Edit button for the property to change.
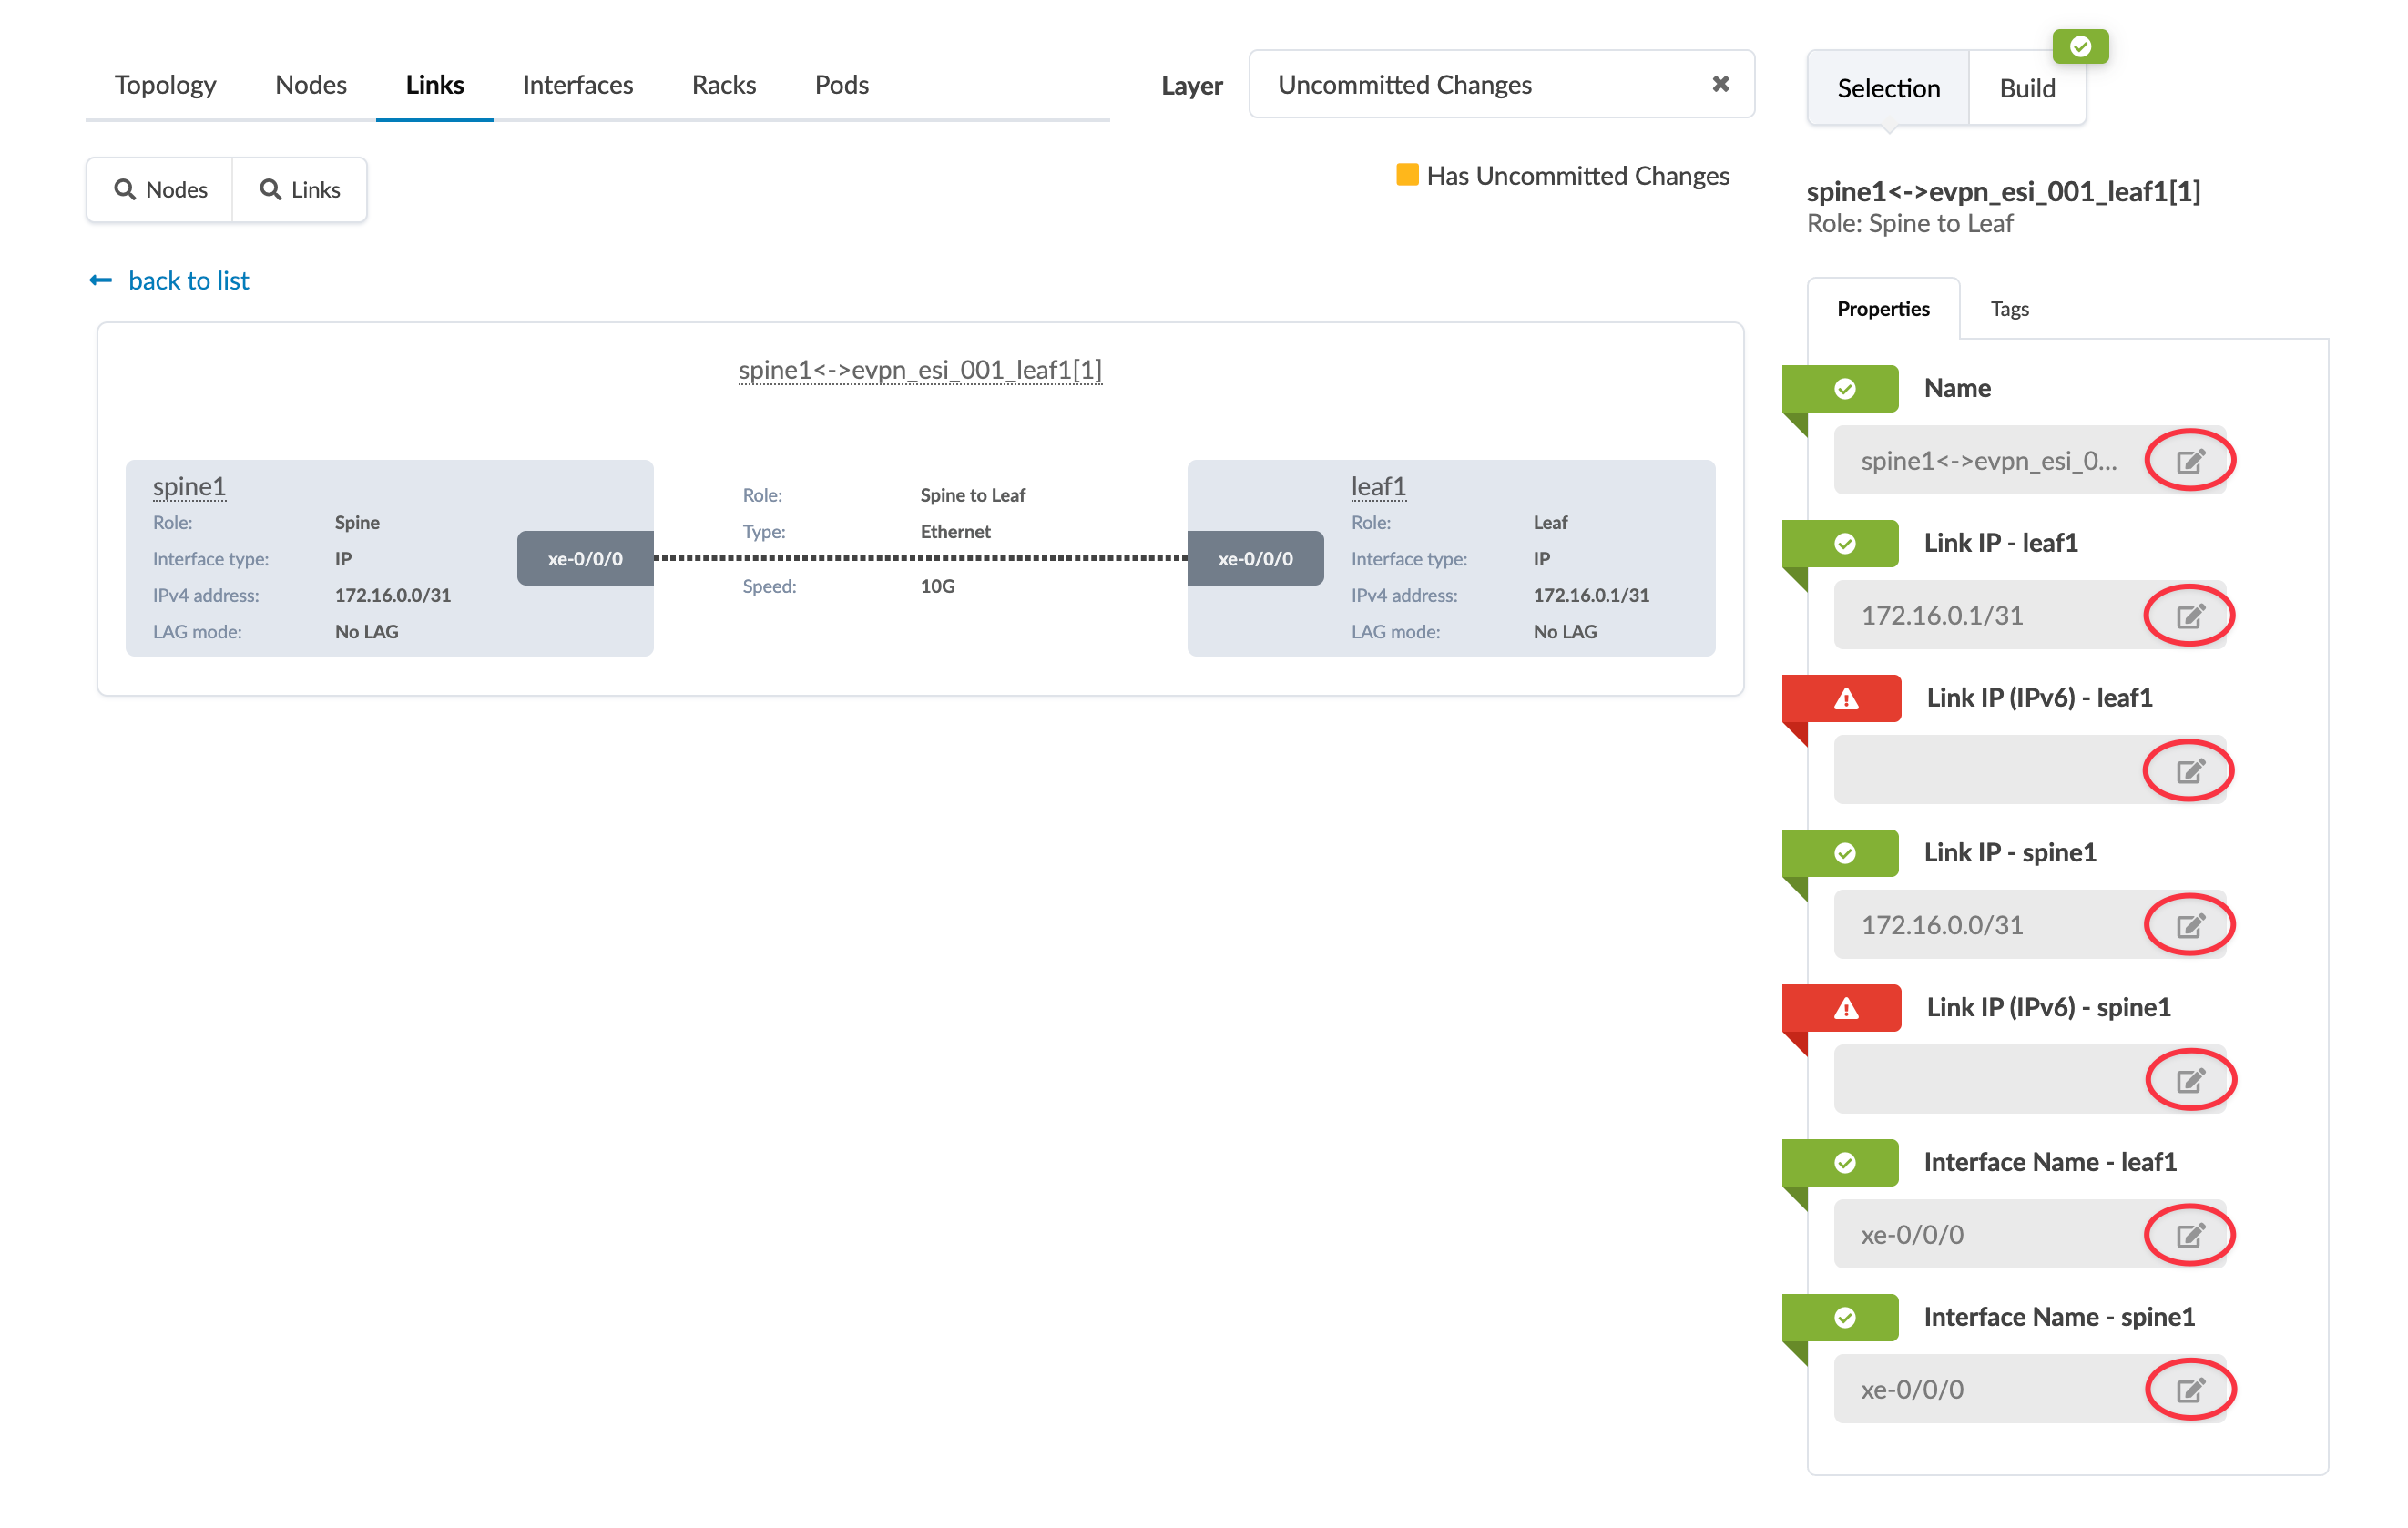
The changes are staged.
When you're ready to activate your changes, go to the Uncommitted tab to review and commit (or discard) your changes.