Add Mesh Links (Collapsed)
You can increase the number of mesh links in your collapsed fabric topology as a Day 2 operation. You might do this, for example, when you want to increase network capacity, or because the incorrect number of links were allocated when the template was created.
To add mesh links using the GUI:
-
From the blueprint, navigate to Staged > Physical > Topology and
select the leaf where you want to add a link.
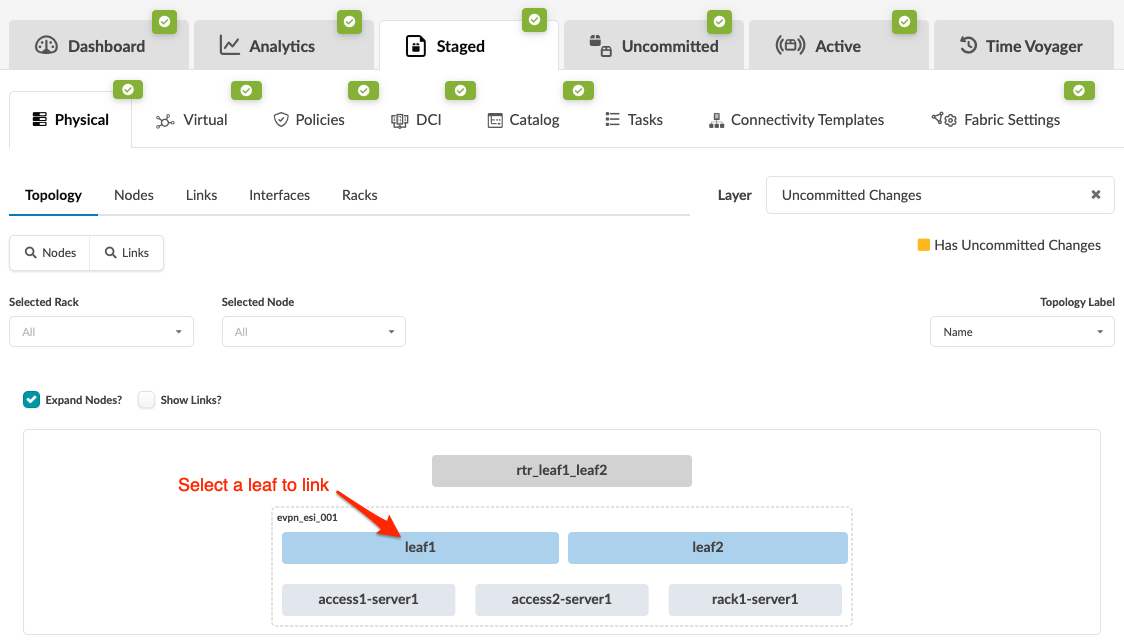 The Topology selection view appears.
 -
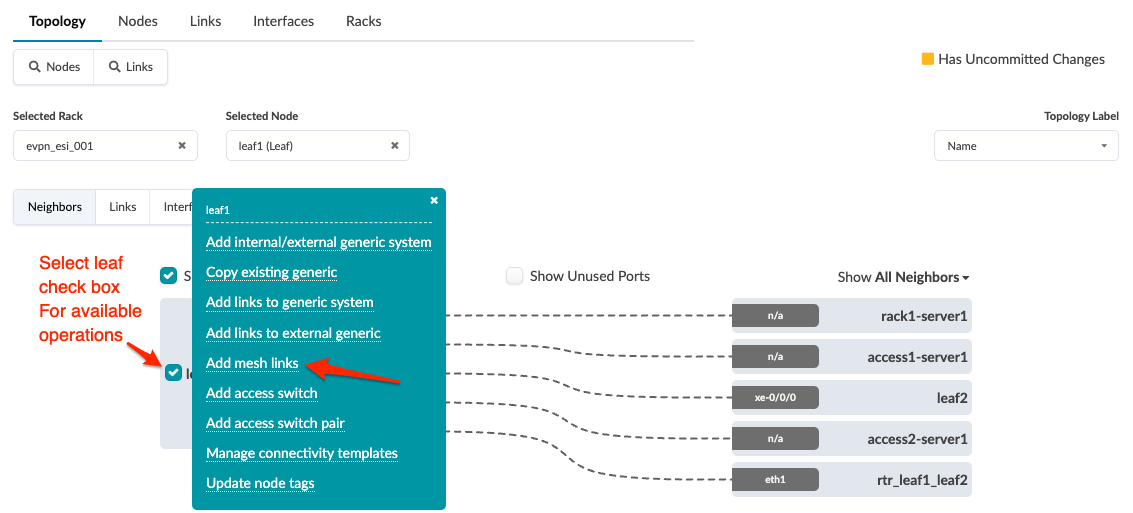
Select the leaf check box to see the operations available for that leaf (and that you
have permissions for).
-
Select ports and transformations on each leaf.
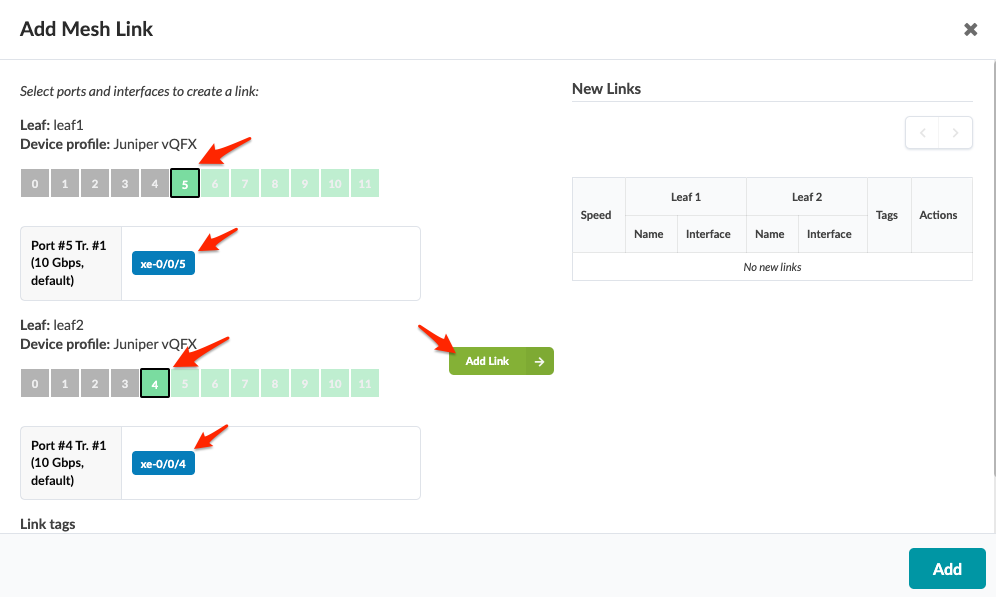 The gray Add Link button turns green.
 -
Click Add.
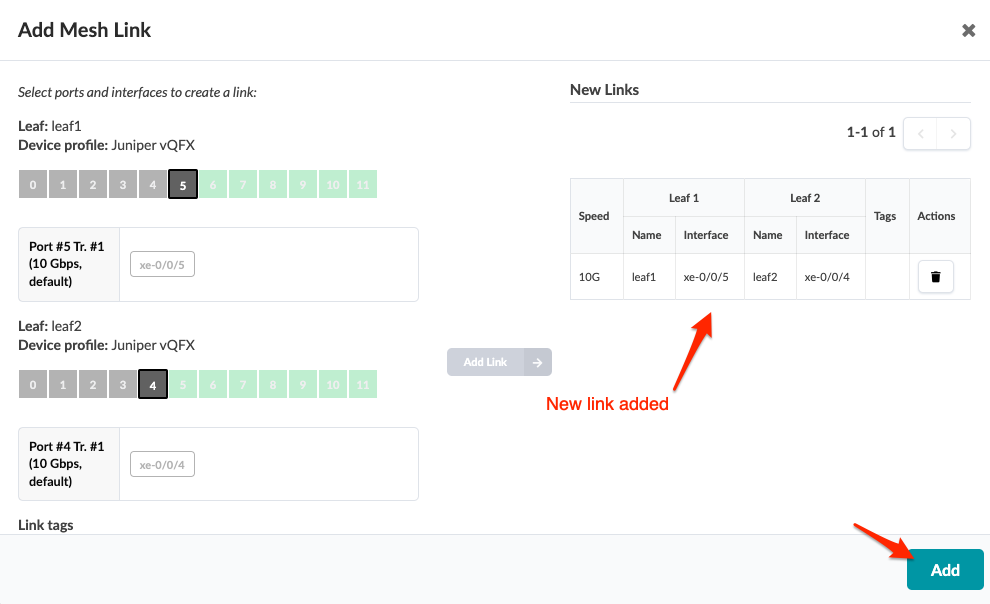
The new link is staged and you're returned to the Topology view.
When you're ready to activate your changes, go to the Uncommitted tab to review and commit (or discard) your changes.