Create Access Switch

To create an access switch using the GUI:

  1. From the blueprint, navigate to Staged > Physical > Topology and select the leaf that you want to connect to the new access switch.
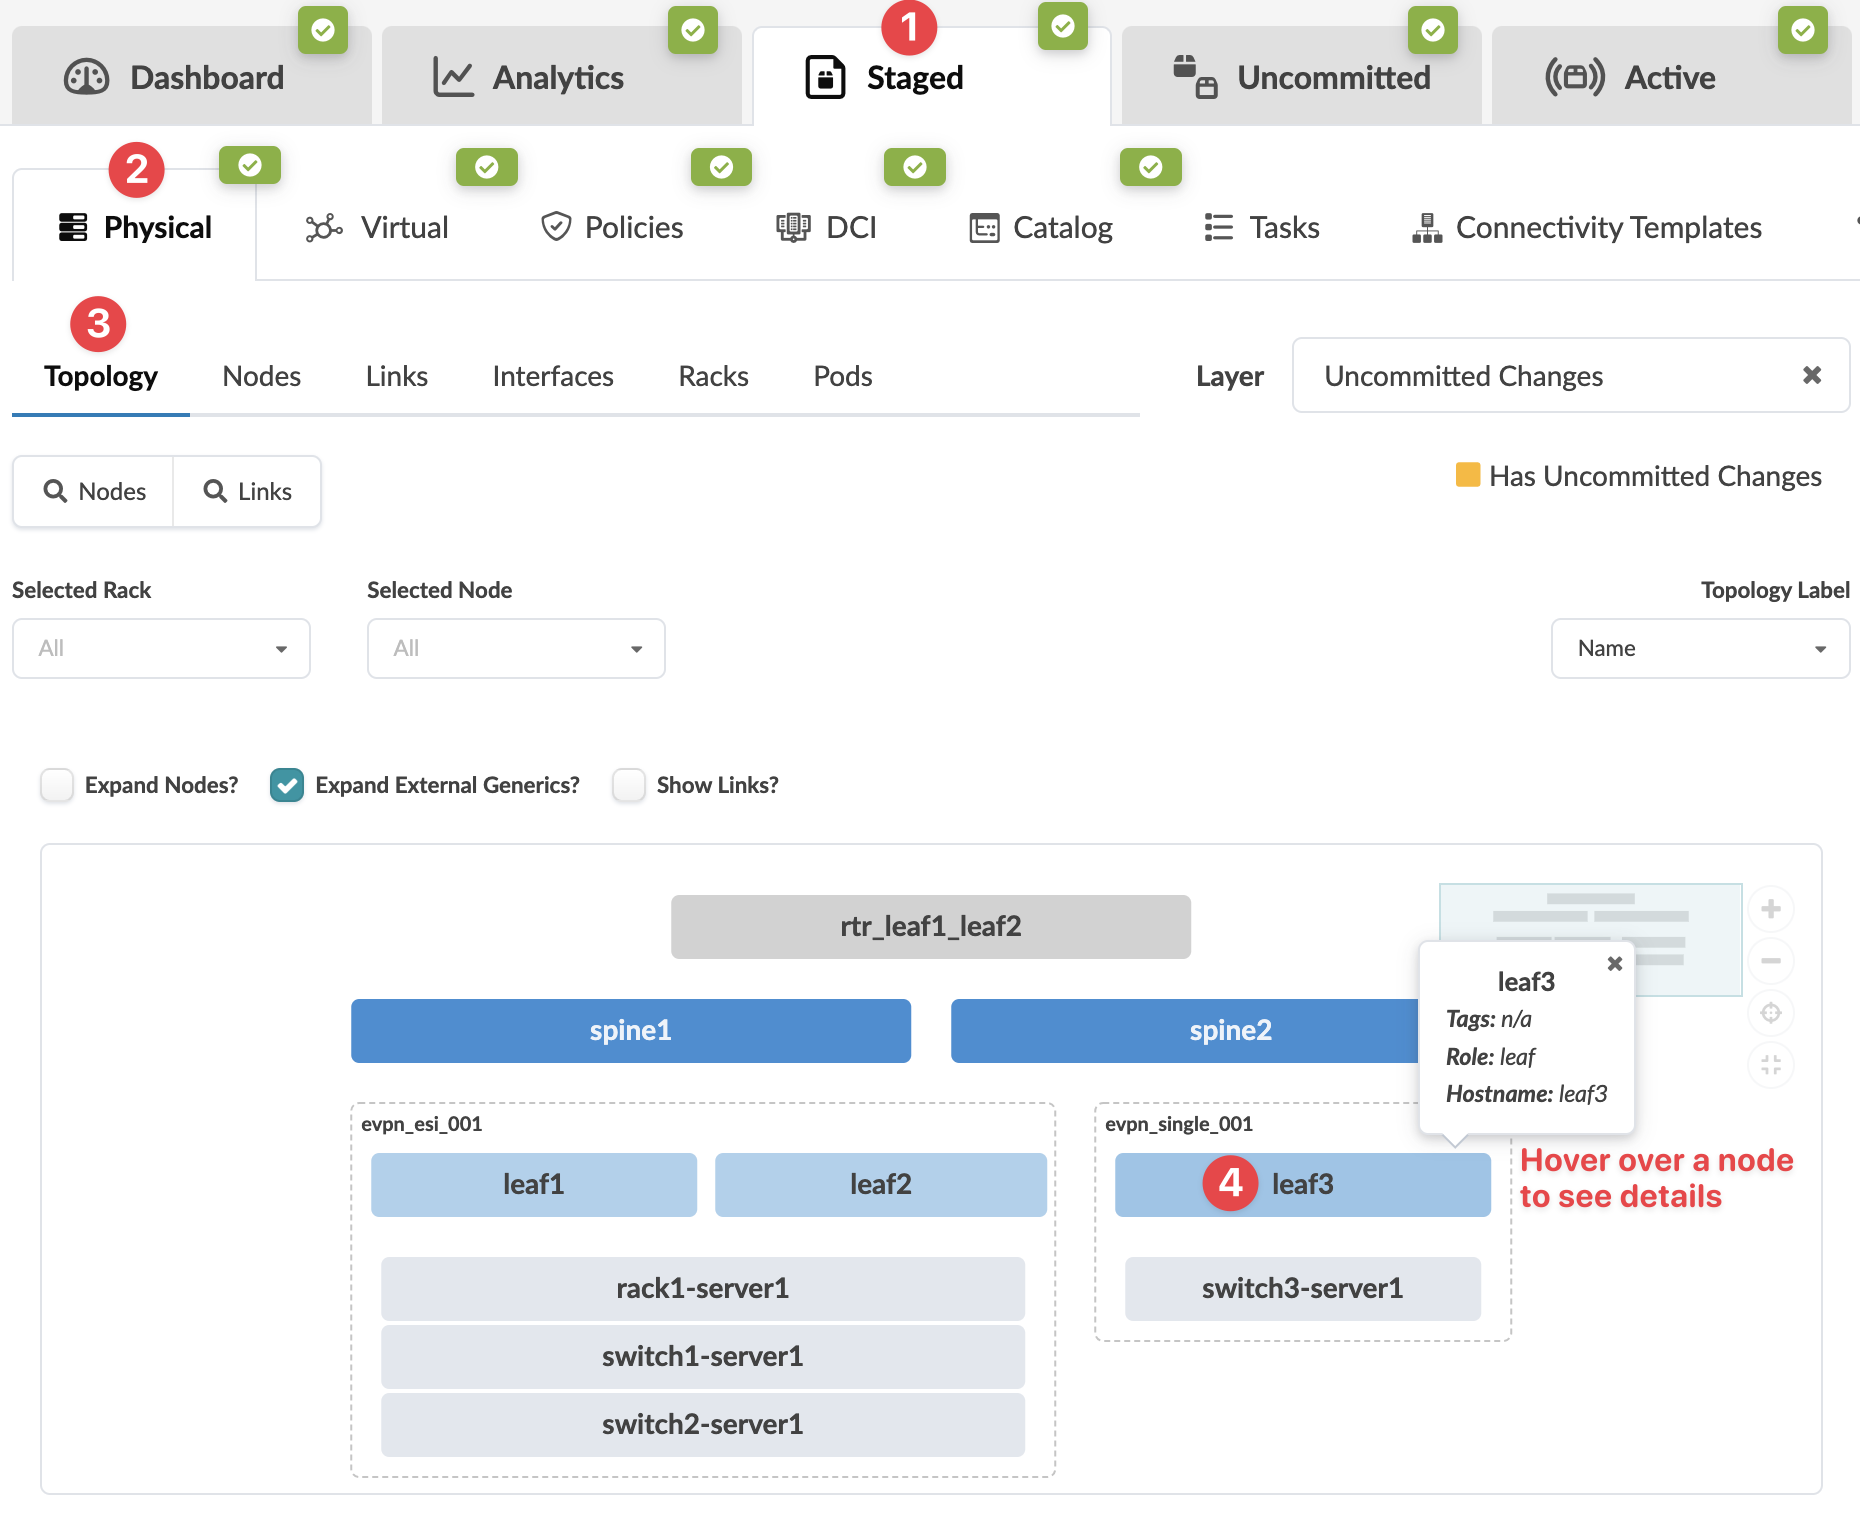
    Network management interface screenshot displaying a topology view of nodes, links, racks, and pods with options for physical and virtual management. Tabs include Dashboard, Analytics, Staged, Uncommitted, and Active. The diagram shows spine and leaf switches with connected devices.
    The selection details appear.
  2. Select the node check box to see the operations available for that node (and that you have permissions for).
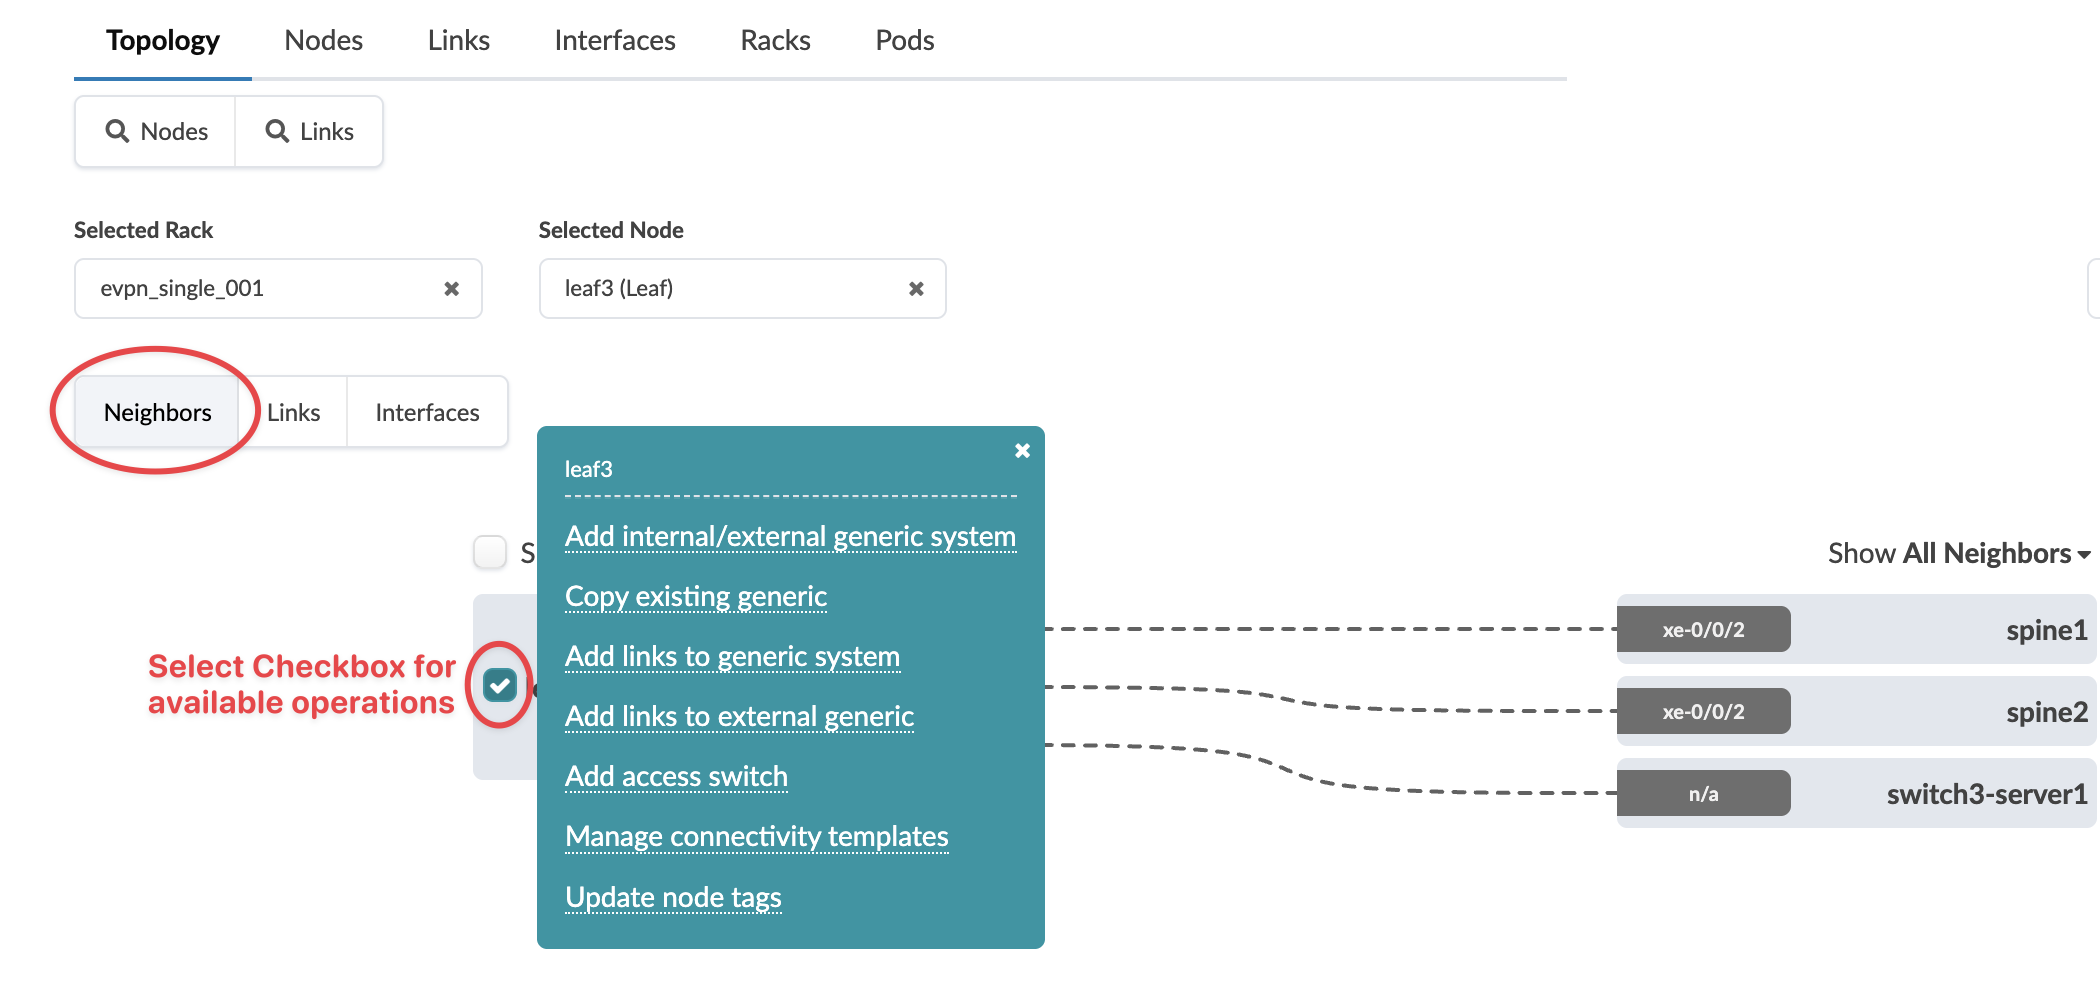
    Network topology interface showing options for managing nodes and links, with "leaf3" selected. Connections to "spine1," "spine2," and "switch3-server1" visible. Uncommitted changes indicated.
    Note:

    You can also get to the selection page from the Nodes view. From the blueprint, navigate to Staged > Physical > Nodes, click the leaf name in the table, then click the leaf name that appears at the top of the Selection panel (on the right side of the page).

  3. Click Add access switch and enter a unique label and hostname.
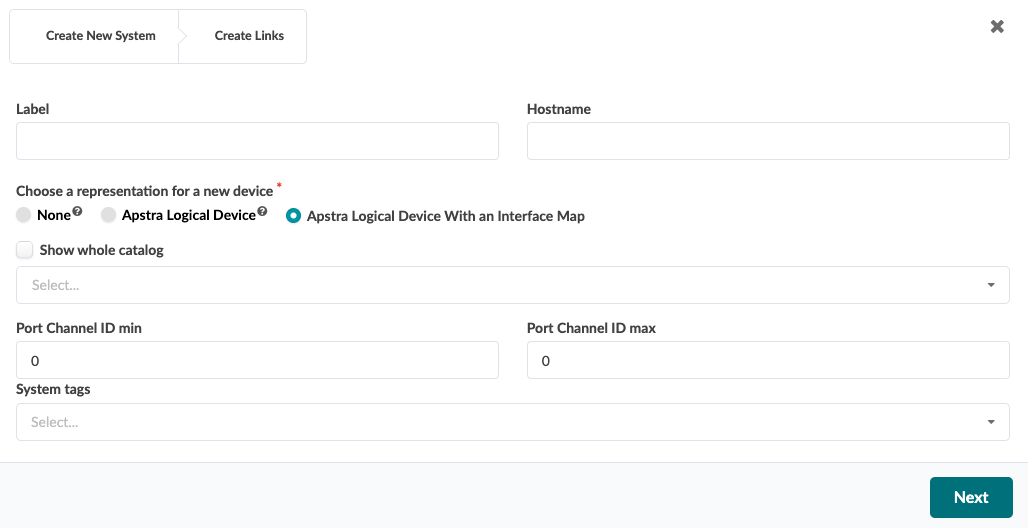
    User interface for creating a new system with fields for label, hostname, device representation options, catalog checkbox, dropdown menus, port channel IDs, system tags, and a Next button.
  4. Select the appropriate interface map from the drop-down list.
  5. Enter the port channel ID min and max.
  6. Enter tags (optional) to identify the role(s) of the new access switch, then click Next.
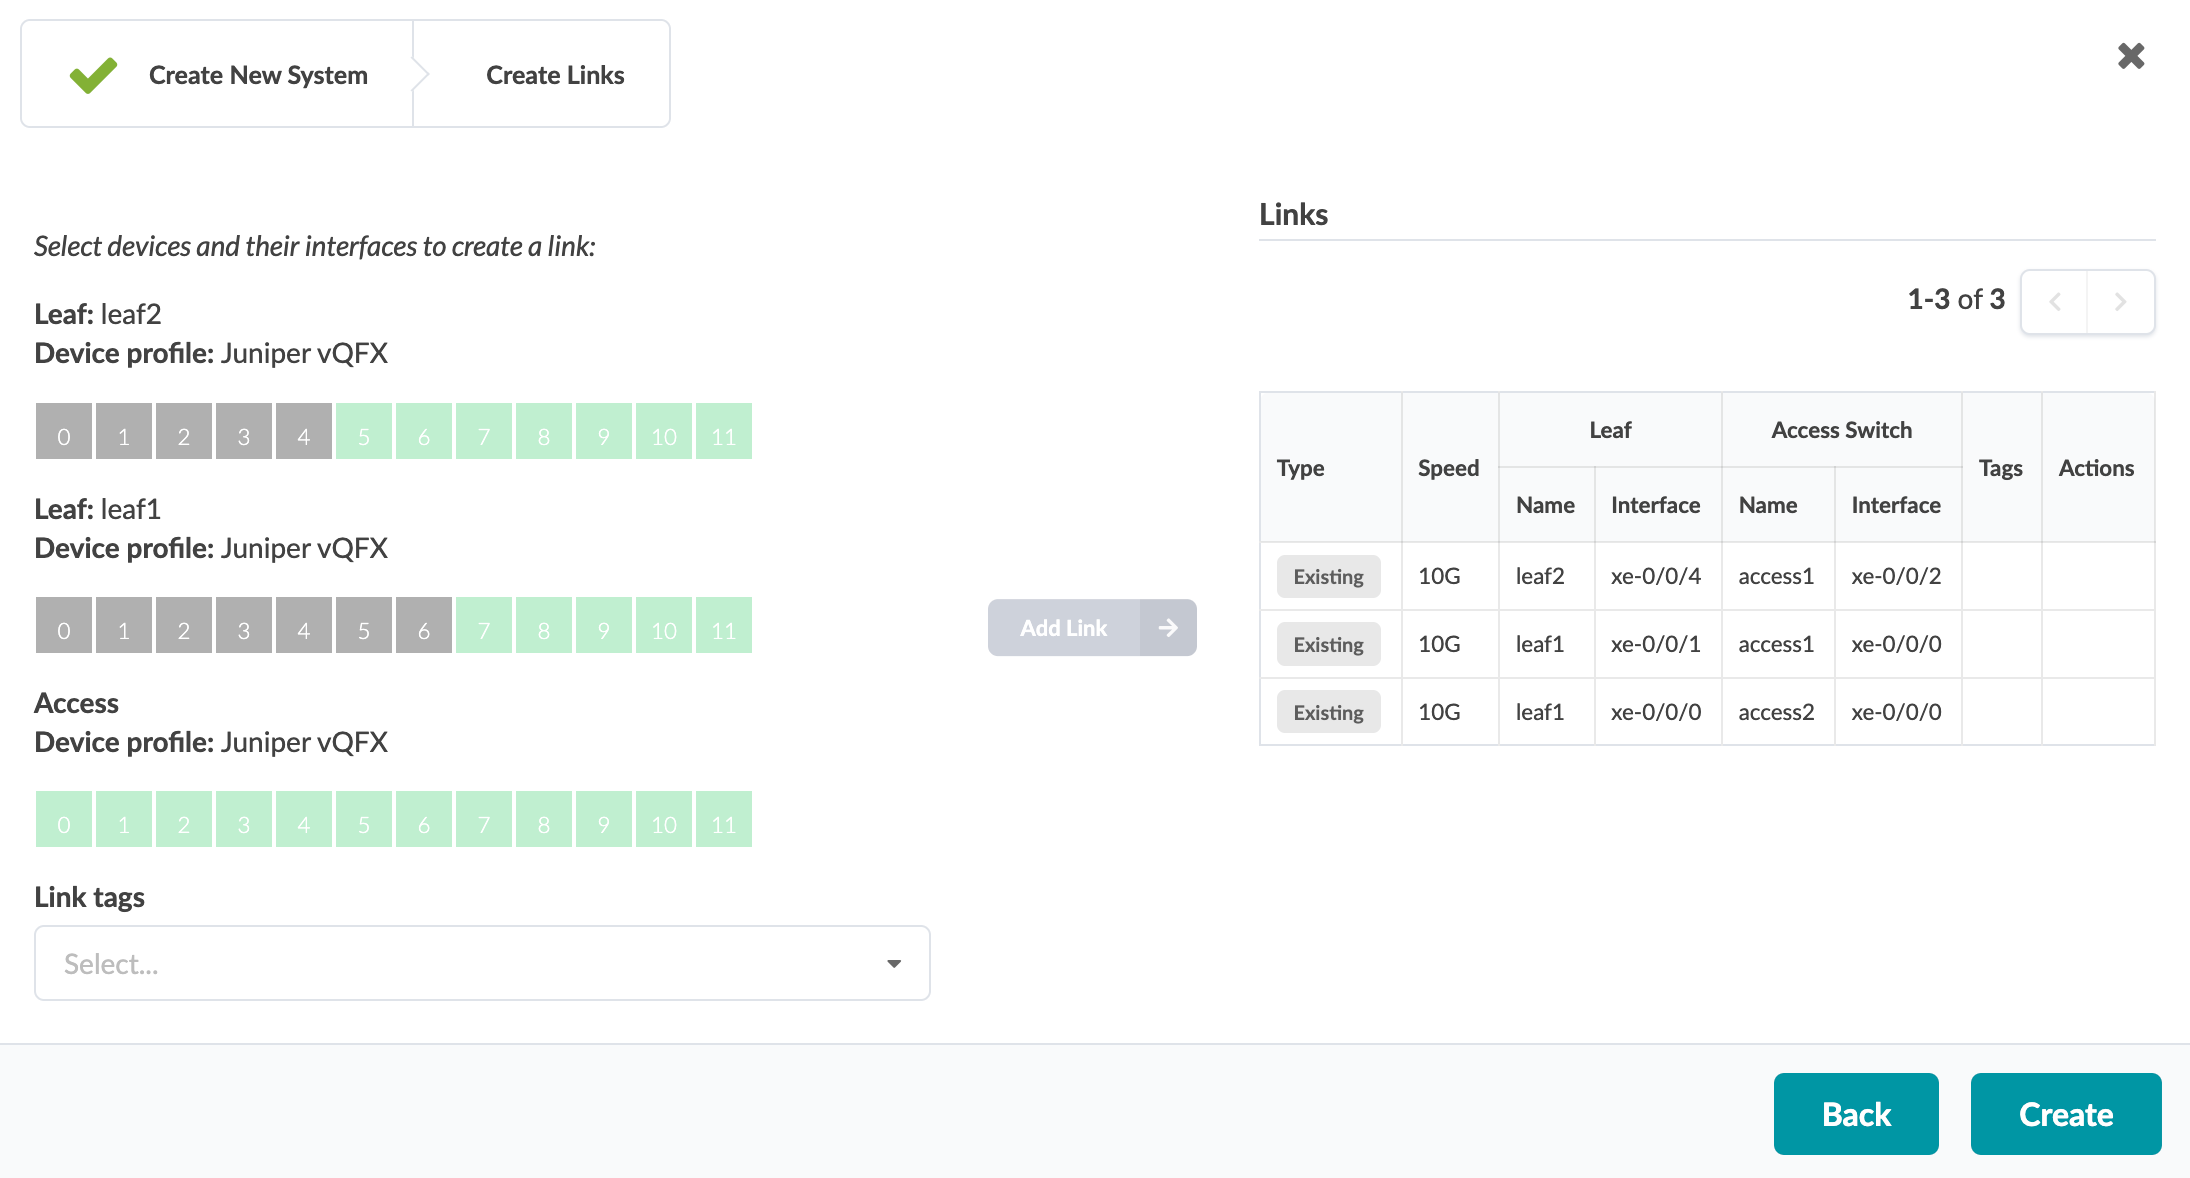
    Network configuration interface showing "Create Links" step. Devices leaf2, leaf1, and access listed with Juniper vQFX profiles. Available interfaces in green. Existing 10G links table with leaf, access switch details. Add Link, Back, and Create buttons present.
  7. Select available ports and transformations, as applicable. The gray Add Link button turns green.
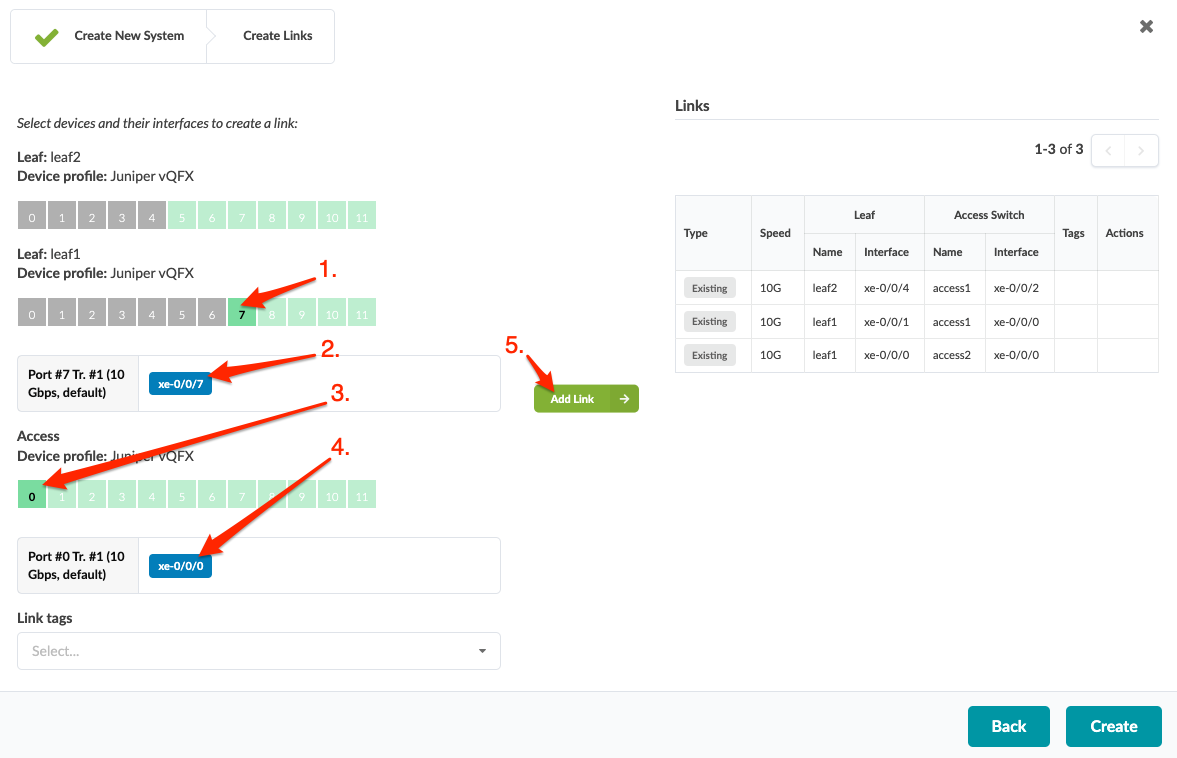
    Network configuration interface for creating links between devices. Displays device selection (Leaf and Access Switches) with ports, port details, and link creation. Includes "Add Link" button and links table summarizing existing connections. Navigation buttons "Back" and "Create" at the bottom.
  8. Click Add Link.
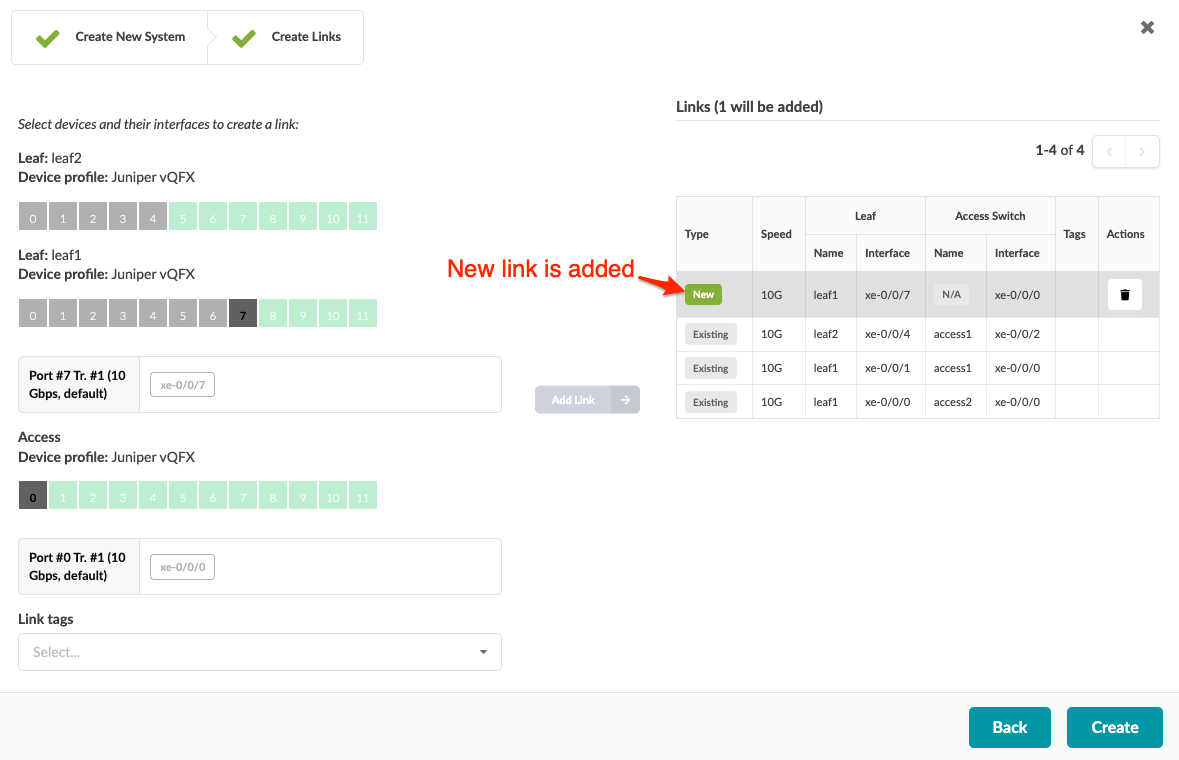
    Network configuration interface showing device selection with `leaf2` and `leaf1`, port details, and a new link being added at 10G speed.
    The link is added to the link table.
  9. Click Create.
The change is staged and you're returned to the Topology view.

When you're ready to activate your changes, go to the Uncommitted tab to review and commit (or discard) your changes.