Replace the System Battery

Remove the System Battery

Before you begin, remove the cover panel as described in Remove the Cover Panel.

To remove the system battery:

  1. Remove the air shroud. Hold the air shroud at both ends and carefully lift it out of the system.
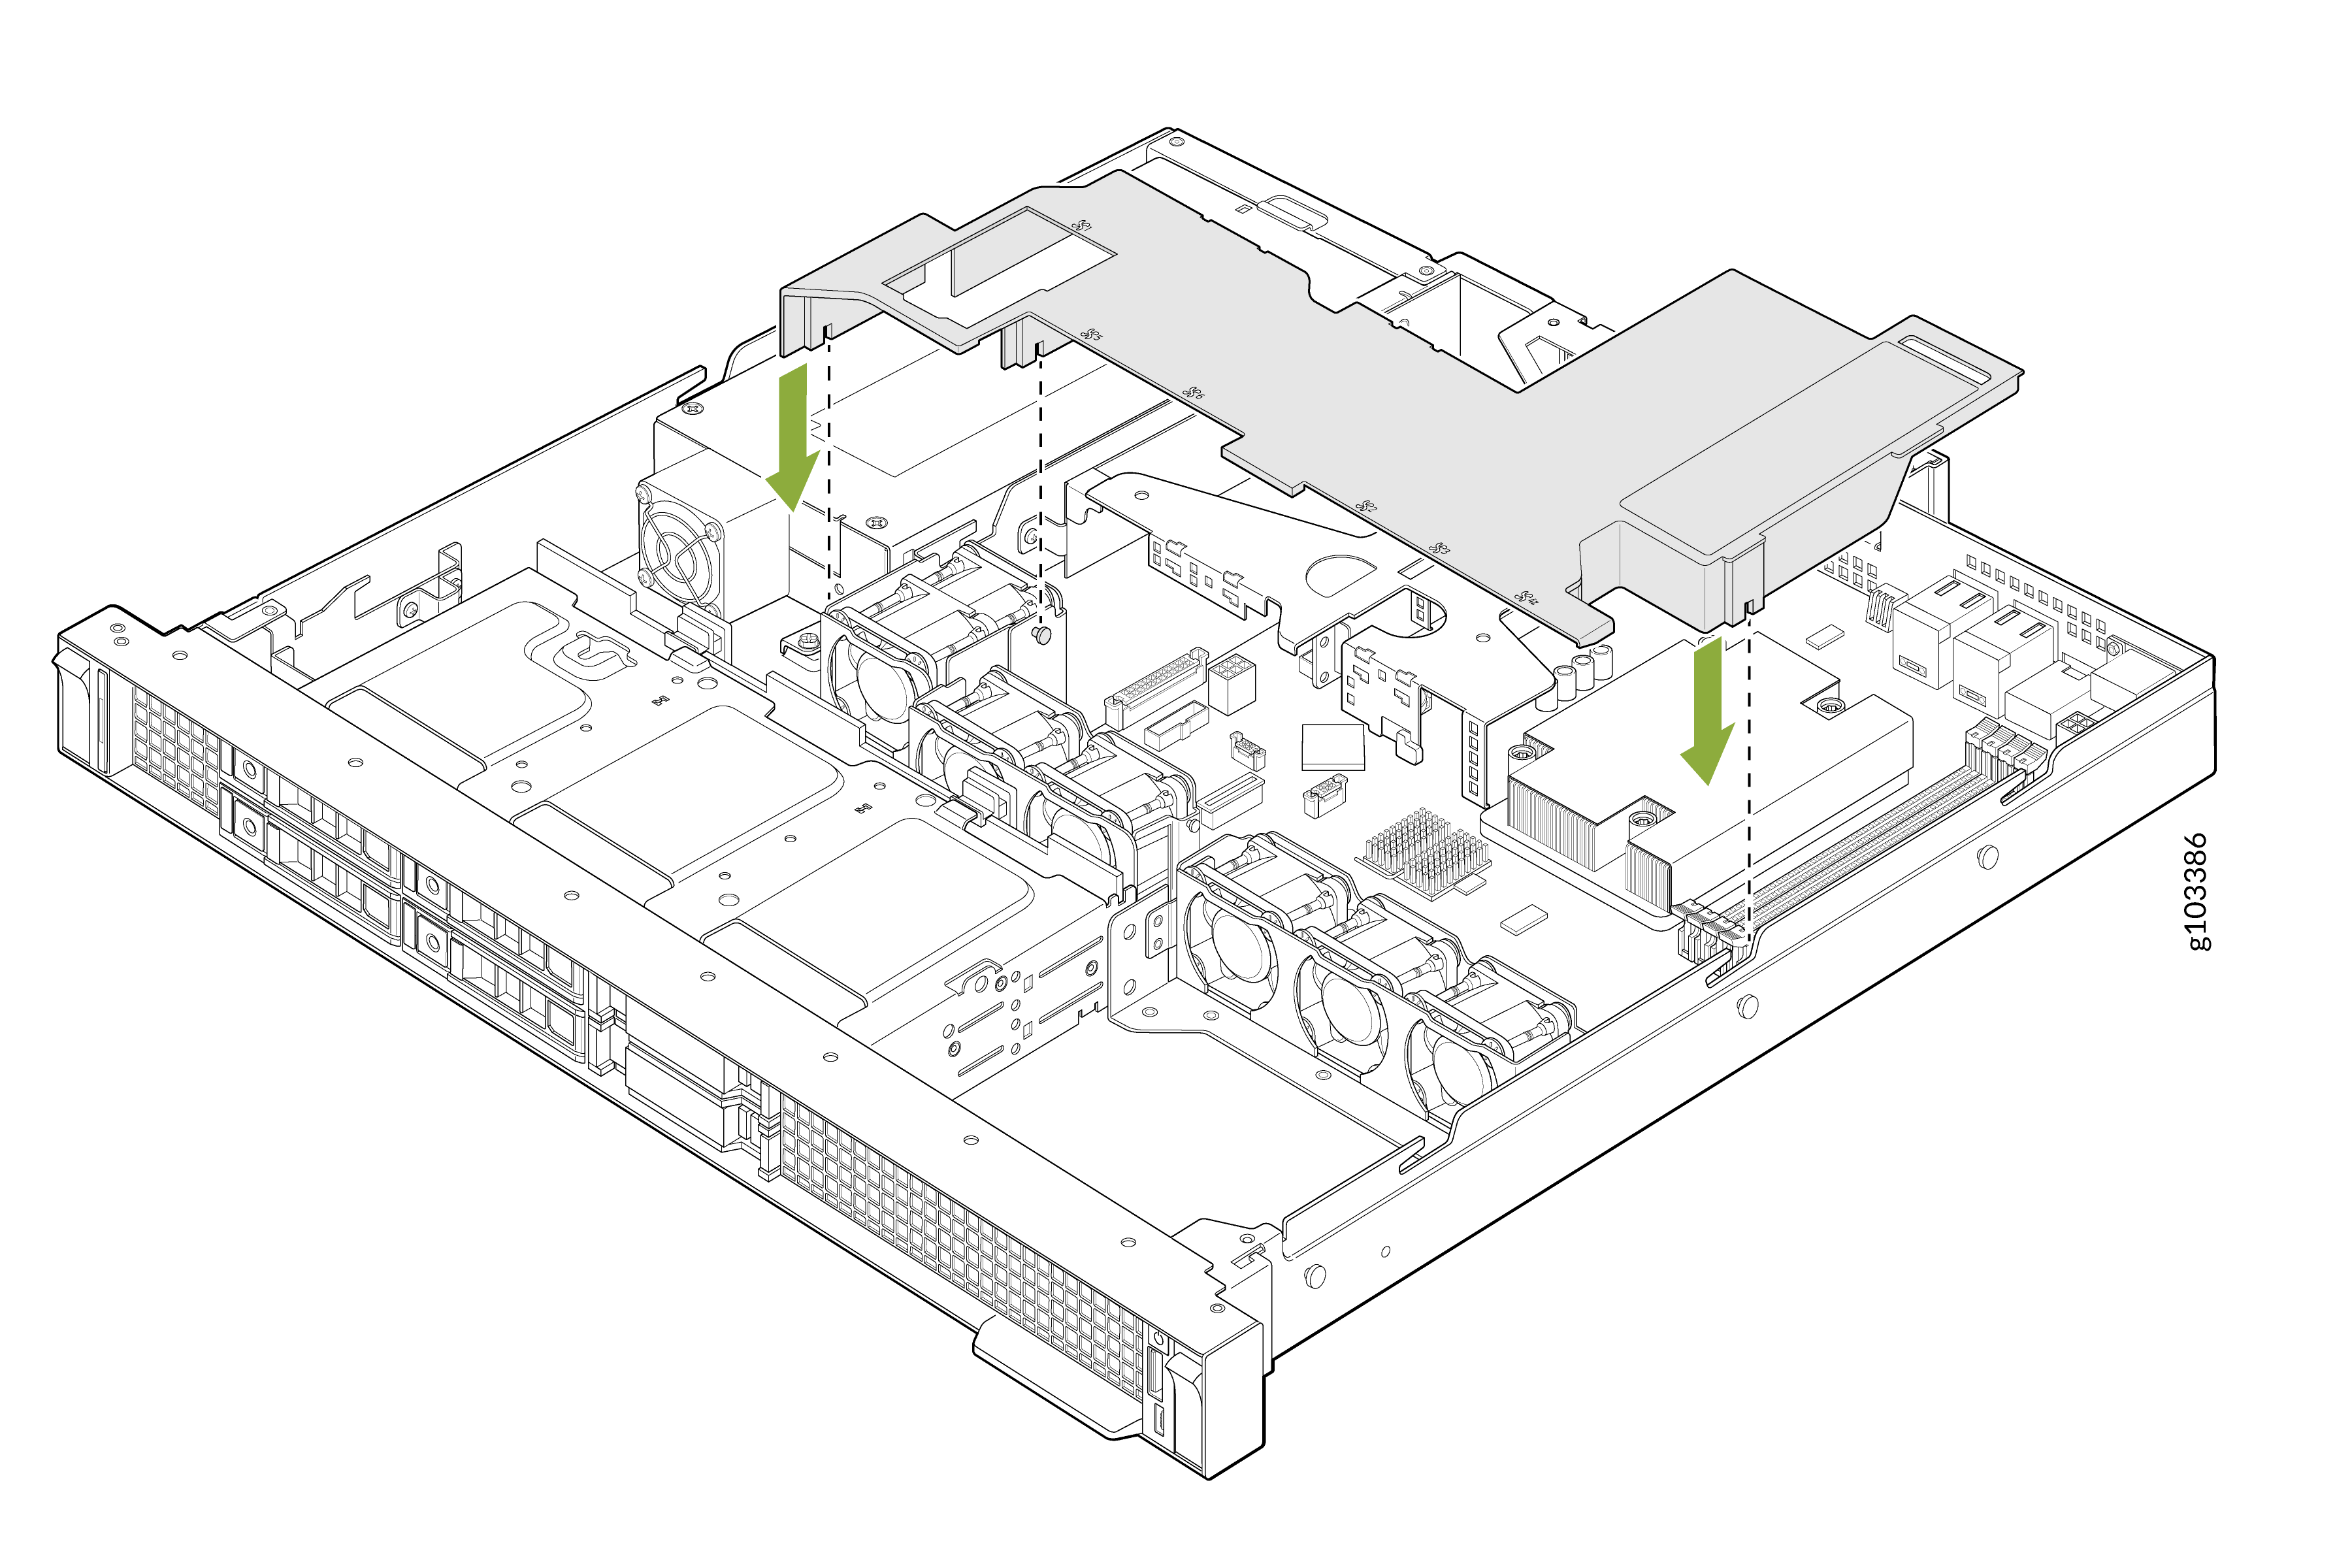
    Technical illustration of a server chassis showing internal components including cooling fans, processors, memory slots, with green arrows indicating installation or removal of components.
  2. Disconnect the cables connected to the expansion card, if any.
  3. Hold the butterfly riser by the blue touch points and lift it out of the system.
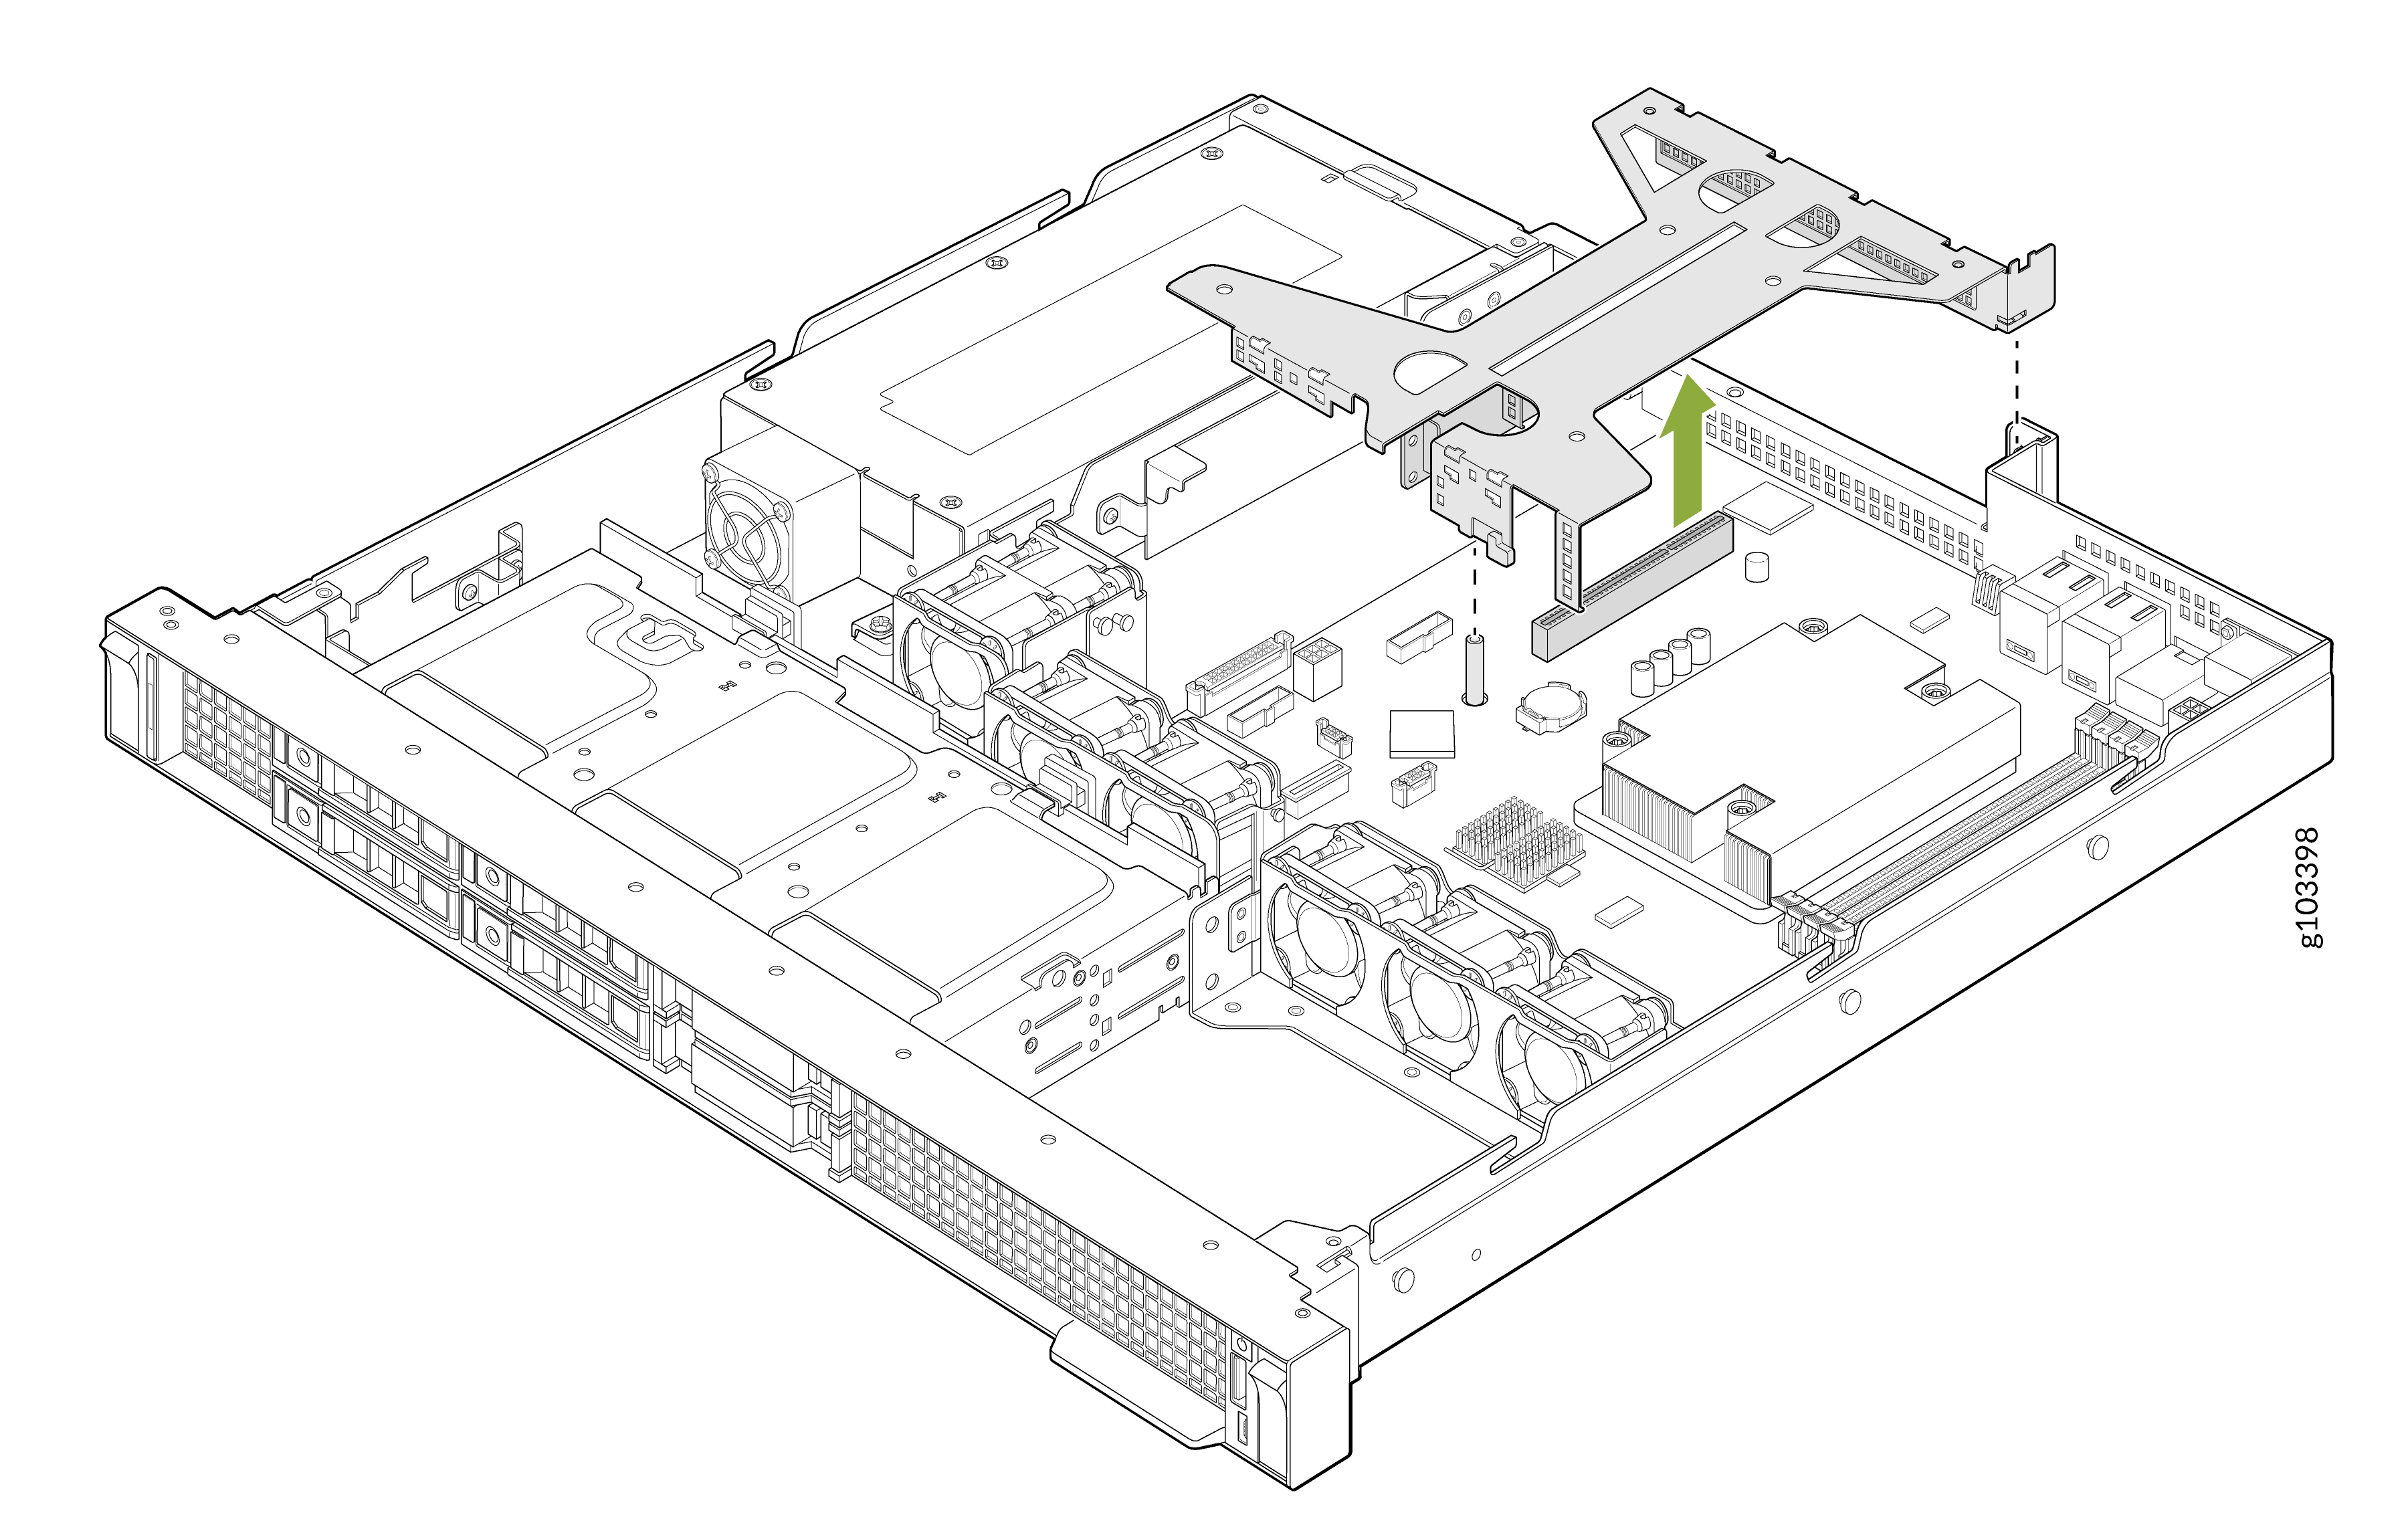
    Technical illustration showing server components including cooling fans, drive bays, and motherboard. A green arrow indicates removing or installing a metal bracket for securing parts.
  4. Press and hold the battery retention latch. The battery pops out.

    If the battery does not pop out, carefully lift it out of the socket.

    Technical diagram showing internal computer layout with components highlighted, including motherboard and storage bays. Green circle and inset detail show CMOS battery location and instructions for removal or replacement.
    CAUTION:

    To avoid damage to the battery connector, you must firmly support the connector while installing or removing a battery.

Install the System Battery

To install the system battery:
  1. Hold the battery with the positive side facing up. Slide the battery under the battery socket latch.
  2. Press the battery into the socket until the latch locks into place.
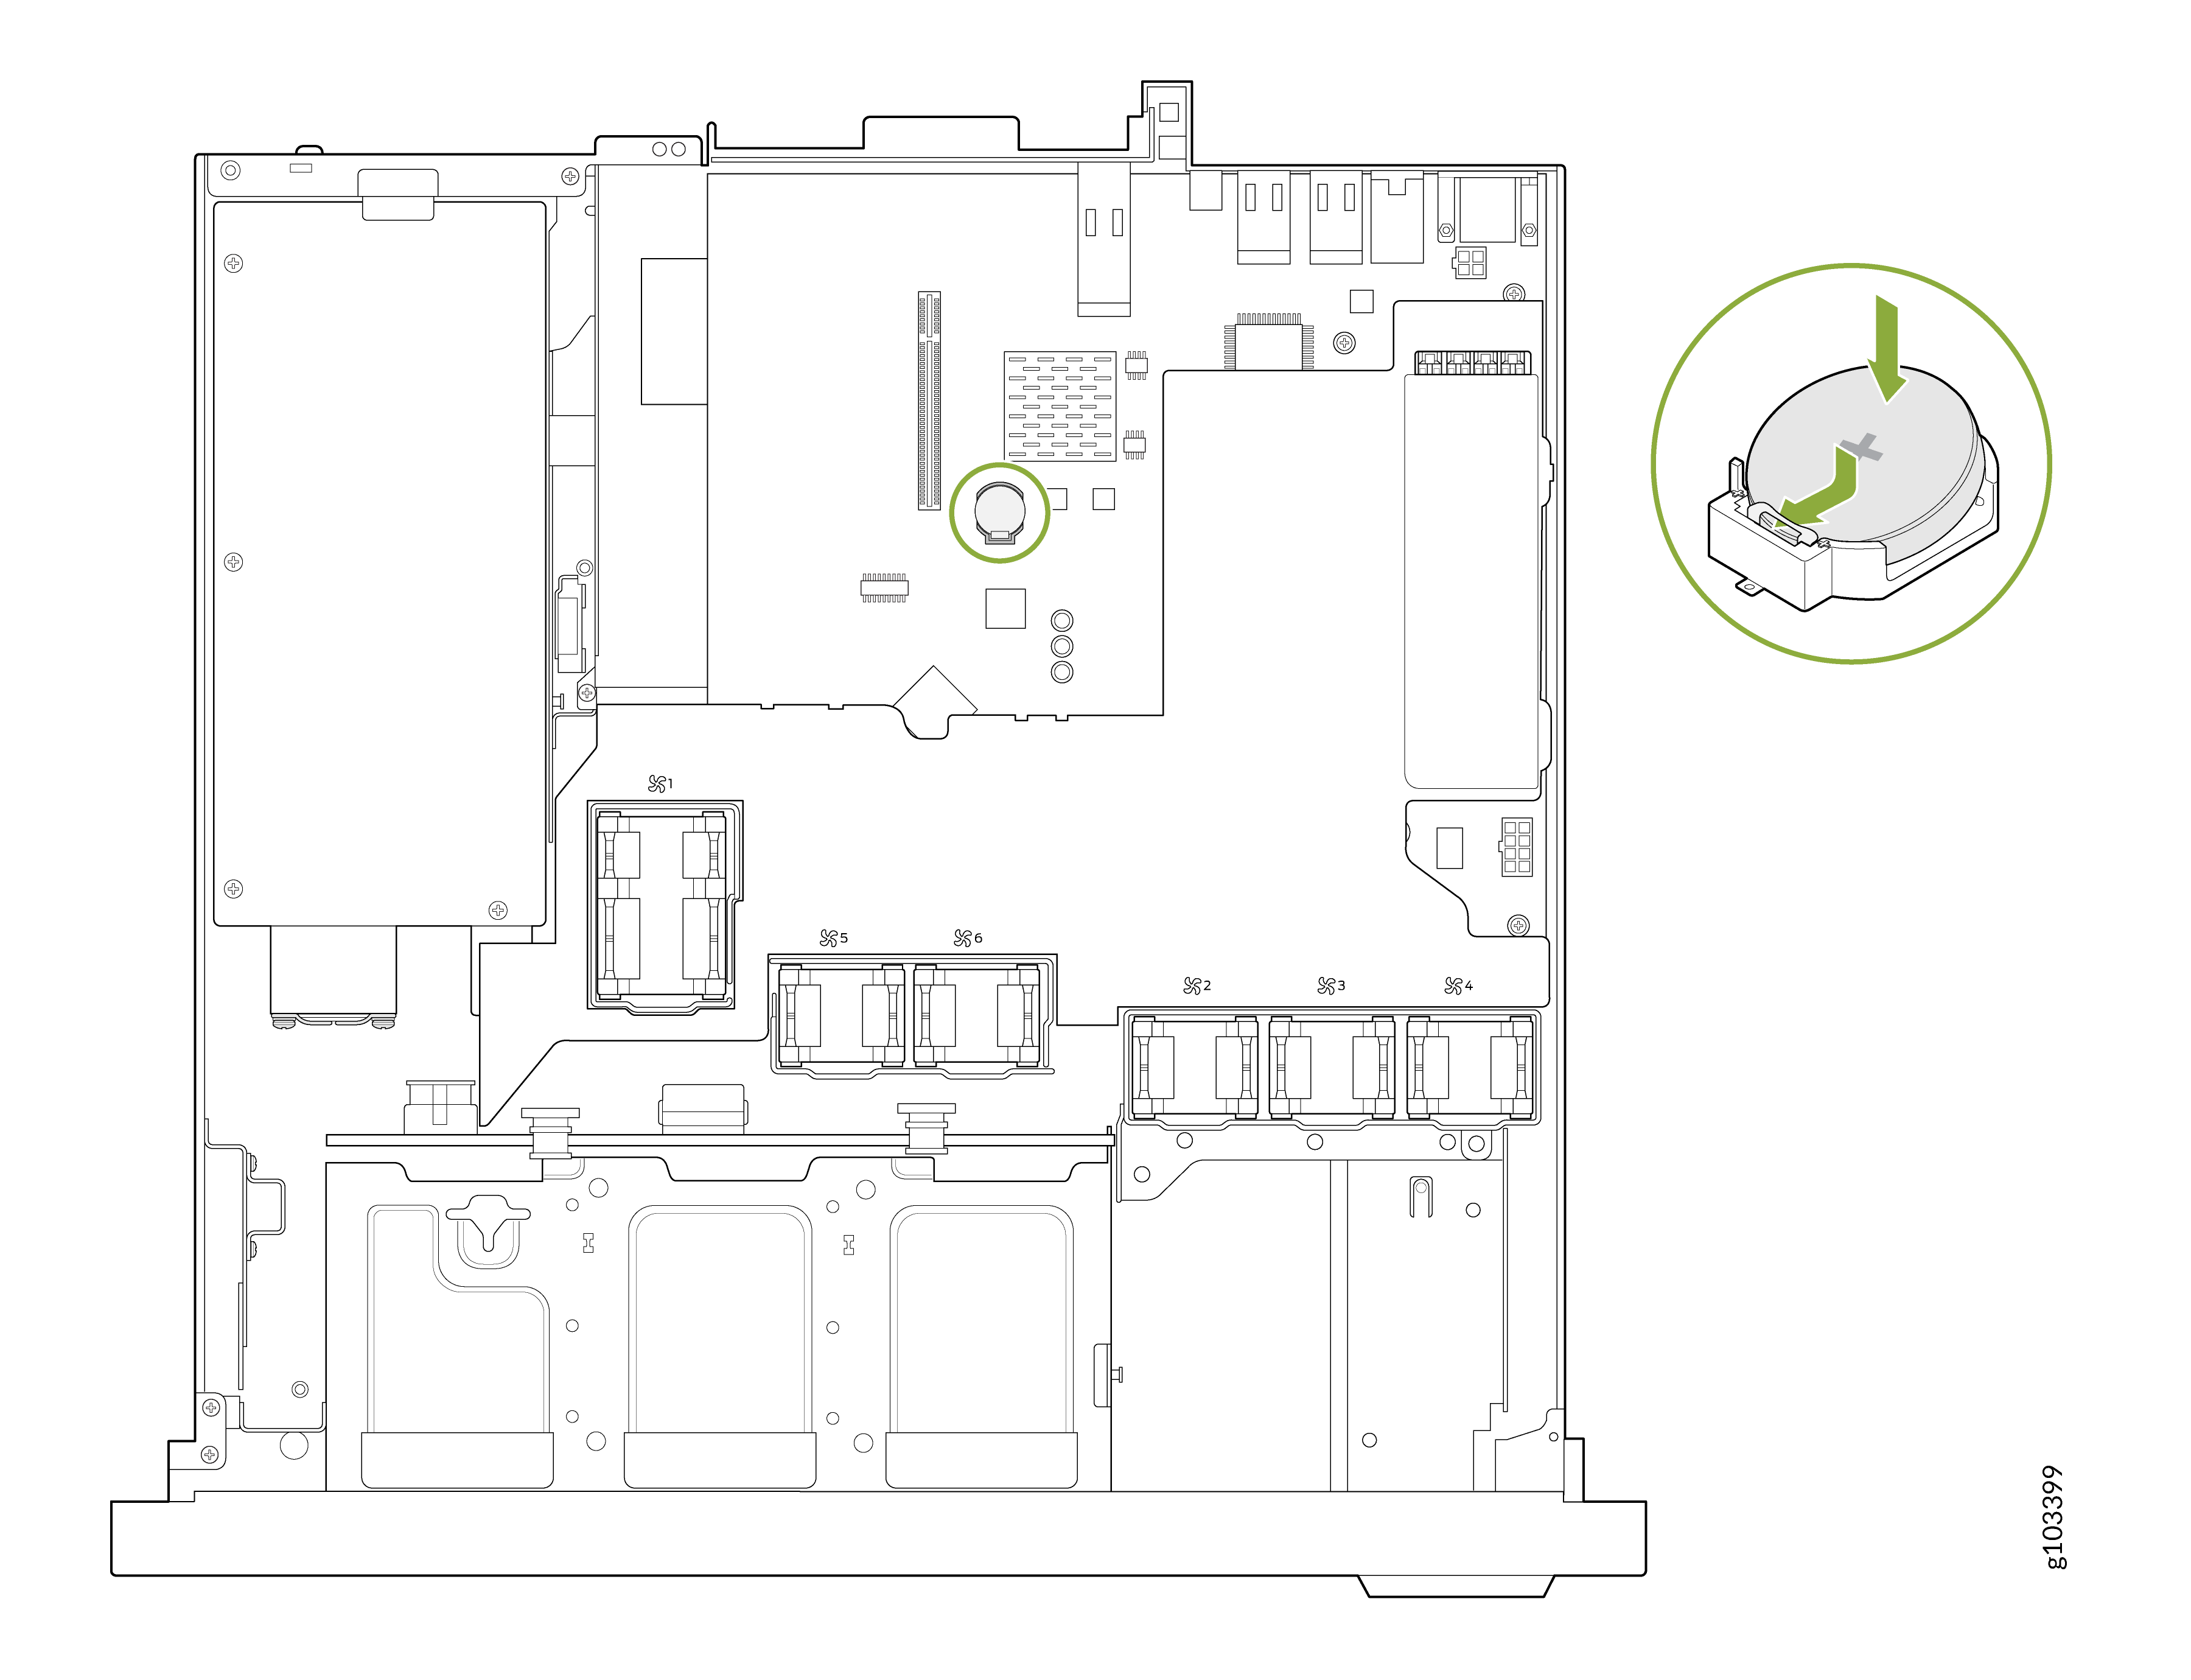
    Internal layout of a computer chassis showing motherboard, expansion slots, drive bays, and a zoomed detail of CMOS battery installation.
    CAUTION:

    To avoid damage to the battery connector, you must firmly support the connector while installing or removing a battery.

  3. Hold the expansion card riser by the blue touch points and align it with the connectors and guide pins on the system.
  4. Lower the riser into place so that it is firmly seated on the connector.
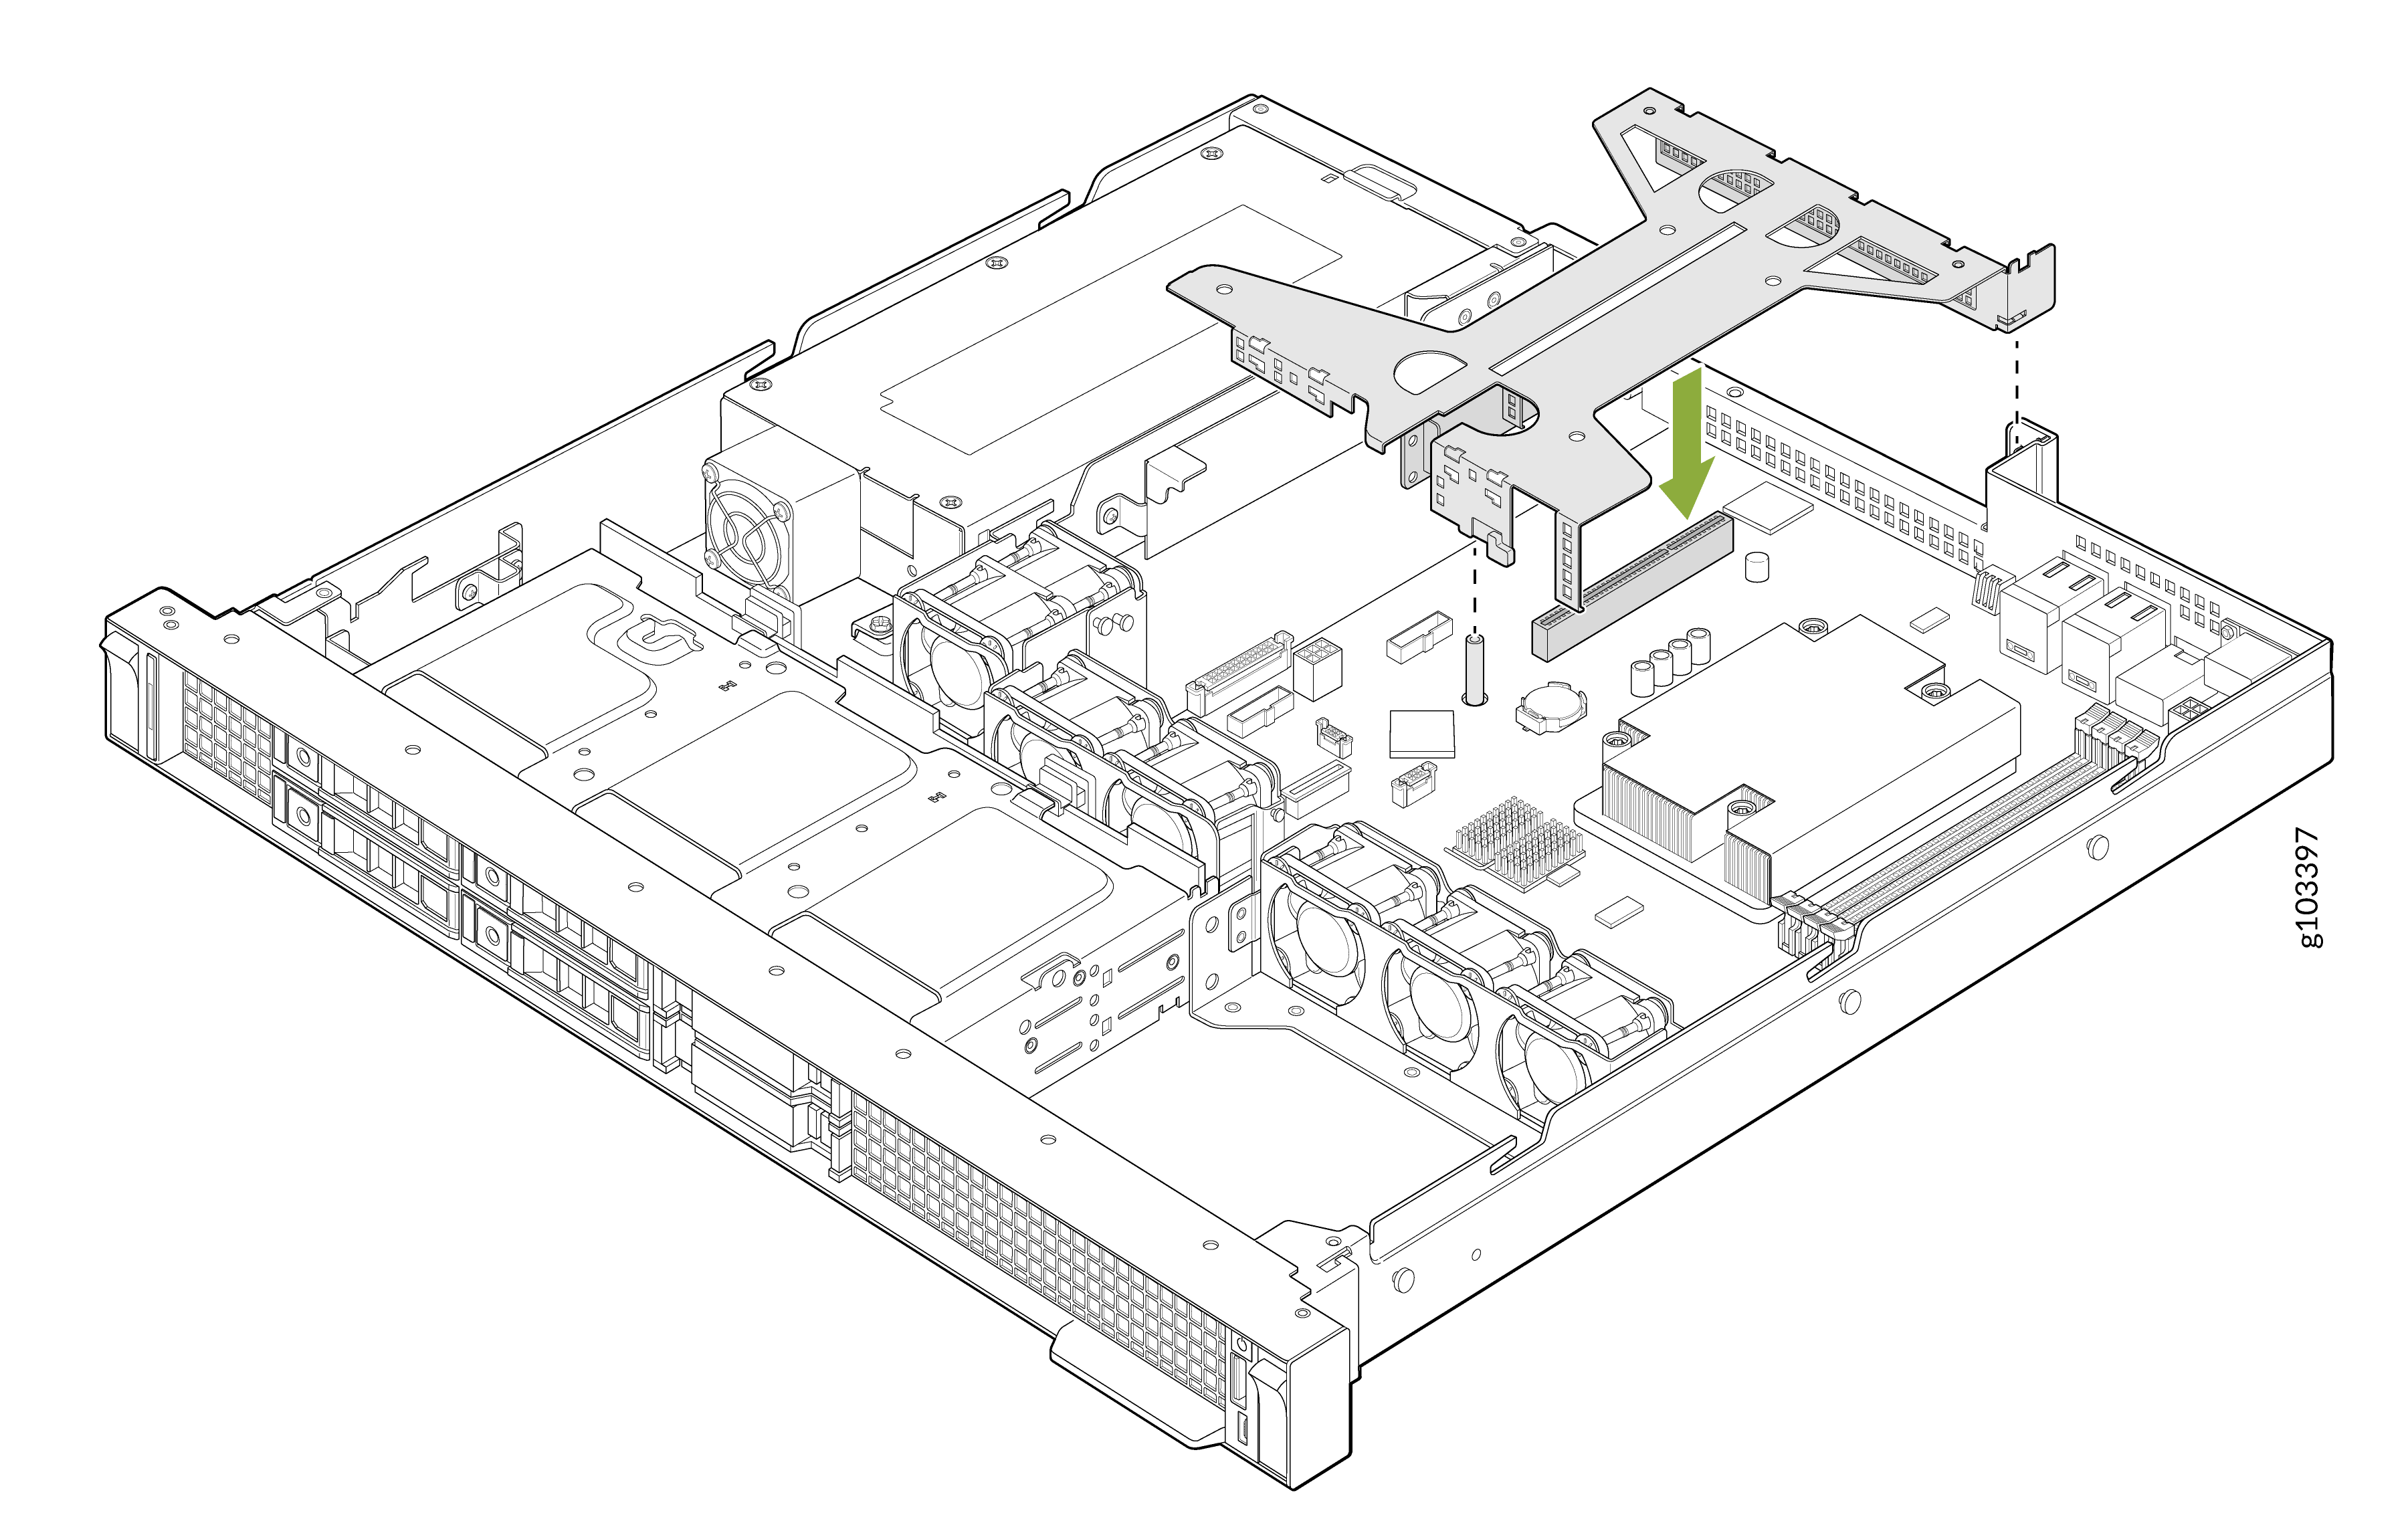
    Technical illustration showing internal server components, including cooling fans, drive bays, motherboard, and a green arrow indicating component installation or removal.
    CAUTION:

    While installing the expansion card riser assembly, ensure the connector and pins are aligned with the slot on the system board. Press down on the contact area and gently insert it straight down to avoid damage to the pins or slot.

After you have installed the system battery and expanison card riser:

  • Install the air shroud.

    Align the tabs on the air shroud with the slots on the system board and lower the air shroud until it is firmly seated.Technical illustration of a server chassis showing internal components including cooling fans, processors, memory slots, with green arrows indicating installation or removal of components.

  • Install the cover panel as described in Install the Cover Panel.