Replace Power Supplies on the EX5200 Switch
Maintaining the EX5200 switch includes removing and installing the power supplies.
Power supply units (PSUs) in the EX5200 switch are hot-removable and hot-insertable field-replaceable units (FRUs). You can remove and replace the PSUs without powering off the switch or disrupting the device functions.
Ensure that you have the following parts and tools:
-
An electrostatic discharge (ESD) grounding strap
-
An antistatic bag or an antistatic mat
-
A replacement PSU
-
A blank cover panel (in case you're not replacing the PSU)
Ensure that you understand how to prevent electrostatic discharge (ESD) damage.
Remove a Power Supply from an EX5200 Switch
Before you remove a power supply from an EX5200 switch:
-
Ensure that you have taken the necessary precautions to prevent electrostatic discharge (ESD) damage (see Prevention of Electrostatic Discharge Damage).
-
Ensure that you have the following parts and tools available:
-
Number 2 Phillips (+) screwdriver—not provided
-
An antistatic bag or an antistatic mat—not provided
-
An ESD grounding strap—not provided
-
A replacement power supply
-
We ship the EX5200 switches with one AC power supply preinstalled in the rear panel. Each power supply is a hot-removable and hot-insertable field-replaceable unit (FRU) when the second power supply is installed and running: You can remove and replace either one of them without powering off the switch or disrupting switch functions.
Replace the power supply with a new power supply within one minute of removal to prevent chassis overheating.
To remove a power supply:
Place the antistatic bag or the antistatic mat on a flat, stable surface.
Wrap and fasten one end of the ESD wrist strap around your bare wrist, and connect the other end of the strap to a site ESD point.
Note:If only one power supply is installed in your EX5200 switch, you need to power off the switch before removing the power supply.
Disconnect power to the switch:
AC power supply—If the AC power source outlet has a power switch, set it to the off position. If the AC power source outlet does not have a power switch, gently pull out the plug end of the power cord connected to the power source outlet.
Remove the power source cable from the power supply faceplate:
AC power supply—Detach the power cord retainer by using your hands, and gently pull out the power cord.
Push the ejector lever toward the handle until it stops.
Grasp the power supply handle and pull firmly to slide the power supply halfway out of the chassis.
Place one hand under the power supply to support it and then slide it completely out of the chassis. Take care not to touch power supply components, pins, leads, or solder connections.
Figure 1: Remove an AC Power Supply from the Switch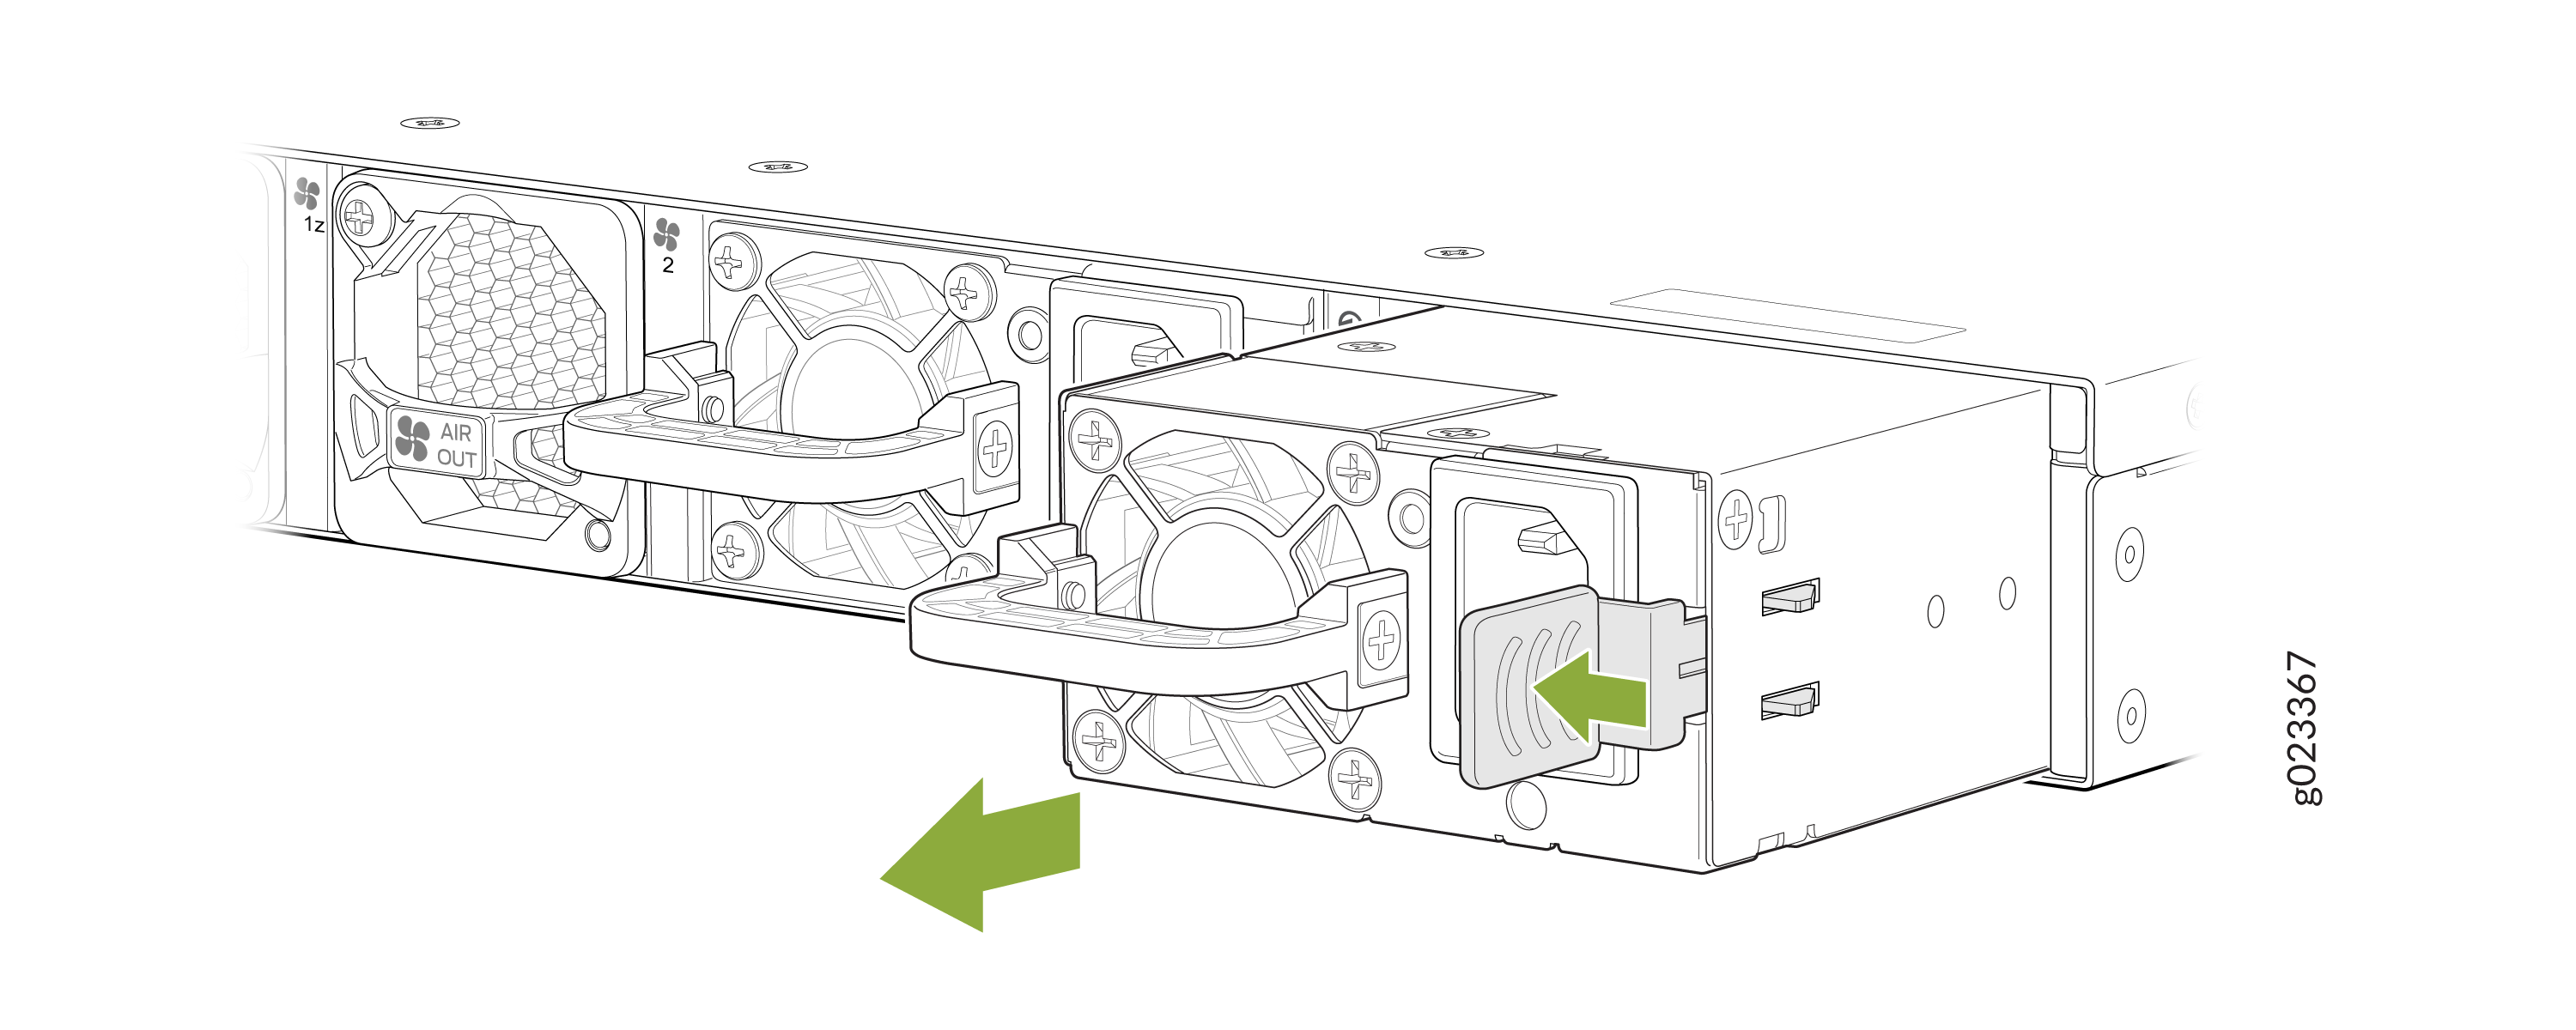
Place the power supply in the antistatic bag or on the antistatic mat placed on a flat, stable surface.
Install the replacement power supply.
You must install both the power supplies and they must be operational for optimal functioning of the switch.
Install a Power Supply in an EX5200 Switch
Before you install a power supply:
-
Ensure that you understand how to prevent electrostatic discharge (ESD) damage (see Prevention of Electrostatic Discharge Damage).
-
Ensure that you have the following parts and tools available:
-
Number 2 Phillips (+) screwdriver—not provided
-
An ESD grounding strap—not provided
-
We ship the EX5200 switches with one AC power supply preinstalled in the rear panel. Each power supply is a hot-removable and hot-insertable field-replaceable unit (FRU) when the second power supply is installed and running. You can remove and replace either one of them without powering off the switch or disrupting switch functions.
To install a power supply:
Wrap and fasten one end of the ESD wrist strap around your bare wrist, and connect the other end of the strap to a site ESD point.
Taking care not to touch power supply pins, leads, or solder connections, remove the power supply from its bag.
If you are installing an AC power supply, push the end of the retainer strip into the hole below the inlet on the power supply faceplate until it snaps into place.
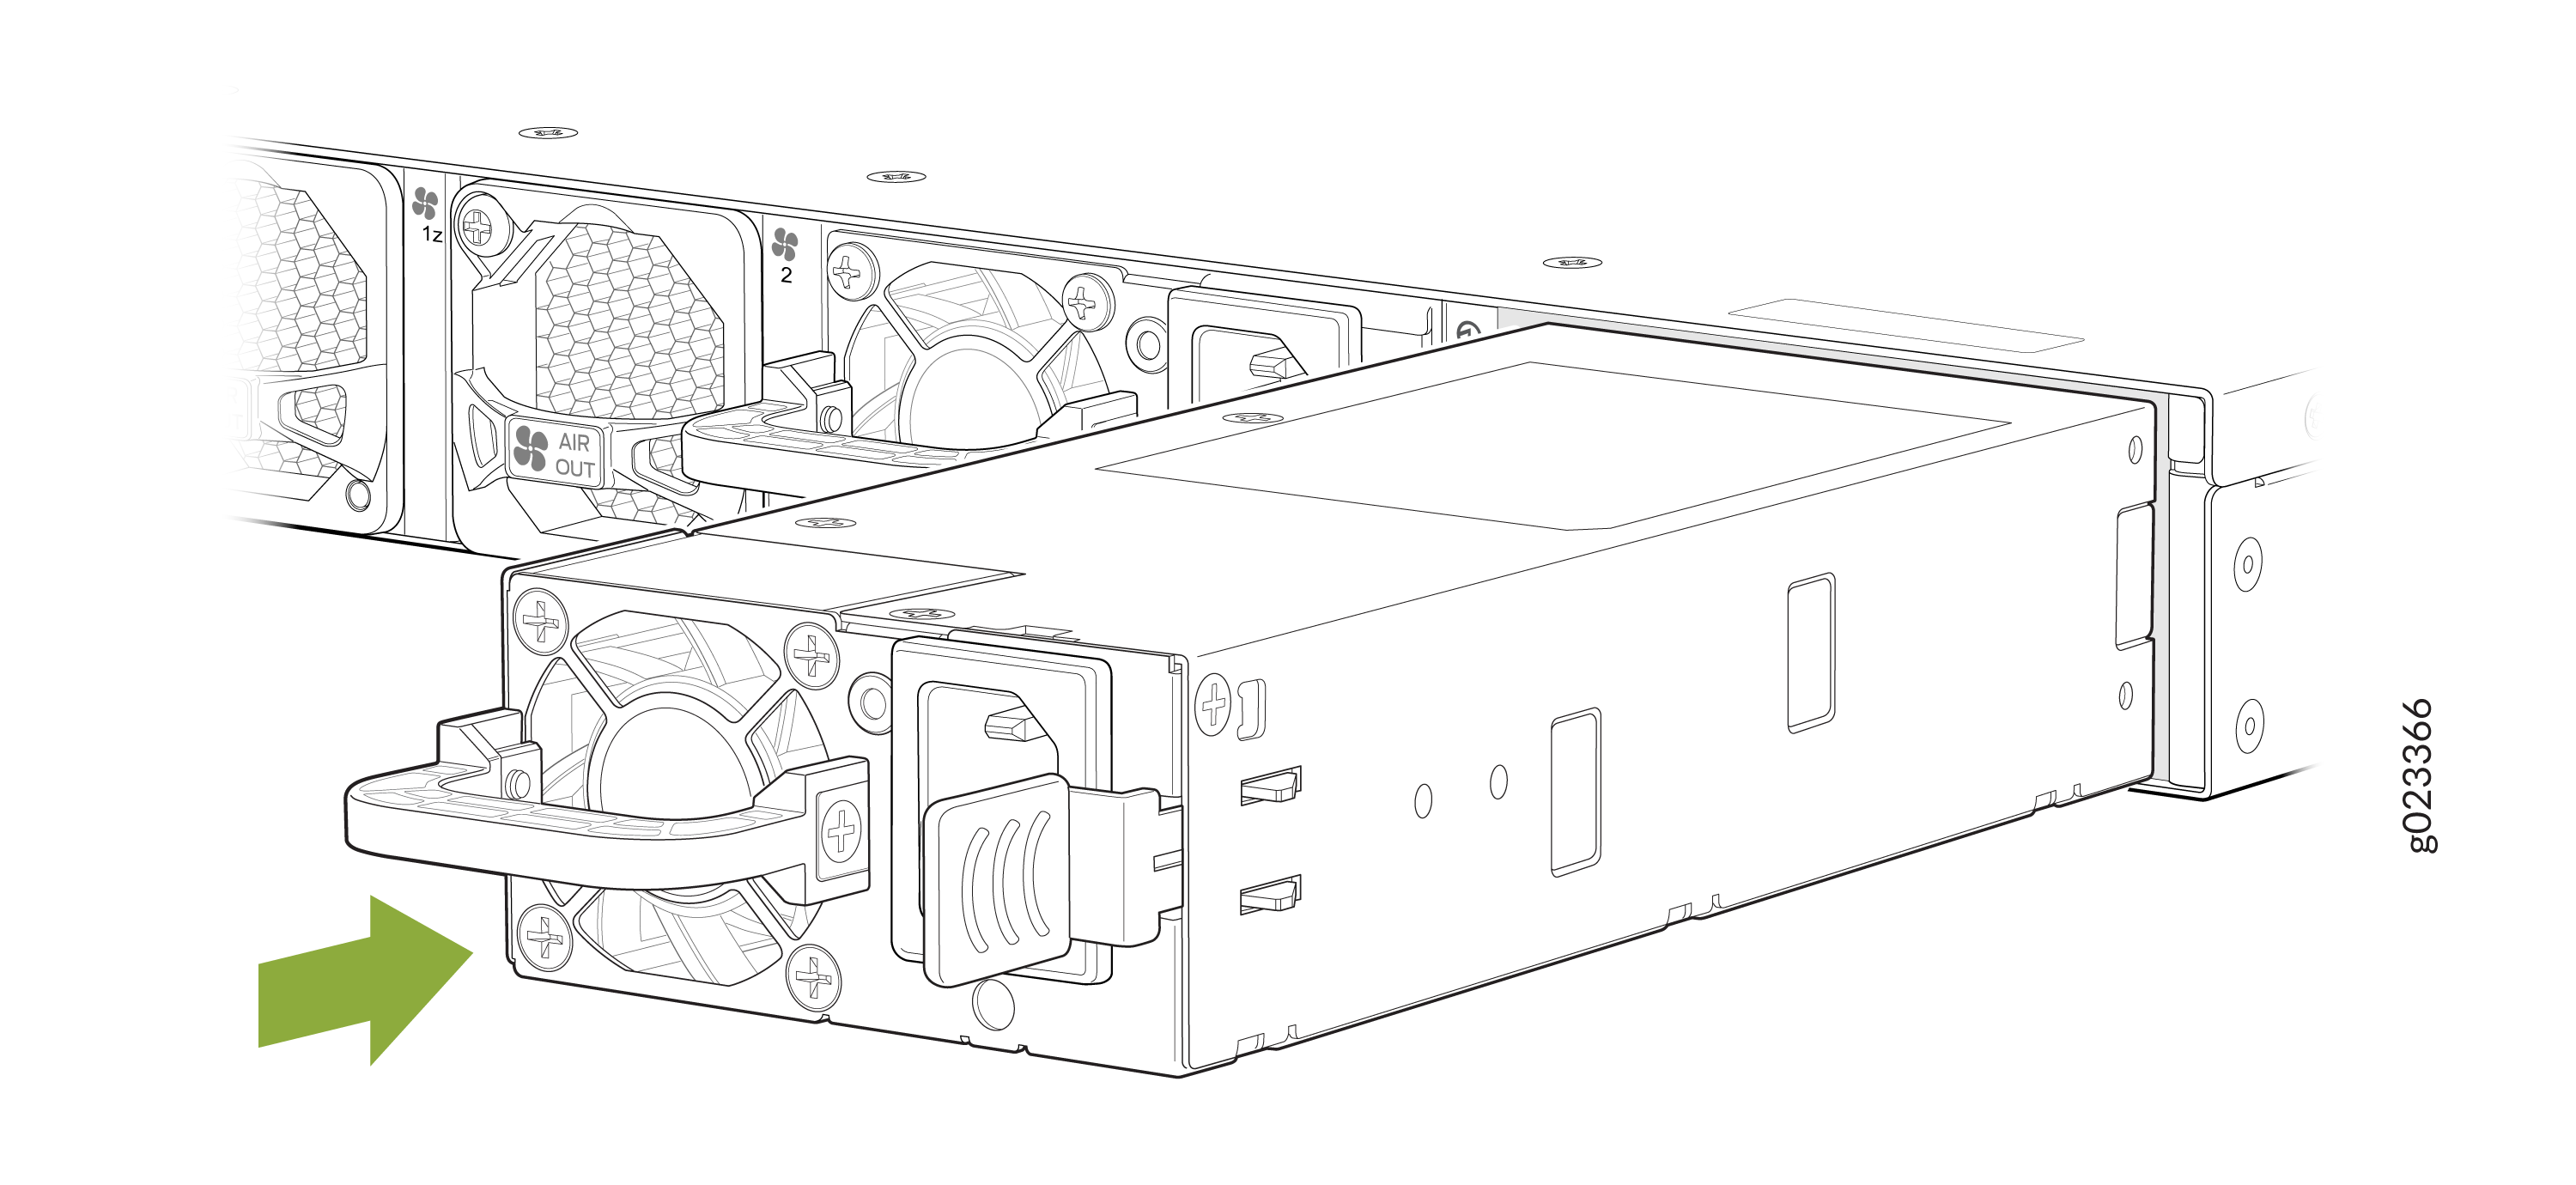
Using both hands, place the power supply in the power supply slot on the rear panel of the switch and slide it in until it is fully seated and the ejector lever fits into place.
Figure 2: Install an AC Power Supply in the EX5200 Switch