Replace Fans on the EX5200 Switch
Maintaining the EX5200 switch includes removing and installing the fans.
Fan modules in the EX5200 switch are hot-removable and hot-insertable field-replaceable units (FRUs). You can remove and replace the fan modules without powering off the switch or disrupting the device functions.
Ensure that you have the following parts and tools:
-
An electrostatic discharge (ESD) grounding strap
-
An antistatic bag or an antistatic mat
-
A replacement fan module
-
A blank cover panel (in case you're not replacing the fan module)
Ensure that you understand how to prevent electrostatic discharge (ESD) damage.
Remove a Fan Module from an EX5200 Switch
Before you remove a fan module:
-
Ensure that you understand how to prevent electrostatic discharge (ESD) damage (see Prevention of Electrostatic Discharge Damage).
-
Ensure that you have the following parts and tools available:
-
Number 2 Phillips (+) screwdriver—not provided
-
An antistatic bag or an antistatic mat—not provided
-
An ESD grounding strap—not provided
-
A replacement fan module
-
We ship EX5200 switches with 1+1 redundant fan modules preinstalled in the rear panel. The fan modules in EX5200 switches are hot-removable and hot-insertable field-replaceable unit (FRU) installed in the rear panel of the switch: You can remove and replace them without powering off the switch or disrupting switch functions.
To remove a fan module:
Place the antistatic bag or the antistatic mat on a flat, stable surface.
Wrap and fasten one end of the ESD wrist strap around your bare wrist, and connect the other end of the strap to a site ESD point.
Loosen the captive screws on the front bezel of the fan module by using the screwdriver.
Warning:To prevent injury, do not touch the fan with your hands or any tools as you slide the fan module out of the chassis—the fan might still be running.
Grasp the handle on the fan module and pull it firmly to slide the fan module out of the chassis.
Figure 1: Remove a Fan Module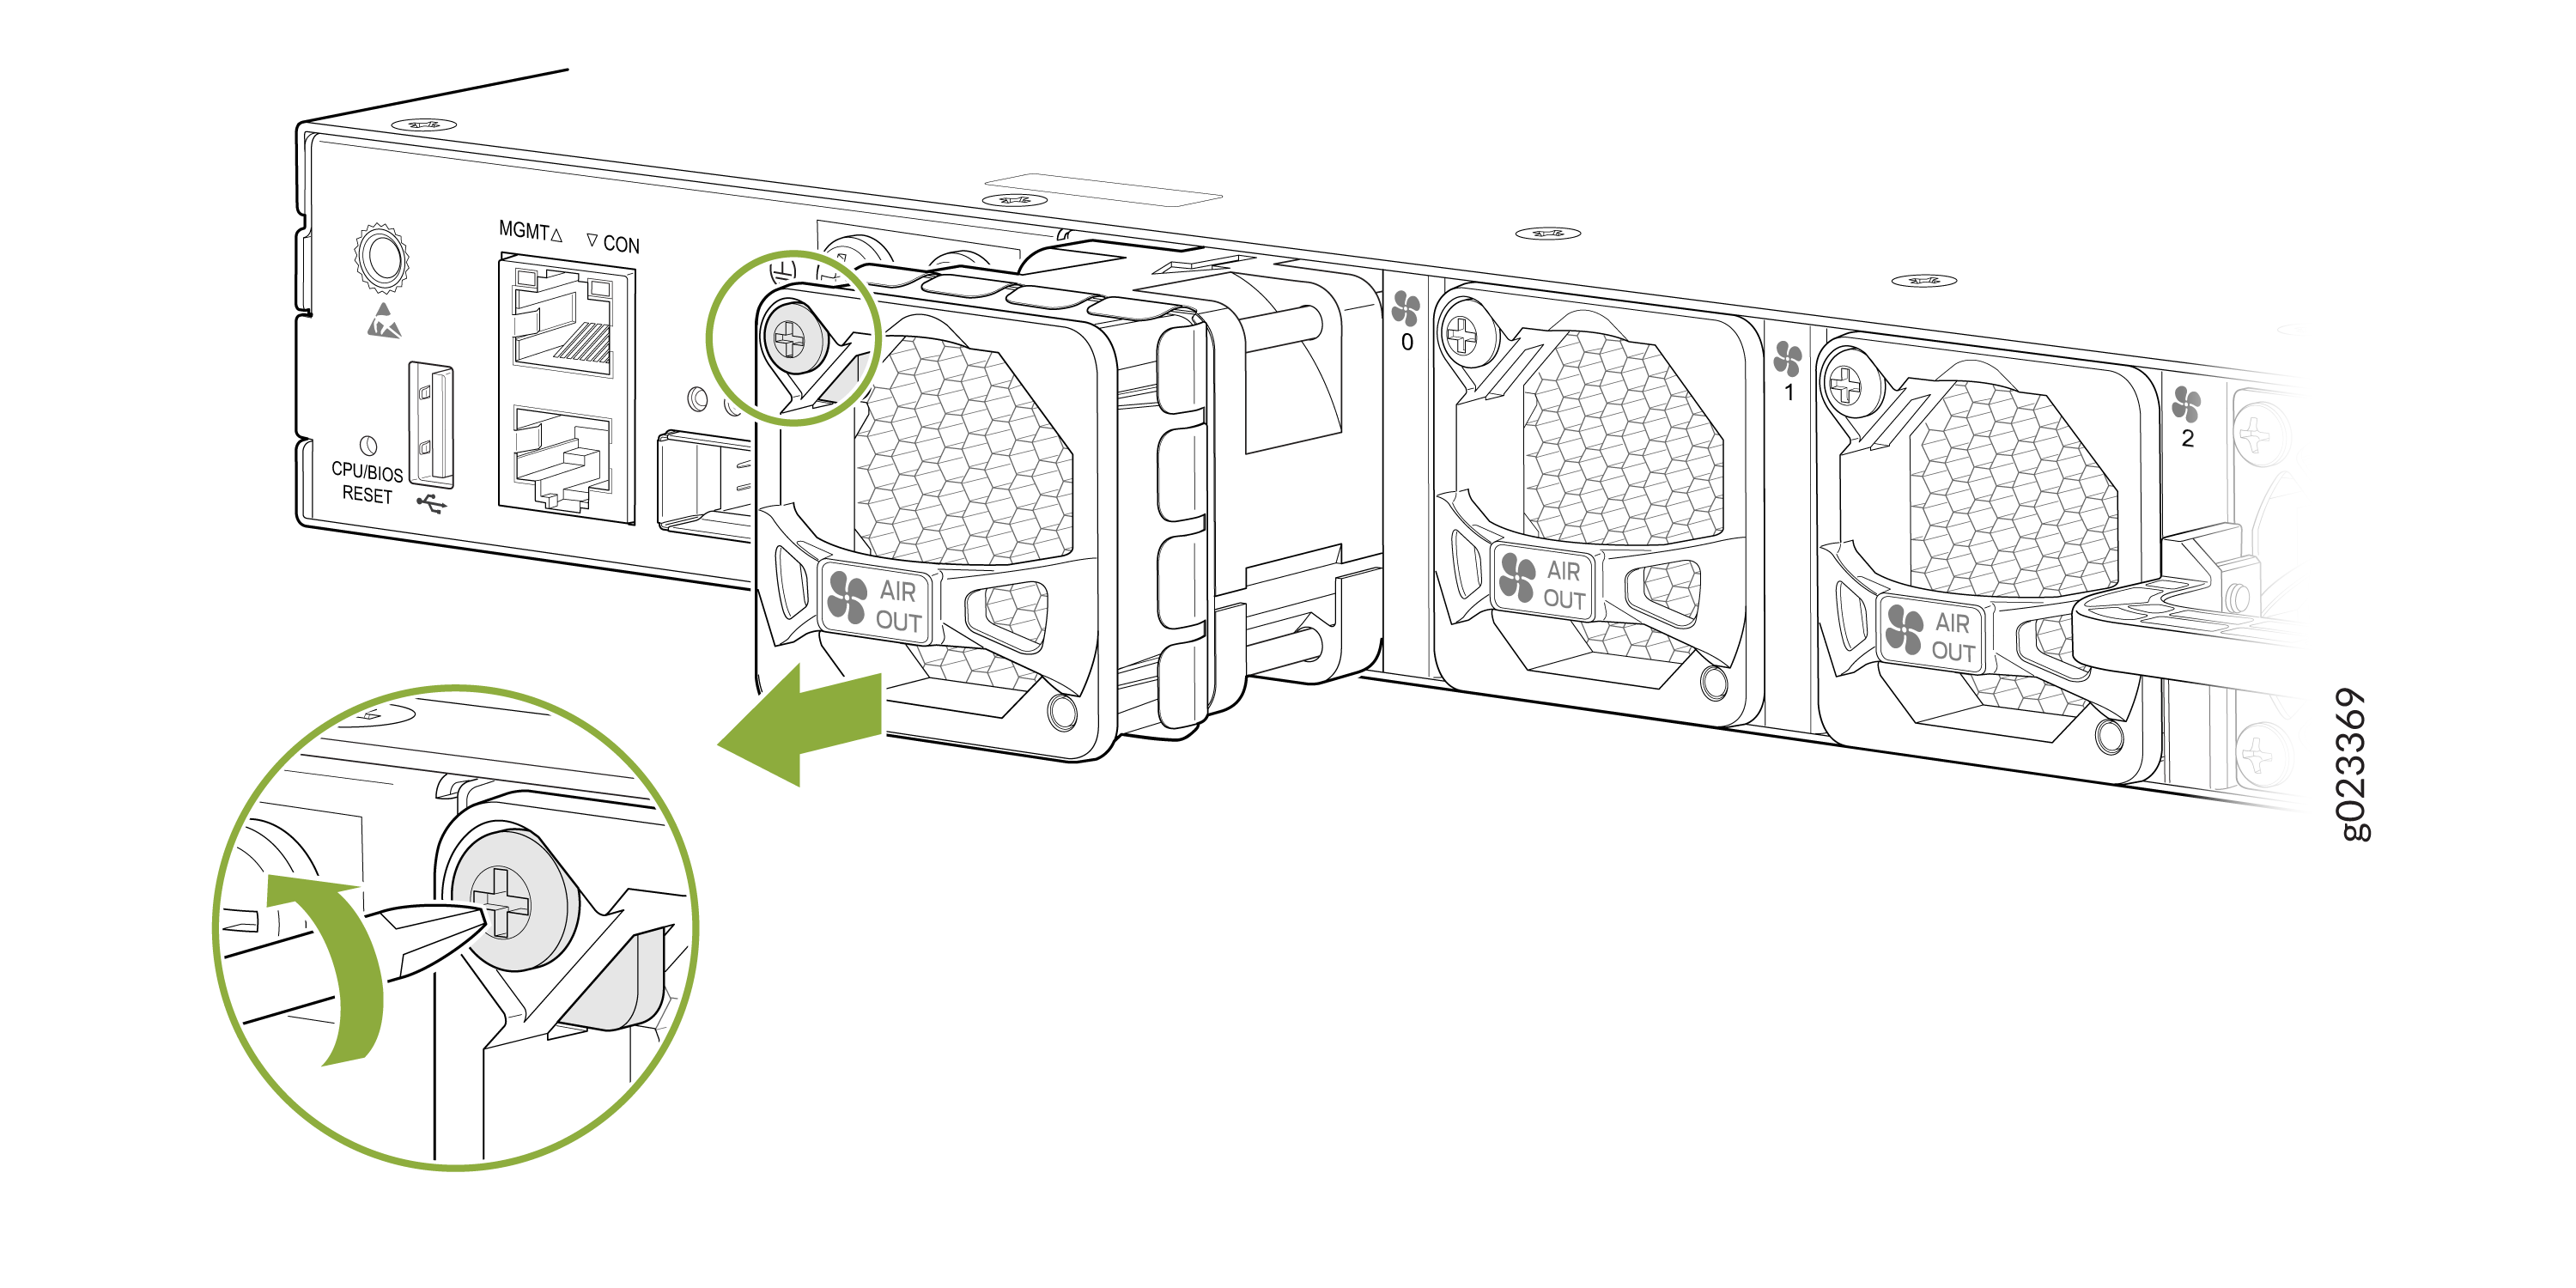
Place the fan module in the antistatic bag or on the antistatic mat placed on a flat, stable surface.
CAUTION:Do not mix:
Fan modules with different airflow directions in the same chassis.
Power supplies and fan modules with different airflow directions in the same chassis.
If you install power supplies or fan modules with different airflow directions, Junos OS raises an alarm.
Install the replacement fan.
Note:You must install all the fan modules and they must be operational for optimal functioning of the switch.
If the switch is operational while you are replacing fan modules, you must remove only one fan module at a time. The switch continues to operate for 60 seconds without thermal shutdown while you are replacing a fan module.
Install a Fan Module in an EX5200 Switch
Before you install a fan module in the switch:
-
Ensure that you understand how to prevent electrostatic discharge (ESD) damage (see Prevention of Electrostatic Discharge Damage).
-
Ensure that you have the following parts and tools available:
-
Number 2 Phillips (+) screwdriver—not provided
-
An ESD grounding strap—not provided
-
We ship EX5200 switches with 1+1 redundant fan modules preinstalled in the rear panel. The fan modules in EX5200 switches are hot-removable and hot-insertable field-replaceable unit (FRU) installed in the rear panel of the switch: You can remove and replace them without powering off the switch or disrupting switch functions.
Do not mix:
-
Fan modules with different airflow directions in the same chassis.
-
Power supplies and fan modules with different airflow directions in the same chassis.
If you install power supplies or fan modules with different airflow directions, Junos OS raises an alarm.
To install a fan module:
Wrap and fasten one end of the ESD wrist strap around your bare wrist, and connect the other end of the strap to a site ESD point.
Remove the fan module from its bag.
Hold the handle of the fan module with one hand and support the weight of the module with the other hand. Place the fan module in the fan module slot on the rear panel of the switch and slide it in until it is fully seated.
Tighten the captive screws on the front bezel of the fan module by using the screwdriver
Figure 2: Install a Fan Module in the EX5200 Switch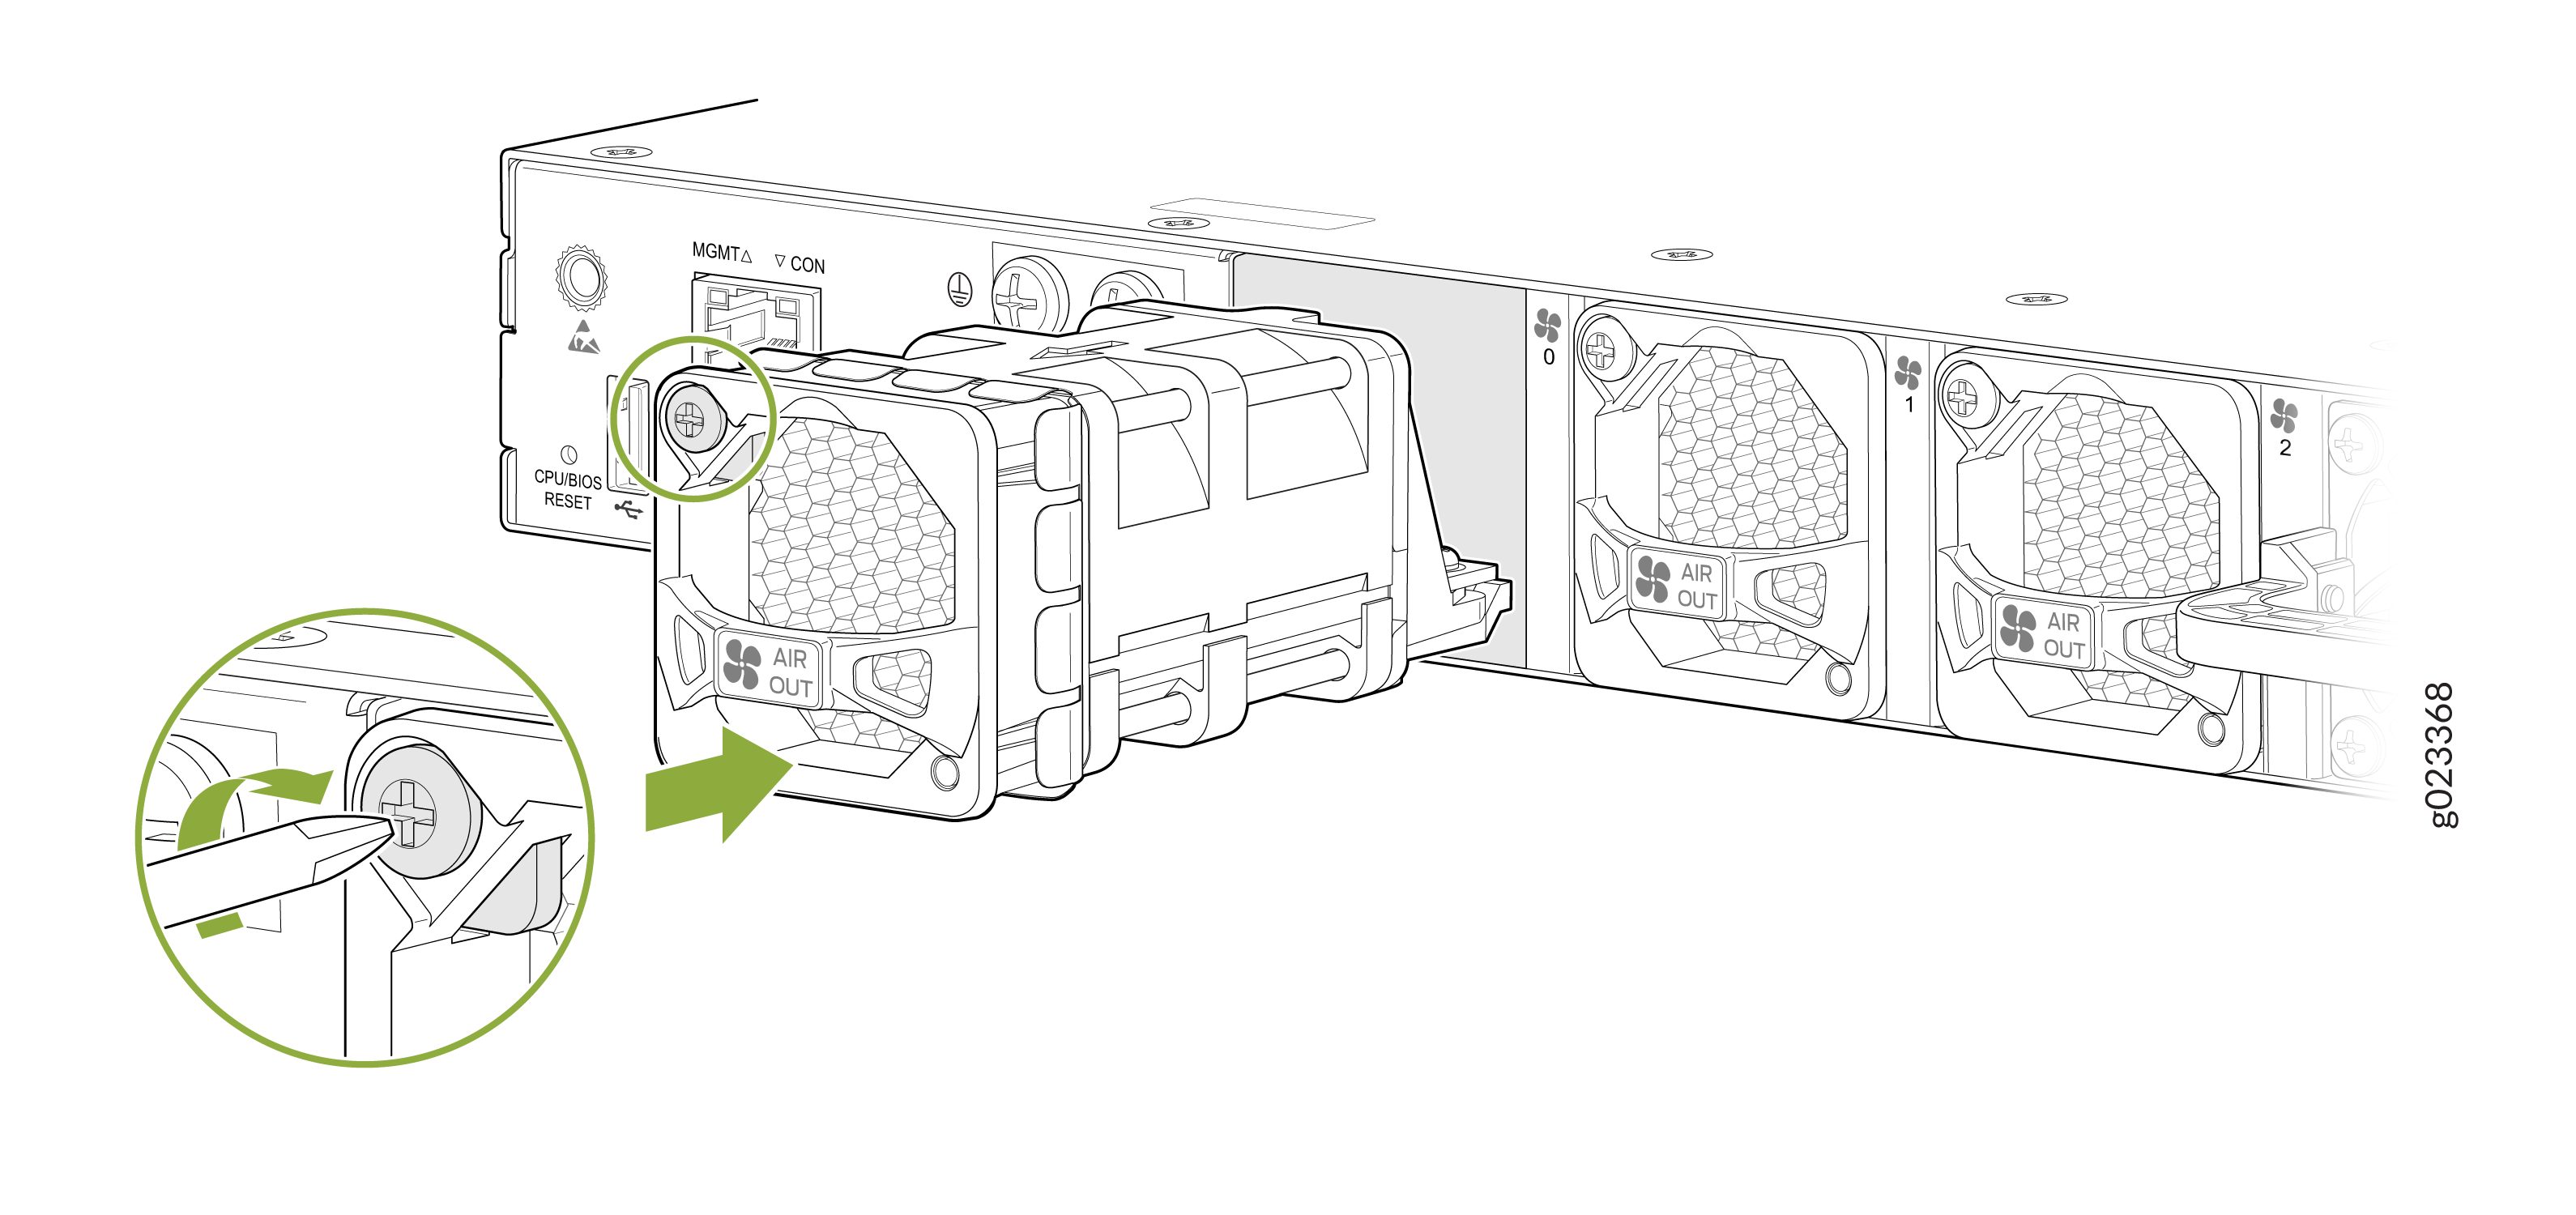
You must install all the fan modules and they must be operational for optimal functioning of the switch.
The switch continues to operate for 60 seconds without thermal shutdown while you are replacing a fan module.