QRコードを使用して、グリーンフィールドSRXシリーズファイアウォールを Juniper Security Directorクラウド にオンボーディング
このトピックでは、QRコードを使用して、新しいクラウド対応ジュニパーネットワークスSRXシリーズ®ファイアウォールを Juniper Security Director Cloud にオンボーディングする手順を説明します。
SRXシリーズファイアウォールを Juniper Security Directorクラウドにオンボーディングするには、まずデバイスがクラウド対応か非クラウド対応かを確認することが重要です。
-
クラウド対応のSRXシリーズファイアウォールには、シャーシにQRまたはクレームコードが記載されており、 Juniper Security Director Cloudに迅速にオンボーディングできます。クラウド対応のSRXシリーズファイアウォールは、高度なセキュリティサービス、シームレスな統合、クラウド導入時の保護を提供します。携帯電話を使用して、QRコードをスキャンし、ポータルのガイド付き手順に従って、クラウド対応のSRXシリーズファイアウォールをオンボーディングできます。
-
クラウド対応ではないSRXシリーズファイアウォールにはQRコードやクレームコードがなく、手動でオンボーディングする必要があります。CLIコマンドまたはゼロタッチプロビジョニング(ZTP)を使用して、クラウド対応ではないSRXシリーズファイアウォールをオンボーディングできます。
サポートされているクラウド対応および非クラウド対応のSRXシリーズファイアウォールについては、 クラウドがサポートするファイアウォールJuniper Security Directorを参照してください。
始める前に
ラックをインストールし、クラウド対応のSRXシリーズファイアウォールの電源を入れます。デバイス固有の手順については、該当するハードウェアガイドを参照してください。
DHCPは、工場出荷時のデフォルト設定で、クラウド対応のSRXシリーズファイアウォール上のすべてのインターフェイスで有効になっています。いずれかのインターフェイスを使用してインターネットに接続できることを確認します。
ワークフロー
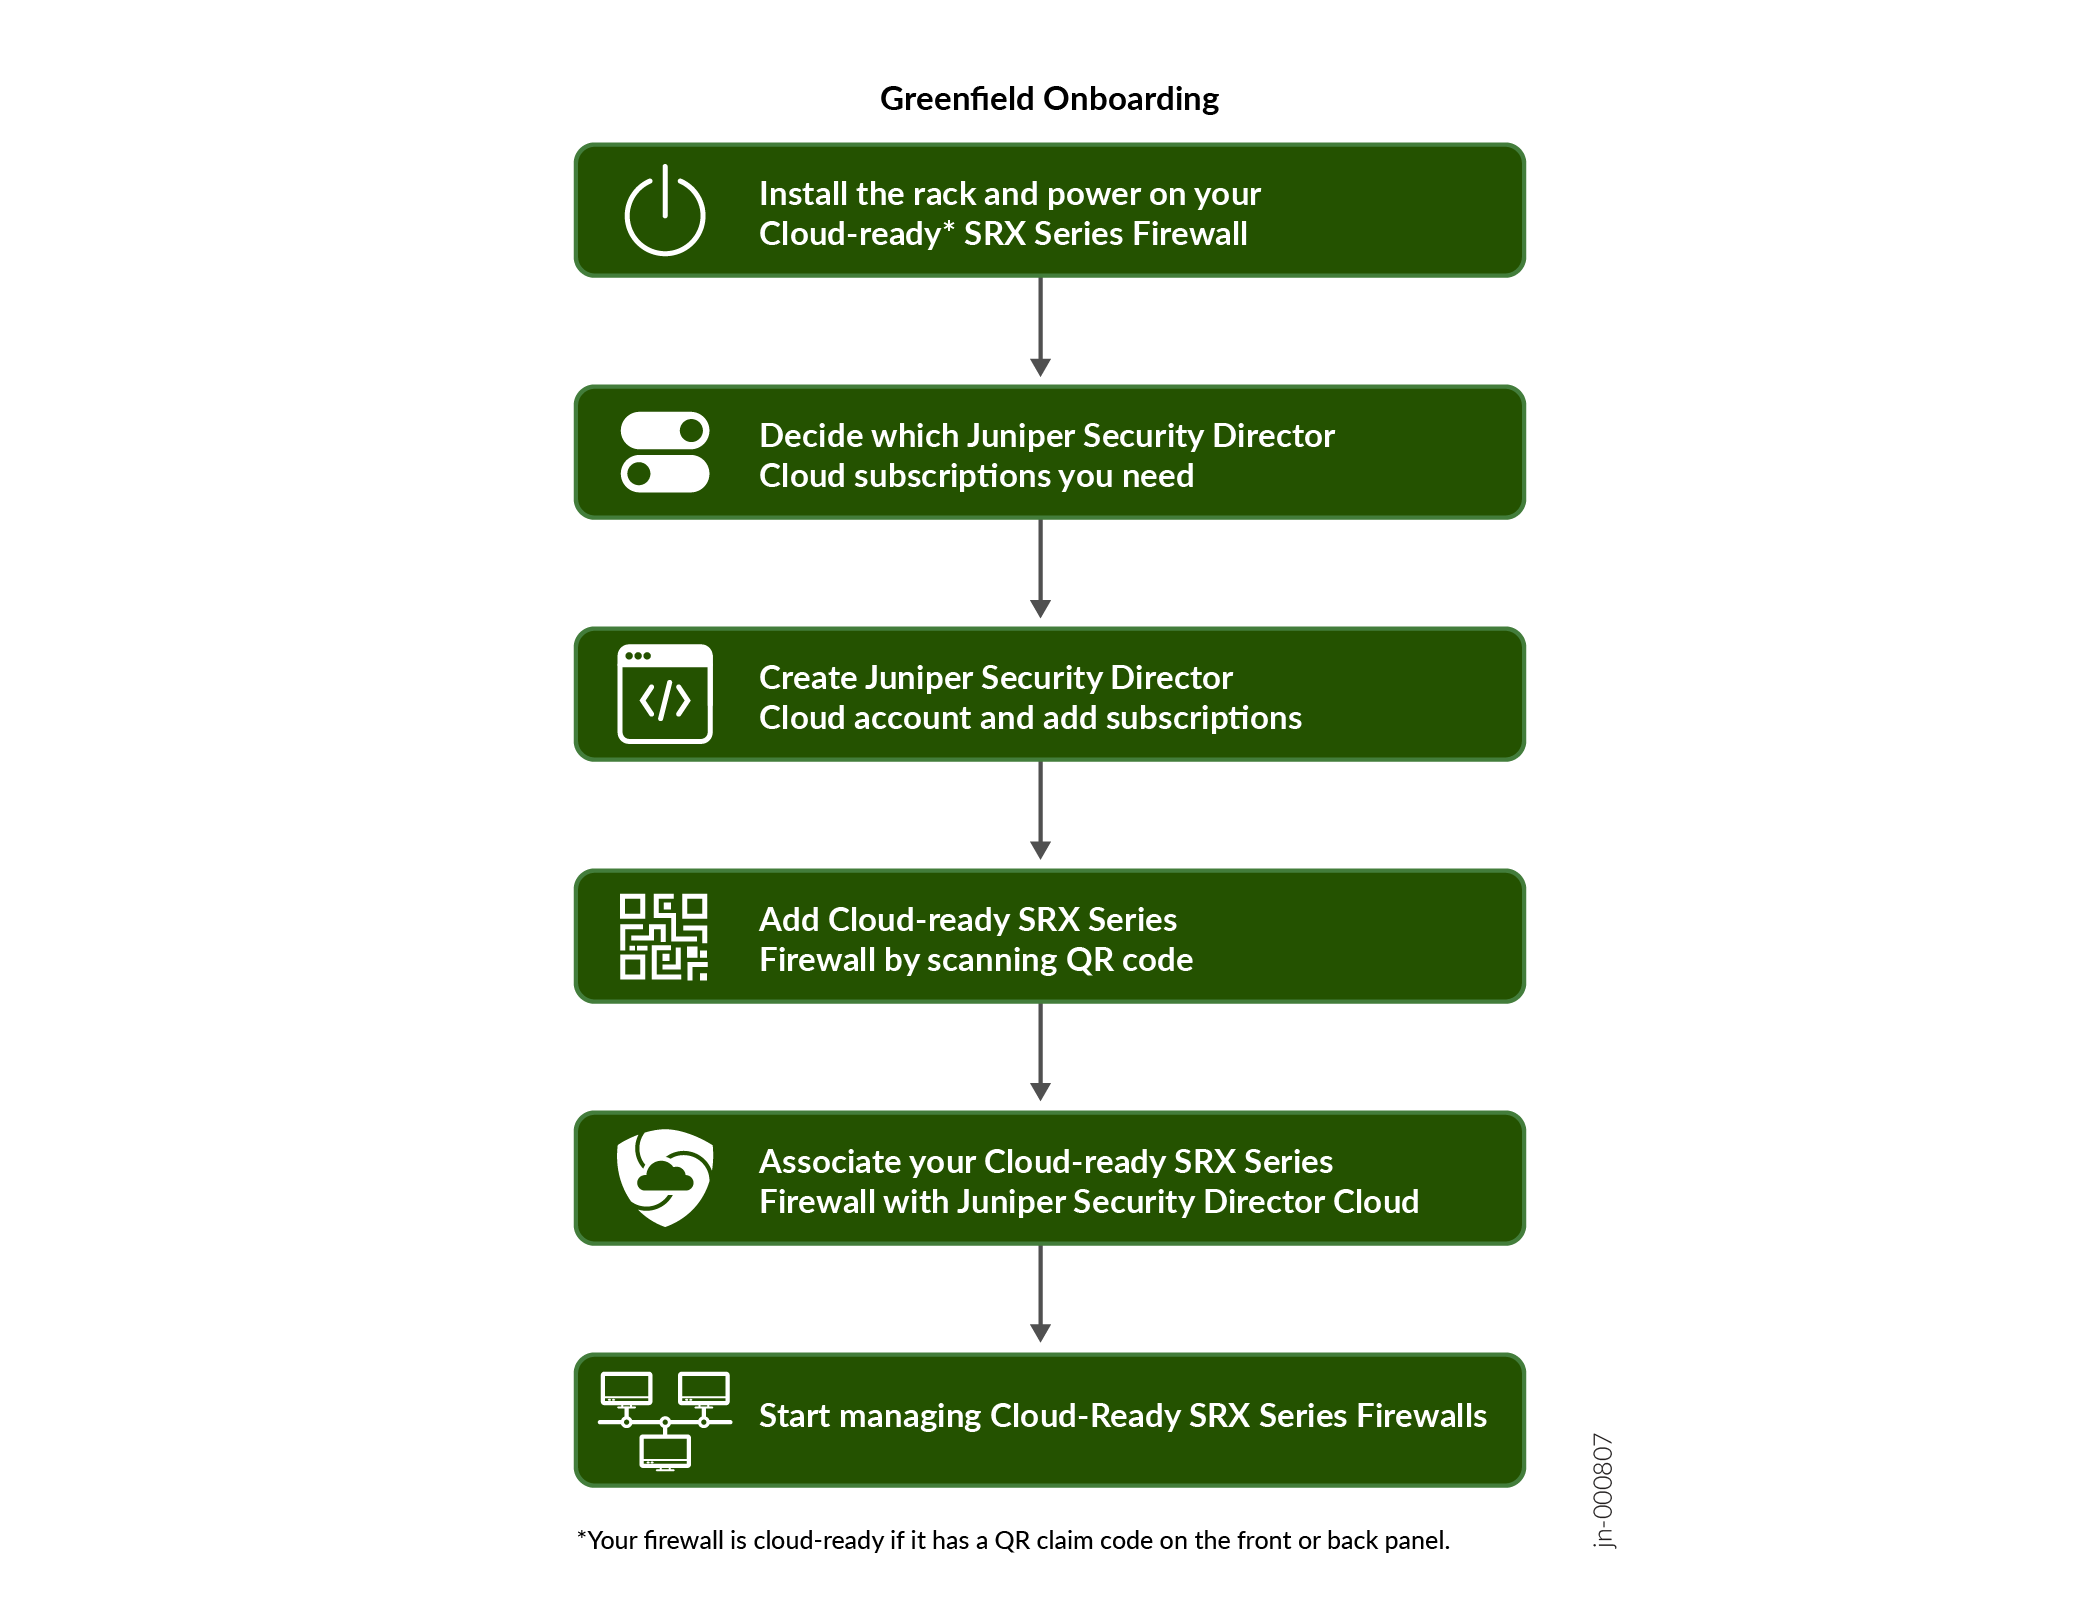 におけるクラウドへのJuniper Security Director SRXシリーズファイアウォールのオンボーディング
SRXシリーズファイアウォールをJuniper Security Director Cloudにオンボーディングします
- 必要な Juniper Security Director Cloudサブスクリプション を決定します。サブスクリプションのご購入については、営業担当者またはアカウントマネージャーにお問い合わせください。ポータルでデフォルトで利用可能な 30 日間のトライアル サブスクリプションを使用することもできます。
- https://sdcloud.juniperclouds.net/ に移動し、組織アカウントを作成をクリックします。
画面の指示に従ってアカウントをアクティブ化します。アカウントの承認には最大7営業日かかります。
-
Juniper Security Director Cloudポータルにログインし、サブスクリプションを追加をクリックし、詳細を入力してOKをクリックします。
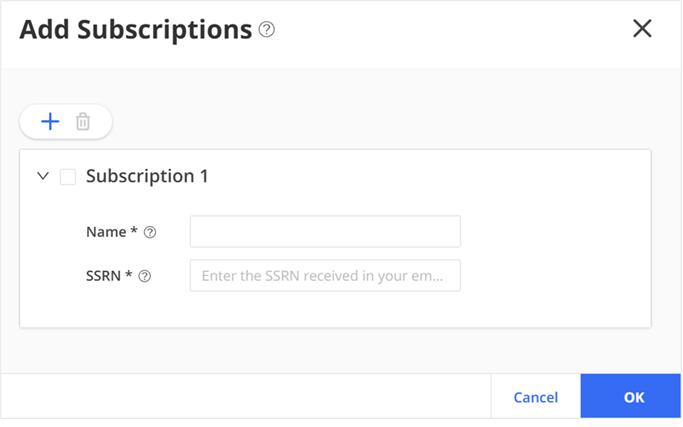
追加したサブスクリプションを から表示します。サブスクリプションが表示されない場合は、 ページに移動してステータスを表示します。
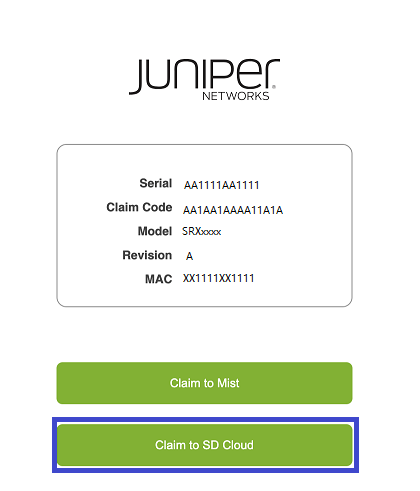
- 携帯電話を使用して、クラウド対応のSRXシリーズファイアウォール上のQRコードをスキャンします。表示されたリンクをクリックし、 SDクラウドへのクレーム を選択して Juniper Security Directorクラウド ログインページに移動します。
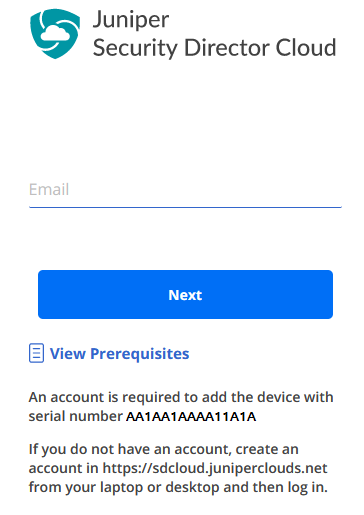
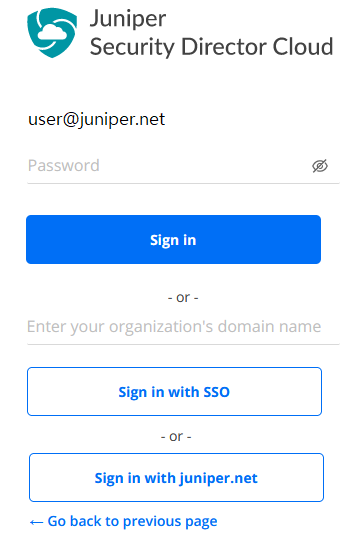
- 前提条件を読み、電子メールアドレスを入力し、 次へをクリックします。
- 画面の指示に従ってサインインします。
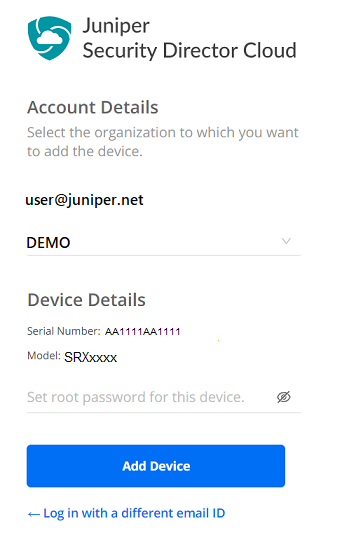
- デバイスを追加する組織を選択し、rootパスワードを入力し、デバイスの追加をクリックします
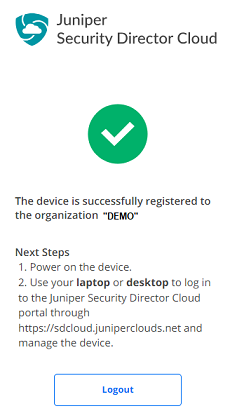
おめでとうございます!デバイスが組織に正常に登録され、デバイスが Juniper Security Director Cloud に追加されました。携帯電話のページからログアウトします。
-
クラウド対応のSRXシリーズファイアウォールの電源を入れ、ラップトップまたはデスクトップを使用して Juniper Security Director Cloud ポータルにログインします。
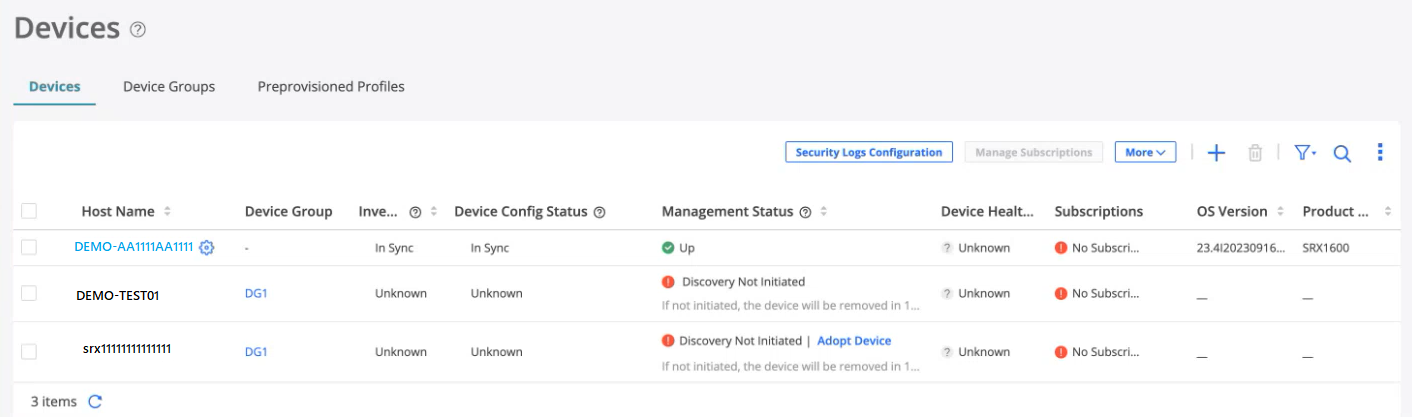
デバイスページで新しく追加されたデバイスを表示します。
 注:
注:デバイスの検出が完了するまでに数秒かかります。デバイス検出に成功すると、以下のステータス更新が表示されます。
-
インベントリステータス: 同期中
-
デバイス構成ステータス: 同期中
-
管理ステータス: アップ
おめでとうございます!これで、クラウド対応のSRXシリーズファイアウォールが正常にオンボーディングされました。これで、デバイスを Juniper Security Director Cloud サブスクリプションに関連付ける準備ができました。
-
SRXシリーズファイアウォールを Juniper Security Directorクラウド サブスクリプションに関連付ける
- ]に移動し、デバイスを選択して、[Manage Subscriptions]をクリックします。画面の指示に従います。
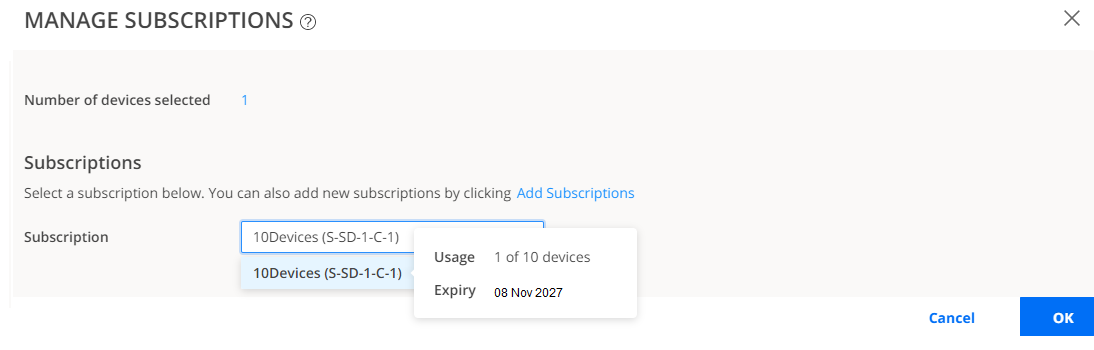
- サブスクリプション 列 にデバイスのサブスクリプション名が表示されていることを確認します。
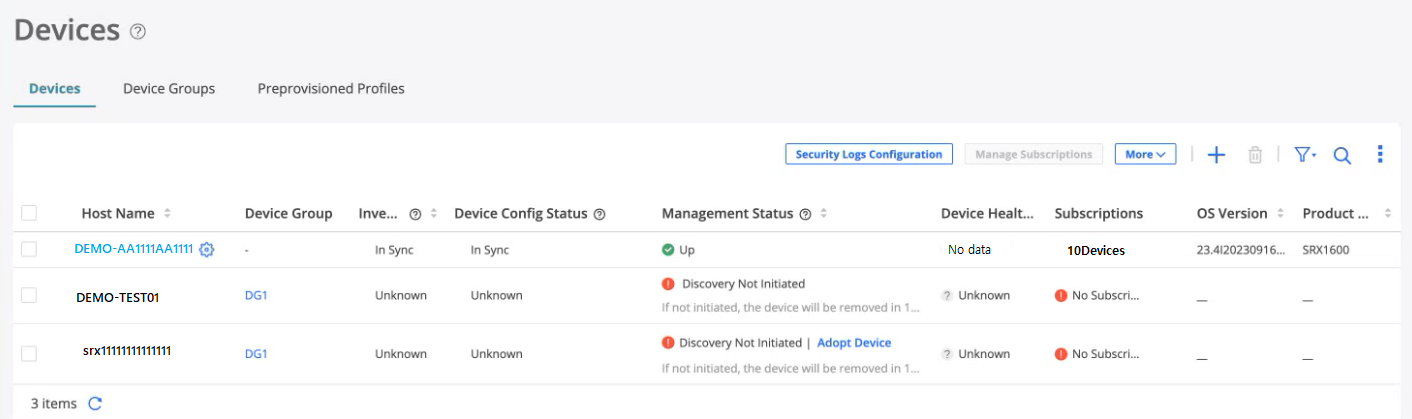
おめでとうございます!デバイスが Juniper Security Directorクラウドに正常に関連付けられました。
Juniper Security Directorクラウドの機能を確認する
Juniper Security Direct Cloudのセットアップが開始されたので、ビジネスニーズを満たすJuniper Security Director Cloudの他の機能もご確認ください。特に役立つと思われる機能をいくつか紹介します。
| 必要に応じて | 次に |
|---|---|
| セキュリティポリシーを作成またはインポートし、セキュリティポリシーにルールを追加し、デバイスにセキュリティポリシーを展開します |
セキュリティポリシーの概要を参照してください |
| コンテンツセキュリティプロファイルを設定して、複数のセキュリティ脅威タイプからネットワークを保護します |
コンテンツセキュリティプロファイルの概要を参照してください |
| ATPクラウドを設定して、進化するセキュリティ脅威からネットワーク内のすべてのホストを保護 |
ファイル検査プロファイルの概要を参照してください |
| 見つかったウイルス、ダウンしているインターフェイス、攻撃数、CPUの急増、システム再起動、セッションなど、トラフィックログとネットワークイベントを表示します |
セッションの概要とすべてのセキュリティイベントの概要を参照してください |